Aug
The Dream Machine: Chapter 5 Walkthrough
And now, the third floor. Stuck in the fifth chapter of The Dream Machine? Figure out what you need to do with our walkthrough!
- The Dream Machine: Chapter 1
- The Dream Machine: Chapter 2
- The Dream Machine: Chapter 3
- The Dream Machine: Chapter 4
- The Dream Machine: Chapter 5
- The Dream Machine: Chapter 6
This walkthrough covers Chapter 5 of The Dream Machine. This walkthrough series covers the game on a puzzle-by-puzzle basis, which involves a lot of backtracking. It also omits side-content that isn’t relevant to the story progression. At all times, it is recommended that you explore the world of The Dream Machine yourself and only consult this walkthrough when you’re really stuck.

Putting Martin and Selma to Sleep
Welcome to the lengthiest chapter of them all.
As usual, take the Sender and Receiver devices off. Then, exit Edie’s apartment. Feel free to go up to the third floor and meet Martin and Selma to get to know them. You can even try sneaking into Selma’s apartment using the Master Key.
To proceed, take the elevator down to the basement and enter the surveillance room. Examine the strange device to the left. This is what Mr Morton used to gas people to sleep.
Use the beaker of sleeping powder on the funnel on top of the machine. This will fill up the machine with sleeping powder. The dial in the middle is used to specify which room you want to gas, according to the camera. Finally, the slot below holds a gas canister, which you don’t have at the moment.
Go to the first floor, and enter the lobby. Talk to the new mailman behind the sofa, and it seems he’s got a package for Mr Morton. Say that you’re Felix Morton. You’ll need to get some identification, it seems.
Go back to the basement, and head to the machine room. Examine Mr Morton’s body to find his ID. You’ll find the library card, which you can now present to the mailman… only to be told that your face doesn’t match the photograph on the ID card.
Examine the ID card and Mr Morton’s photograph, and then rip it off. Examine Mr Morton’s notebook and flip over to the page that has Victor’s photograph on it. Pick up Victor’s photograph. Examine the library card again, and use Victor’s photograph on the card. You’re now ready to commit identity fraud!
Return to the lobby and use the library card on the mailman. Examine the package you just got, and open it. There’s the gas canister you were waiting for. Go back to the strange machine in the surveillance room, and place the gas canister in the slot.
Now, your machine is ready and you can gas the two inhabitants of the third floor. First, you’ll have to deal with Martin, and you can deal with Selma afterwards.
Martin
If you check the TVs, you’ll find that Martin is visible on Camera 2. However, gassing that room won’t do much, as Martin is too far away from the vent. You need to get him closer to a vent. Calling him on the telephone would bring him over to Camera 6, as he would be forced to answer the phone. But first, you’ll need his phone number.
Go to the lobby and check the mail boxes. Use the master key to open Martin’s mailbox (labelled M. Williard), and pick up the letter. Open it up, and you’ll find a bill inside. Examine the phone bill in your inventory, and then examine it again when it’s in your hands to get Martin’s phone number.
Return to the surveillance room in the basement, and examine the strange device again. Set the dial to 6, and then head to the TV screens. Pick up the phone and call Martin. Martin heads over to Camera 6. Hit the big red ‘gas’ button and he’ll be knocked out.
You can now head on over to his apartment and enter his dream the usual way, or you can gas Selma and enter her dream. It’s recommended to do Martin’s first, however.
Selma
If you’ve talked to Selma, you’ll know that all she wants is some relaxation right now. You need to interrupt her. There are four things you need to do to piss Selma off, and you can do them in any order you like.
One, head to Martin’s apartment and examine the stereo. Raise the volume until it can’t be raised anymore, and then leave the stereo alone. Wait for the doorbell to ring, and answer the door. Selma will complain about the noise.
Two, ring Selma’s door and try to talk to her. She’ll be annoyed.
Three, enter the elevator while on the third floor and hit the alarm. This will annoy her as well.
Four, enter Selma’s apartment. Try to use the telephone, and you’ll get caught.
Once you do all four things, Selma will get on the telephone to call either Mr Morton or the police (depending on the order you did things in).
Return to the surveillance room, set the strange device to 7, and hit the big red gas button. This knocks out Selma. You can now head on over to her apartment and enter her dream, or you can enter Martin’s dream first, which is recommended.
Martin’s Dream
Head to Martin’s apartment and put the Sender device on him. Put the receiver device on Victor and get sucked into Martin’s head.
Martin’s dream is… interesting. You’ll find yourself in the main room, which we’ll call the Portal Room. You’ll find that the walls open into doors if you walk over to the middle of any of the four walls. Explore away.
To proceed, head to the wall at the bottom. It’ll open up, and you can step through. Look into the abyss, and then examine the abyss. Keep up the conversation and don’t leave. When you’re done, leave the abyss, and two symbols will be formed on either side of the doorway. Keep these symbols in mind. Draw them on a piece of paper (in real life) if you have to.
Return to the Portal Room and head to the doorway on the left. Look through the telescope, and drag the view until the laser of the telescope is pointed on the symbol that you saw on the right. Return to the Portal Room and head to the doorway on the right. Repeat the procedure, this time making the telescope point to the symbol that you saw on the left.
Return to the Portal Room and head to the doorway at the top. Examine the tile below where the two lasers intersect. Press it, and a cube will emerge.
Return to the Portal Room, head to the doorway at the bottom, and pick up the prism. Now, return to the Portal Room and head through the doorway at the top. Place the prism mirror on the cube. Examine the cube, and turn it so that the laser is pointed towards the front (i.e. facing away from where you entered).
Head through the newly opened doorway and pick up the futuristic gun. Return to the previous room, and turn the cube so that the laser is pointing towards the Portal Room. Enter the Portal Room.
After the Dream Machine talks to you, the ceiling will start to come down. It’s time to act fast.
First, press the darkened tile underneath the laser, and a cube will open up. Turn the cube once. Use the futuristic gun on yourself and wait for the ceiling to come down. Once it goes back up, use the futuristic gun on yourself again to go back to normal size. That put a stop to the Dream Machine’s machinations… for now.
From here on, you can use the futuristic gun at any point to make yourself smaller, or to return to normal size.
Now, if you enter the left doorway from the Portal Room, you’ll find another prism that is inaccessible to you right now. First, go through the doorway to the right from the Portal Room. Stand right next to the prism rod, on the little platform, and become small. Pick up the prism rod, and then return to normal size. The prism rod is now large enough to use as a bridge.
If you picked up the prism rod in the past, return to where you got it, and place the prism rod back into its indentation. Then, do the procedure mentioned above to enlarge the rod: i.e. standing on the platform and becoming small, etc.
Go through the left doorway from the Portal Room, and place the enlarged prism rod on the indentations. Pick up the prism, and once you’re on the other side of the prism bridge, pick up the prism rod. In the Portal Room, place the prism mirror on the cube. Turn the cube until the laser faces an edge. Head over to the edge and examine the gap. Turn the cube again to reveal the gap in the other edge.
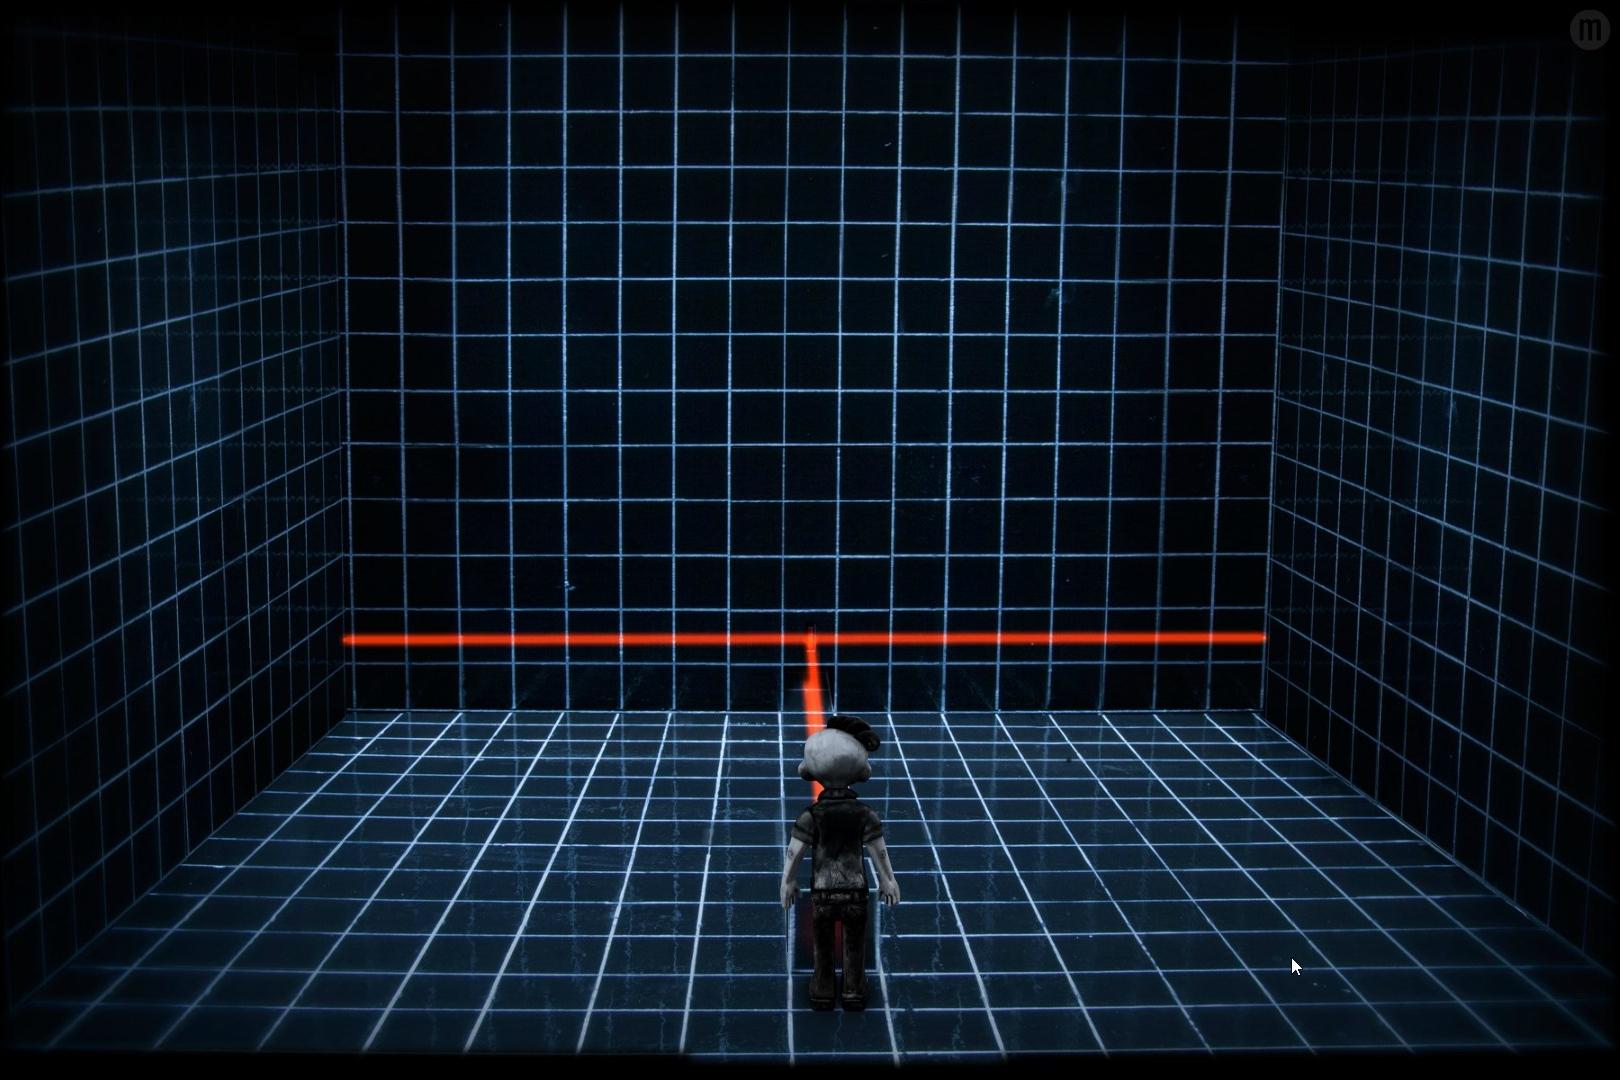
To find out what’s behind the gaps, stand close to the gaps, make yourself small, and then walk through the gaps. To the right, you’ll find an impassable chasm and a wall of eyes. To the left, there’s a gigantic flight of stairs and a doorway. You can enter the doorway, but only if you’d like to be filled with existential despair. Thanks, Dream Machine. You can also look into the abyss and talk to Legion again if you’re feeling up for a chat.
Return to the Portal Room, and go through the doorway to the right, where you found the prism rod. Stand on top of the platform again and make yourself small. Place the prism rod on the indentation. Make yourself big again, and pick up the prism rod. Return to the Portal Room, and place the prism rod on the doorway to the top (the one with the indentation on it). Then, turn the cube until the laser hits the prism rod. The laser should now divide into two, forming a T-shape.
Go through the gap to the left, and become normal-sized. You’ll find a thin path leading to the left that wasn’t visible before. Walk on it to the left, and you’ll find a staff. Take it, and return to the Portal Room.
There is one thing left to do in Martin’s dream, but if you want the complete story experience, I recommend doing Selma’s dream now, until the point where I reference Martin’s dream again.
Blinding the Eyes
Go left from the Portal Room and place the staff in the indentation. Standing on the platform, make yourself small, and then pick up the staff. With the staff in your inventory again, make yourself normal-sized. Go back the chasm with the wall of the eyes on the right side, and then use the staff with the laser beam.
This will blind the eyes, which will help in Selma’s side of the dream.
When you’re ready, exit Martin’s dream using the portal in the Portal Room. Take off the sender and receiver devices, and head into Selma’s apartment. If you haven’t yet put Selma to sleep, follow the steps in the previous section.
Place the sender device on Selma and the receiver device on yourself.
Selma’s Dream — Finding Selma
This is a fairly vast area to explore, so you should go ahead and find out what the Dream Machine is doing to Selma’s dream. This walkthrough will continue assuming you’re where you entered the dream from.
You’ll find yourself in the area called the Spiral. Head down the path to the left, and you’ll find a house. Enter the house and examine the shelves to the far right to pick up bandages.
Head down the path to the left, to the Cage. Then head left again to the Shack. There are two paths here, one in the middle, and one to the far left. Follow the middle path to the Mob. They’re not letting you through, so you’ll return to the Shack. Use the bandage on Victor to get him to wear it. Then, use the bandage in your inventory with the blood spilt on the ground (you can also do this with the blood spilt in other scenes).
Return to the Mob with the bloodied bandage. After you’re done talking to them, go down the middle path (i.e. the one that isn’t blocked). This brings you to the Stream. Take the path on the left, and you’ll find the scout. Talk to the scout and ask her what happened to her. Then tell her that her patrol is looking for her, and after the conversation ends, return the to the mob. Talk to the mob and inform them of Selma’s situation. When asked, agree to join the ‘militia’. You’ll now have almost full access to the areas in Selma’s dream.
Now, we need to find Selma herself. You can most people in the dream about Selma’s whereabouts, but the only one with a real clue is the Squirrel. The Squirrel is located to the left of the Shack. It seems you’ll need to find a way to converse with the pixies.
The way to do that is to trap a pixie. You already have a cage located in the area next to Selma’s house. The other items you need to complete your trap are a forked twig, some yarn and berries for the bait.

Return to the Stream (the area just before the Scout), and take the top-right path. Ignore the boarded house and go right to the Tarn. You’ll find the forked twig on the ground, so pick it up.
For the berries, return to the Mob and go down the path to the right, to the Castle Ruins. Then go up, past the broken-down catapult to the Old Castle. Go right from here, and you’ll finally find the berries you need. Pick them up.
Finally, for the yarn, return to Selma’s house (the house just next to the Spiral). You’ll find the yarn on a shelf to the right of the fireplace. Pick it up.
When you have everything, return to the Cage to the left of Selma’s house. Use the forked twig on the cage, then use the berries on the cage, and finally, use the yarn on the cage. Walk as far left as you can, and Victor will drop the yarn. Go down the left path to the Shack, and then immediately return to the Cage. You’ll find that a pixie has caught on to the berries. Pull the yarn, and trap the pixie.
Examine the cage and then free the pixie. Talk to the pixie until she wants you to tickle her. Use your finger to tickle her stomach repeatedly until the pixie is satisfied. You’ll learn of a hidden path in the Old Castle.
Return to the Old Castle area, and you’ll find that you can now examine the wall in front of you. Follow the path to the upper-left. Walk to the left, and you’ll find Selma at last.
If you haven’t ‘blinded the eyes’ in Martin’s dream yet, Selma will be transfixed by the wall of eyes. If you made it far enough in Martin’s dream to create the laser T-junction, you’ll find that one of the eyes is ‘blinded’. This is a clue. Either way, you can’t help Selma from this side of the dream, so return to the Spiral and exit her dream to return to reality. Follow the instructions under ‘Blinding the Eyes’ section above to figure out what you need to do.
Once you have ‘blinded the eyes’, you can wake Selma, so do that. After talking to her, examine the turned-off screens. Victor and Selma will push the screens until they fall right off into the chasm.
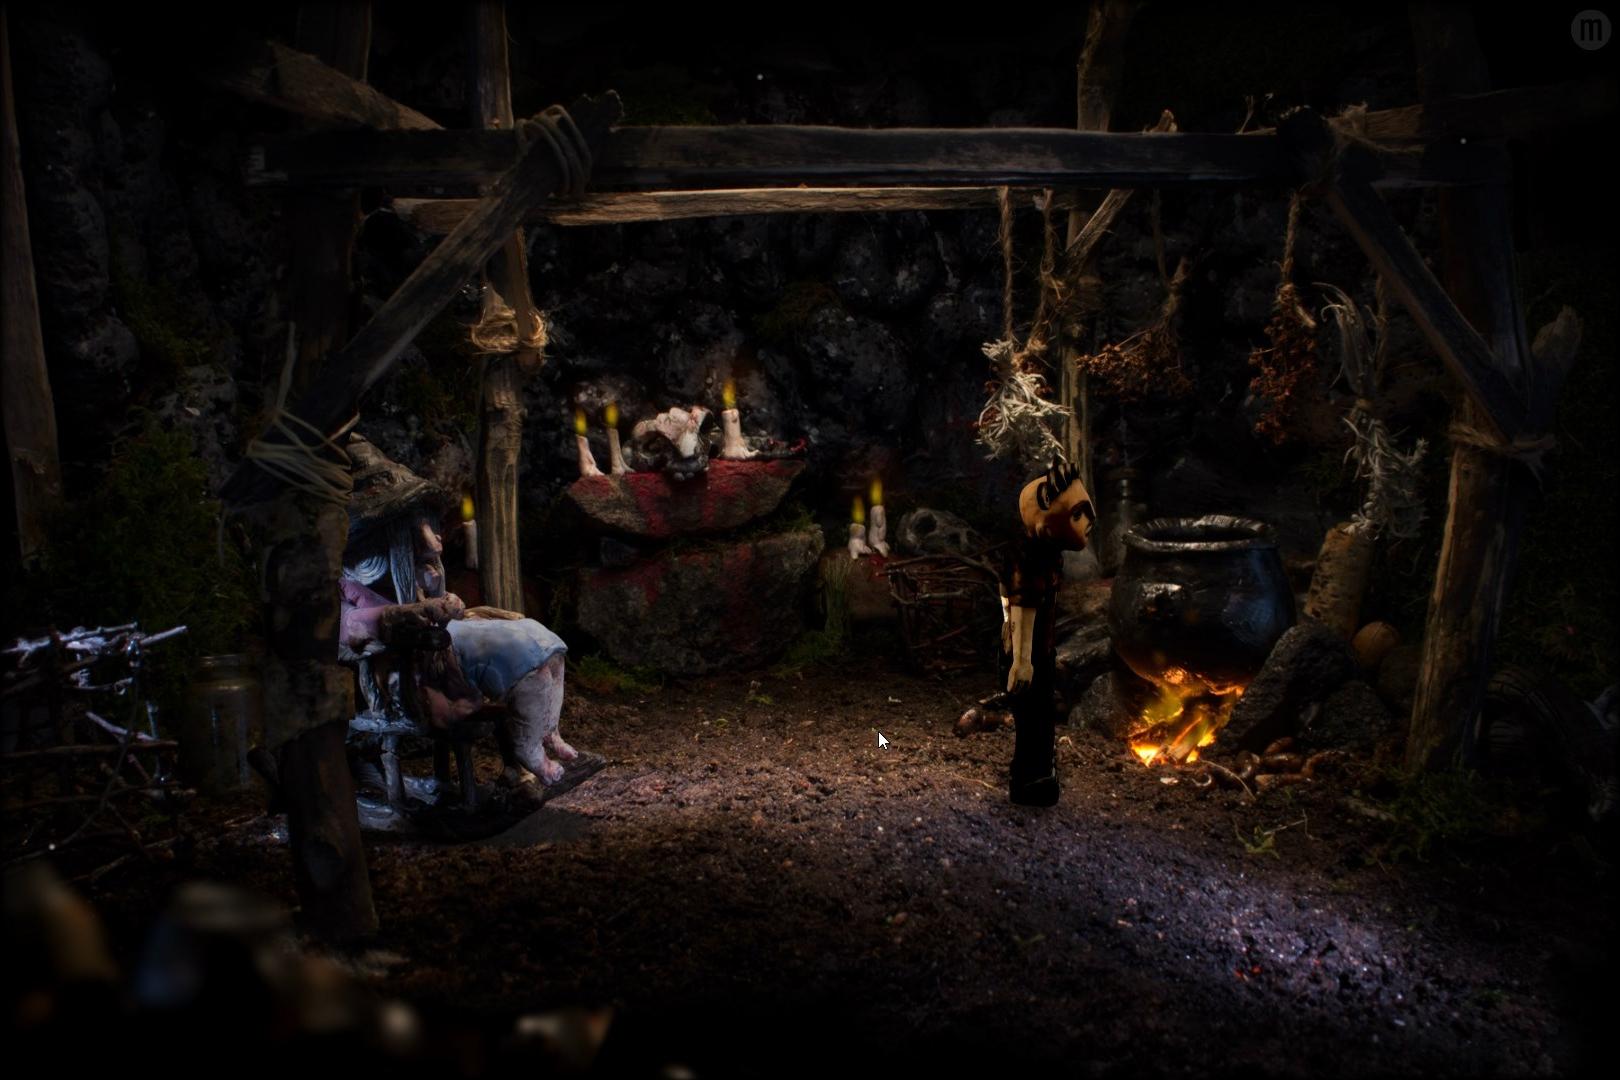
As Selma suggested, you should meet with the Wiccan lady now. To find her, go to where the scout was, and take a left to find her house. Knock on her door and mention that a lady of the forest sent you.
You need to show the Wiccan lady something magical in order to proceed. While there’s nothing in Selma’s Dream that will impress her, you could use the futuristic gun from Martin’s dream to blow her mind.
The Bridge Between Dreams
To properly bridge the two dreams together, you’re going to need a bow. The only person with the bow is the scout, so you’re going to have to help her.
Return to the Scout and talk to her. You’ll learn that she needs gear to build a wagon of some sort. To build such a wagon, you need four wheels (or four wheel substitutes) and some planks of wood.
Go to the catapult by the Castle Ruins and examine the handles. Victor will pick them up. There’s two of your wheels.
Return to Selma’s House and without entering it, examine the lid of the barrel. That’s your third wheel.
Return to the Squirrel and examine the door. If you’ve talked to Selma about the wagon, Victor will immediately be interested in the door as a wheel. The Squirrel needs some kind of security in exchange for it. Give the Squirrel your militia whistle, and then pick up the door.
Once you have all four wheels, you’ll also need some planks. Go to the Shack and pick up the planks of wood to the left of the shovel. With the wheels and the planks, return to the Scout and give her each of the wheels and the planks.
You’ll get the bow, which you can now combine with the forked twig (that has the yarn around it).
Return to the Wall and go through the empty space to reach Martin’s side. Use the bow on the passage to the left, and you finally have your bridge, flimsy as it is. You can’t quite traverse from this side, though—you’re too big for that.
Head all the way back to the Spiral and exit Selma’s dream. Head to Martin’s apartment and enter his dream.
Go to the gap to the right, make yourself small and enter the passage. Use the yarn to cross the void at last. Once you’re on the other side, make yourself normal-sized again, and enter Selma’s dream.
Return to the Wiccan lady and use the futuristic gun on yourself in front of her. Now you’re initiated!
Selma’s Dream — The Potion
Examine the potion recipe. You need an egg, burnt limestone, an acorn, water lily stamen and dirt from a fresh grave. You can get almost all of these items without having to re-enter Selma’s dream. In fact, some of these require you to have the futuristic gun with you.
The sole exception here is the dirt from a fresh grave, which requires you to have a shovel. If you haven’t picked up the shovel yet, you’re good. If you did pick up the shovel while in Selma’s dream, then you’ll have to re-enter Selma’s dream to complete a part of this section of the walkthrough.
The egg is the most straightforward item on the list. Once you’re out of the Wiccan lady’s hut, climb the ladder next to her door and steal an egg. (If you already stole an egg while in Selma’s dream before, you can steal another egg now).
To get the burnt limestone, go to the boarded-up pink house. Make yourself small and walk through the small hole below the window. Inside, make yourself normal-sized again and talk to Jerome the Vampire. Once you’re done, inspect the kiln and you’ll find the burnt limestone you need. Make yourself small again and exit the house.
To get the water lily stamen, head to the Tarn. To reach the water lily, you’ll have to arrange the lily pads together. Move the one closest to the shore by clicking on it. Then, use your staff to move the rest of the lily pads in place. When you’re done, there should be nine lily pads leading to the water lily. Make yourself small and cross the lily pads to get to the water lily. Examine it to get the stamen, and return to shore. Make yourself normal-sized again.
For the dirt from a freshly dug grave, you first need to find someone who needs burying. Go to the Castle Ruins, the area with the catapult and the suit of armour. Examine the knight, and he’ll talk to you. When talking to him, keep asserting that he’s dead and that you can’t help him. When you’re done talking to him, examine him and pick up his bones.
To bury the knight, you’re going to need a shovel. Go to the Shack and pick up the shovel there. Return to the knight’s suit of armour and go right to the cemetery. Use the shovel on the ground. Place the old bones in the grave, and then use the shovel on the dirt. Try to pick up the dirt, and the knight will return. Place the staff on his grave, and then pick up the dirt.
Finally, you need the acorn. Go to the squirrel’s place and become small. Then enter the squirrel’s home. Examine the acorns, and you’ll see that there’s no way to get one out with your current size. Exit the squirrel’s home and become normal-sized. Go to Selma’s house and pick up the yarn. Then, return to the squirrel’s home and use the yarn on the acorn. Exit the squirrel’s home and then become normal-sized. Pull on the yarn to get your acorn.
Return to the Wiccan lady’s hut and put each of the five items you picked up into the cauldron to the right. You’ll get the sticky liquid you need. It functions essentially the same way as the futuristic gun, except it makes you huge.
The Organ Thief
Once you’re out of the Wiccan lady’s hut, use the potion on yourself to become huge. Go to the wall and make yourself normal-sized again. You can now ‘fast travel’ your way around Selma’s Dream this way. Return to Martin’s Dream by crossing the void the same way you did before.
From the Portal Room, go through the narrow passage to the left, to get to the enormous flight of stairs. Become normal-sized, and then huge. Climb the flight of stairs and then look through the window. Examine the creature, and then the anatomy drawing to find out what the Dream Machine is planning. Examine the creature’s diagram in the anatomy drawing, and you’ll find out that only one organ is left to be stolen to complete the Dream Machine’s plans: a vampire’s stomach.
Leave the window, and go all the way back to Selma’s dream. You’re going to need the potion and the gun, so don’t leave Martin’s dream! Cross the dreams via the yarn, as usual.
Go back to Jerome’s house, entering through the hole below the window. This is the boarded-up house with pink walls, if you don’t remember. Talk to Jerome. If you haven’t already, ask him who he is, and exhaust all his dialogue. Warn him that he’s the next to get his organ stolen. Jerome is quite confident about his chances, so you’ll have to prove that he’s wrong.
Go to the mob to report your findings, and tell them about Jerome. Return to Jerome, only to find that he’s unfazed by the mob. Leave Jerome’s house and become big again. Pick up the ladder by the witch’s hut and use it with Jerome’s house. Become normal-sized, climb the ladder and jump down the hole in the roof.
Things quickly get out of hand, so leave the house via the hole. You need to put out the fire on Jerome’s house. To do this, become huge and pick up the barrel next to Selma’s house. It’s very small, and hard to spot. Use the barrel with the Tarn to fill it up. Then, use the barrel on the burning house, and the mob will go away.
Talk to Jerome again and he’ll agree to your crazy plan to stop the Dream Machine. To climb into his mouth, first leave the house and become huge. Pick up the ladder, and re-enter his house. While normal-sized, place the ladder by Jerome’s bed. Become small, and climb the ladder. Enter Jerome’s mouth, and then walk into the oesophagus. Walk into the stomach.
Wait for Martin to finish his flight. It’ll take a while. Once the flight is complete, you’ll be sealed up in the creature. Make yourself normal-sized and burst out of the creature’s tummy. The Dream Machine certainly didn’t enjoy that.
When you’re done talking to Martin, make yourself small and talk to him again. Once you’re back in the Portal Room, exit Martin’s dream.
If you go back to the Dream Machine in the basement, you’ll find that there’s still one more dream left. That dream belongs to your unborn child. Return to Alicia and place the sender device on her tummy, and the receiver device on yourself.
Don’t own The Dream Machine? Get it on Steam for PC and Mac!