


Welcome to Part 1 of Into Indie Games’ walkthrough for End of Abyss.
The game begins with a short cutscene as you see a group of soldiers enter a seemingly abandoned sector. With very little information, Cel and another soldier are left behind as the rest of the crew descends the elevator.
This article is part of our End of Abyss Walkthrough & Guides Hub.
For more information about the game, check out its official website here.
Table of contents
Following Soldier E-19

After the opening sequence, you’ll watch the rest of your team head down the elevator. Follow Soldier-E19. He’ll guide you through a door.

You’ll reach a broken bridge past the door. Go up and use the lever to extend the second bridge.

Keep walking behind the Soldier until you enter a room with a door locked from the other side. You’ll learn how to use the Scanner to scan the environment for more information. There’s a large hole in the floor that you can jump down from to reach the lower section.


Break the storage crates to your left and head outside. Jump down the ledge and then enter the crawlspace to your right.

Break the storage crates on the other side and go up the ladder. This takes you to the other side of the locked door. Open the door using the lever to the left to let Soldier-E19 through.

The soldier will lead you to an Energy Node Door. Use the Scanner to trace the yellow line to find the Energy Node. Then either shoot the node or fire a bullet at it to open the door.

Get on the elevator on the other side, as it takes you down deeper into the facility. Keep moving forward after getting off the elevator. Open the door at the end of the passage to enter the Habitation Sector.
Unlocking the Habitation Door

After the cutscene, check the locked door to your right. There’s a keycard reader next to the door, which requires the Worker Access Keycard.

Go up and into the room to the right near the large Habitation Door. This takes you to the first Restoration Pod of the game. Restoration Pods are like checkpoints that heal you, save your progress, and let you change Suit Mods.
There’s also a Workbench here for crafting items or upgrading weapons. But it’s offline for now. Pick up the Health Booster from the ground. This will let you heal your health when you’re moving through the zone. The Health Booster is refilled when you use the Restoration Pod.

Keep moving forward through the door on the right. You’ll be able to pick up some Fragments from the ground. Fragments are this game’s main currency used to craft or upgrade items/weapons.

In the next room, before heading through the door straight ahead, go down and left to unlock a shortcut. There are many similar shortcuts in the game that you can unlock to move quickly through the sectors.

Continue along the main path. You’ll reach a stairwell. Go up to the second floor.

You can unlock another shortcut to the left from here. Go down and right.

Keep running until you reach a cafeteria. You’ll spot a dead body propped against a door. Something is knocking at the door from the other side. Go up and through the door to the right.

Continue along the passage until you enter a storage room at the end. Interact with the Ventilation Cover and head inside.

You can reach a small room to pick up some more Fragments from the air vent. Keep moving along the vents till you reach a room with two Infected Workers. Take them out.
Pick up the glowing item on the ground to collect the Worker Access Keycard.
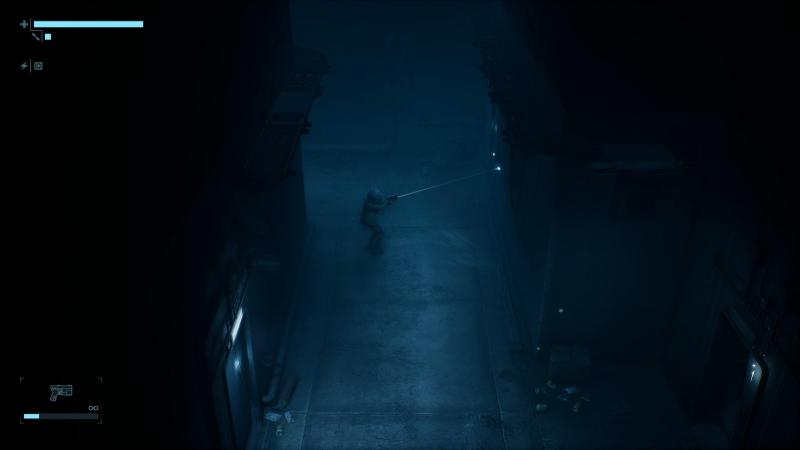
Head up through the door on the right from this room. This takes you to the passageway from earlier. Go up and then enter the room on the right.

Take out the two Infected Workers inside. Then collect the Block B Keycard.

Take a look at your map at this point. With both Keycards acquired, you can explore most of the rooms in the Habitation Section. You can head directly to the Habitation Door to unlock it.

Alternatively, you can head up the stairwell to check out the Block B area. You’ll find some Notes and Fragments in the upper areas, but you’ll also have to fight past some monsters.

When you return to the Habitation Door room, a short cutscene will trigger. Activate the door using the Keycard afterward. Follow Soldier E-19 to the next zone.

Go down the stairs to regroup with the crew and trigger another cutscene.

The captain will ask you to bring the system online. Interact with the cube up ahead to activate the SCU(Sector Control Unit).

After the cutscene, head to the Communications Center Control Room upstairs through the main door. Soldier C-12 will give you your next objective.

Interact with the control panel on the left to Retrieve Map Data.

It essentially reveals the map of the zone. Take a few moments to familiarize yourself with the layout.

The door on the left leads to a Workbench and a Restoration Pod. The Workbench is now back online, but you still don’t have craftable items. Save your progress before moving on.
Climbing The Tower

Head up along the passage, past Soldier O-14. You’ll go down a set of stairs and reach the Array Chamber. You’ll have to climb to the top of the tower.

Run along the steel walkway to the next room. You’ll reach a ladder up ahead. Go up the ladder.

Here you’ll encounter the first Parasitic Flea. These are minuscule enemies that latch on to you and slowly drain your health. They are not much of a threat unless they swarm you. You can use your knife to take them out in one swipe.

Keep moving through the zone. You’ll have to fight some more enemies as you enter a narrow passage up a ladder.

Leaving the room takes you to another walkway. There’s an elevator to your right. This lets you unlock the eastern exit to the Communications Room.

Walk down the walkway. There’s a ladder to your right, but you can’t use it at the moment. Head through the door up ahead.

Clear out the enemies in the Array Chamber and head through the door on the other side.

In the next room, as you go up the steps, an Infected Worker will drop from the ceiling behind you. Quickly run back and take out the two enemies before they sandwich you. Then take the ladder to the upper floor.

There’s a ladder heading up and a door. The door leads you to a dark room where you can collect some Fragments. When you’re ready, head up.

Keep moving forward, and you’ll reach a ladder that will take you all the way to the top of the tower.

As you reach the top, you’ll notice that one of the Power Conduits in the array is offline. You’ll need a Power Converter to activate it.
Activating the Power Conduit

Head through the door at the top to reach a passage. Pick up the glowing item from the ground to collect some Flares. You can use them to distract enemies or light up dark spaces.

Go down the stairs and through the door. Then take the ladder to go down to the lower floor.

Jump off the broken part of the railing. The glowing item below you is a Power Converter. Pick it up.

As soon as you pick it up, you’ll be ambushed by a bunch of enemies. Take them out.

Go down and left to spot a door that you can head through. This takes you to another steel walkway. The door at the end of the walkway takes you to the large ladder leading up to the Power Conduit.

Make your way back to the Power Conduit and insert the Power Converter. Then activate the system to power the Beacon.

Go down the ladder and back to the steel walkway from before. Take the ladder here to head down. Then activate the second ladder here

Take the elevator to the right and then follow the passage to the door at the end to return to the Communications Room. Talk to Soldier C-12 for the next objective.
Unlocking the Shuttle Entrance

Run all the way back to the Habitation Sector. You’ll get a call from Soldier C-12 when you get near the Shuttle Control Room. Head through the door to your left.

Take out the enemies in the area first. Then vault through the open window to your right to enter the control room.

Activate the Lever to open the main door. Then pick up the Riot Breaker from the floor in the small room. Unlike the Pulse Gun, the Riot Breaker‘s ammo is limited. You’ll have to craft more if you run out.

Enter through the door on the right to reach the shuttle control room. Interact with the terminal to unlock the Shuttle’s Entrance.

Exit the area, and you’ll see that the large door to the right is now open. Before you head through, I suggest using the Restoration Pod in the Habitation Sector (go down and right) to activate the checkpoint.
You’ll also want to craft as much Riot Breaker ammo as possible from here.

Head through the unlocked Shuttle Entrance and take out the enemy up ahead. Then proceed down the steps into the next room to trigger a cutscene.
Defeating the Husk Cluster

The Husk Cluster is the first main boss you’ll face in End of Abyss. It’s a giant, slow-moving cluster of Husks that periodically spawns more Husks in the arena for you to fight.

The boss doesn’t have many attacks of its own. It can only do a jump attack that you can easily dodge away from without taking any damage. What makes the fight difficult, however, are the adds. If you don’t take out the Husks that spawn, it’s very easy to get overwhelmed in this fight.

Riot Breaker is your best friend for this battle. You can eat up a huge chunk of the boss’s health pool by hitting it point-blank with the Riot Breaker. But be careful, as dealing enough damage will cause a bunch of Husks to spill out and attack you.

Once the boss is defeated, you can grab the Vault Key that pops out.

Head to the room on the right and call the Shuttle. It will take you to the next area: Factory East.
This concludes the first part of our walkthrough for End of Abyss. For more interesting articles related to indie games, check out the links below:
- Into Indie Games Homepage
- Well Dweller Walkthrough Hub
- Nocturne (2026) Walkthrough Hub
- Rivage Walkthrough Hub – All Puzzle Solutions Under 25 Loops
- Lily’s World XD Complete Walkthrough

Muhit Rahman lives off two things: gaming marathons and endless cups of tea. He writes guides, reviews, and occasionally forgets that real life doesn’t come with checkpoints. His favorite genres are Soulslike and Metroidvania, with Dark Souls III, Hollow Knight, and Dota 2 forever holding top spots on his all-time list.


