


Welcome to Part 2 of Into Indie Games’ walkthrough for End of Abyss.
Cel managed to power up the Reactor Core and reestablish communications. As she regroups with the crew, she’s tasked with activating three Security Control Units (SCU) scattered around the facility. The closest one is in Factory West, and that’s where we’re about to go next.
This article is part of our End of Abyss Walkthrough & Guides Hub.
For more information about End of Abyss, check out its official website here.
Table of contents
Obtaining the Mechanical Crank

After regrouping with your crew at the Central Elevator, the Captain will give you your next set of objectives. You have to activate three SCUs in the Facility to power up the Central Elevator. We’ll start with the one in Factory West.

When you’re ready, head through the door on the left to enter Factory West. You’ll reach a large tunnel. The door on the left is locked from the other side. It’s a shortcut we’ll unlock later on.
For now, head down and follow the path.

You’ll enter a room similar to where you fought the Security Pods earlier. A Security Turret will spawn in the room along with two more Security Pods. The Security Turret is stationary and will shoot a laser beam in a straight line. Strafe around it and take down the enemies.

With the enemies defeated, head down along the passage. You’ll get another transmission from Soldier C-12.

Keep running right, and you’ll soon enter Maintenance. Continue moving forward, and you’ll eventually climb up a ladder. Take the door on the left from here.

There are two more Security Pods here that you’ll have to take down. The elevator to your left doesn’t work right now.

Continue past the enemies and loot the Item Box for an Energy Cell. Then head through the door down the steps to the right.


The door to the right leads to a dead end. Our main path is through the door at the top. However, before you move on, there’s a Safe Room just below you that you can use to save your progress. There’s also a Weak Structure on the floor.

Go through the door at the top to fight three more Security Pods. There’s an item box on the walkway to the left where you can find some Fragments. Go through the door on the left at the far end after defeating the enemies.

Pick up the glowing item on the floor to collect the Mechanical Crank. The Mechanical Crank is a Key Item that lets you activate bridge mechanisms to extend them.

Interact with the control panel nearby to activate the bridge.

With that done, go back to Factory West, to the fork after the Security Turret encounter. Now we’ll be heading along the left path.
Activating The Factory West Shuttle

Go up the stairs and use the Mechanical Crank to extend the bridge.

Keep moving forward. You’ll spot a door on the other side of the gap. But there’s no control panel to extend the bridge on your side. For now, head through the door on the left to reach a Safe Room.

Save your progress and then exit through the door on the other side of the Safe Room. Keep moving along the walkway. You’ll have to fight a Security Pod up ahead along with some Parasitic Fleas.

The door above you on the other side requires the Executive Level Access Keycard. There’s also a Weak Structure on the left above you. Head through the open doorway on the bottom left.

The door to the left is blocked from the other side. So go down and then right.


You’ll reach an Energy Node Door. Use the Scanner to find the Energy Nodes and destroy them. Two of them will be in the same area.

For the third one, you’ll have to enter through the door on the bottom left. This brings you to a dark, infested area. Go down the steps and up along the passage. There’s a room to the left that you can enter. Be careful of the Infected Workers in the area.

Destroy the final Energy Node. Then head back up and go through the Energy Node Door.

You’ll reach a big room. The area on the left leads to some Fragments, a Note, and a Weak Structure. But there’s also a Latcher inside, so be careful if you head in. Go down the steps to the right and take out the two Security Pods patrolling the area.

You’ll spot a door up some steps to the right. This will lead to a dead end. Shoot the Explosive Container near the Storage Crates to reveal a Ventilation Cover.
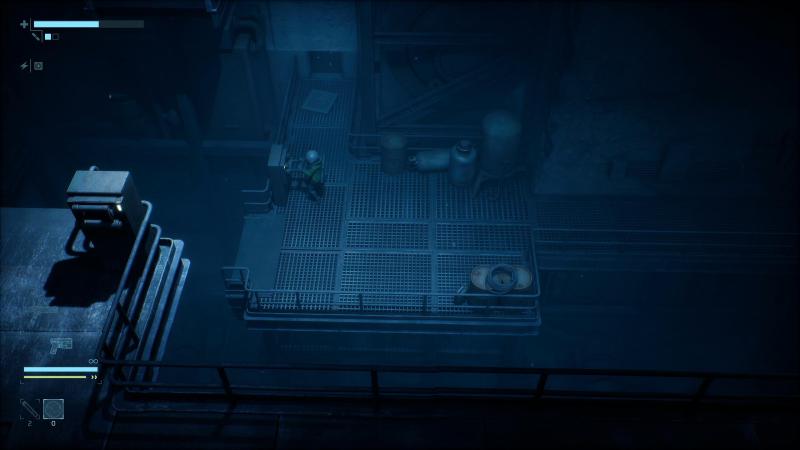
Open the vent and head inside. Follow the path till you reach the other side of the bridge. Use the Lever to extend the bridge and connect it to the previous room.

Go right and use the elevator to head up.

You’ll spot a Security Pod engaged in battle against a Husk. Take them out. Then head through the doorway on the right.

Keep following the path through the doorway until you reach the Shuttle area. Use the lever to activate the Factory West Shuttle.
Obtaining the Explosive Charge

Return to the room where you saw the Security Pod fighting the Husk and head left along the upper floor. You’ll reach a bridge panel that you can use to extend the bridge to the other side.

There’s a Latcher and an Infected Worker up ahead. Take them down.

Then walk along the walkway till you enter the upper floor of the Safe Room from earlier. Extend the ladder and then head through the door on the upper floor.

Use the panel to extend the bridge and connect this side to the door on the other side.

Go down to the Safe Room and exit through the door on the right on the lower floor. Walk across the bridge and through the door up ahead.

This takes you to your second Security Turret encounter in the zone. You’ll have to defeat four Security Pod Type As and the Security Turret.

After defeating them, you’ll then have to fight a Security Turret Type B. This robot throws three grenades at you that explode after a brief delay. But you can bait it to throw the grenades at itself if you can get close enough. It takes damage from its own grenades.

Once all the enemies are defeated, the door to your left unlocks.

Go inside and grab the Explosive Charge from the table.


The Explosive Charge is a consumable item that can blast open the Weak Structures you’ve been seeing around the zone. Go back outside and place an Explosive Charge on the Weak Structure above you. Then activate it to open the path forward.

Head inside and collect the Map Data from the terminal.

Go left to reach a broken bridge. You can see a large shadow in the tunnel in the distance. Grab the fragments and then head back to the room on the right.

Continue along the path to the right till you loop back to the entrance of Factory West.
Obtaining the Health Booster

Return to the Safe Room just before the second Security Turret encounter. Then head out through the door on the left on the lower floor. Go across the walkway and take out the Security Pod on the other side.

Then head to the Weak Structure on the left.

Blow the wall open using an Explosive Charge and head through.

In the control room past the wall, you’ll have to fight a Latcher. Take it out and then head out through the door on the left.

Continue forward until you reach a large room. The door on the right, in the upper area, is locked from the other side. If you go there, you’ll be attacked by a bunch of Security Pods. So instead, head through the left door up the steps.

Take out the Security Pod in the room and then break the Storage Crates.

You’ll spot a trapdoor. Open it and head down the ladder.

Check the Item Box on the left to grab the third Health Booster.
Reaching the Next Safe Room

Go up along the passage to spot an air vent to your right. Enter the vent.


Go up the stairs and then down. You’ll spot a door to your left. Open it to unlock a shortcut back to the previous area. Then head through the doorway on the right.

The area up ahead has two Type A and one Type B Security Pod. Take them out.

The Safe Room is in the bottom right corner of the screen. Head inside and save your progress.
You can also see a door on the right in the upper part of the screen. But we’ll have to unlock it from the other side.
Unlocking the Shortcut to the Safe Room

Go down the ladder in the area where you just fought the Security Pods.

Keep running right. You’ll reach a room with a passage heading up. Don’t go there yet. Instead, go up the steps to the right and through another door.

Go up the stairs and through the door on the left.

There’s a door just ahead. But go down the passage first to grab a Complex Alloy and scan a Note.

Head through the door on the left next. You’ll spot a Weak Structure on the floor. Use the Explosive Charge to open the path.

Before you head down, unlock the door on the left. This takes you back to the room where you fought the three Security Pods. Use the Safe Room to save your progress and prepare your ammo and items for the next boss fight.

When you’re ready, jump down the hole and go left.

The giant door will open automatically as you get close. Head inside to trigger a cutscene, after which the next boss fight will begin.
Security Sentinel Boss Fight

The Security Sentinel is a robotic boss that’s weak to Armor Piercing or EMP rounds. If you prefer playing from a distance, this will be a hard fight. However, if you can stick close to the boss and get the dodge timings right, this becomes one of the easiest bosses in the game.


The boss has two long-range attacks and one short-range attack. If you stay far from the boss, it can either:
- Fire a laser beam at you after a quick charge-up.
- Fire a couple of missiles that home in on you.
Both of these attacks are pretty easy to dodge.

If you instead stay close to the boss, it will charge up an EMP attack that will knock you back and deal massive damage. This attack has a decent AOE, but you can dodge at the right moment to negate all damage.

The best strategy for this fight is to remain close to the boss so that it keeps using the EMP attack. Use the Charged Attack from your Pulse Gun to keep shooting at it. If you’ve unlocked the Security Rifle, its Armor-Piercing rounds can do massive damage to the boss.

Once you deal enough damage, the boss enters its second phase. It doesn’t gain any new attacks. However, all of its attacks are amplified, gaining new effects and dealing more damage. The EMP attack gains a shockwave that expands outward. The laser beam attack lasts longer. And the homing missile gains an additional projectile.

The strategy, however, remains the same. Stick close to the boss and keep attacking it until it goes down. Grab the Vault Key after the fight ends.

After defeating the boss, head through the door on the right. Follow the tunnel and then enter the passage with the door at the end.

Interact with the panel to open the door. The SCU is inside. Interact with it to activate the Factory West SCU and trigger a cutscene.

After the cutscene, return to the tunnel and continue along the path to the right. Use the bridge panel to extend the bridge. This takes you back to the first tunnel in the game. From here, you can run straight to the Central Elevator.
That wraps up the first SCU. For the next one, we’ll have to head into the Waterworks.
This concludes the third part of our End of Abyss walkthrough. For more interesting articles related to indie games, check out the links below:
- Into Indie Games Homepage
- Well Dweller Walkthrough Hub
- Nocturne (2026) Walkthrough Hub
- Rivage Walkthrough Hub – All Puzzle Solutions Under 25 Loops
- Lily’s World XD Complete Walkthrough

Muhit Rahman lives off two things: gaming marathons and endless cups of tea. He writes guides, reviews, and occasionally forgets that real life doesn’t come with checkpoints. His favorite genres are Soulslike and Metroidvania, with Dark Souls III, Hollow Knight, and Dota 2 forever holding top spots on his all-time list.


