Jul
The Wild at Heart Story Walkthrough – Part 26 (Wispwagon Pieces #1, #2)
Stuck in The Wild at Heart? This walkthrough will guide you through finding the first two pieces of the disk for the shrine in Wispwagon.
The Wild at Heart Story Walkthrough – Table of Contents
- Part 12 (Paper Planes)
- Part 13 (Crystalfall Coast Camp)
- Part 14 (Crystalfall Coast Oyster Piles #1 - #4)
- Part 15 (Crystalfall Coast Oyster Pile #5)
- Part 16 (Crystalfall Coast Oyster Pile #6)
- Part 17 (Shiverlings)
- Part 18 (Frostfields Camp)
- Part 19 (Frostfields Crate #1)
- Part 20 (Frostfields Crate #2)
- Part 21 (Frostfields Crates #3 and #4)
- Part 22 (Frostfields Crate #5)
Welcome to the Into Indie Games walkthrough for The Wild at Heart. This story-oriented walkthrough will guide you through completing the game’s story.
The Wild at Heart is a game of exploration and adventure, so be sure to explore and use your spritelings as much as you can, wherever you can. If you’re stuck, our walkthrough will help you out. For more information on The Wild at Heart, check out the official website here.
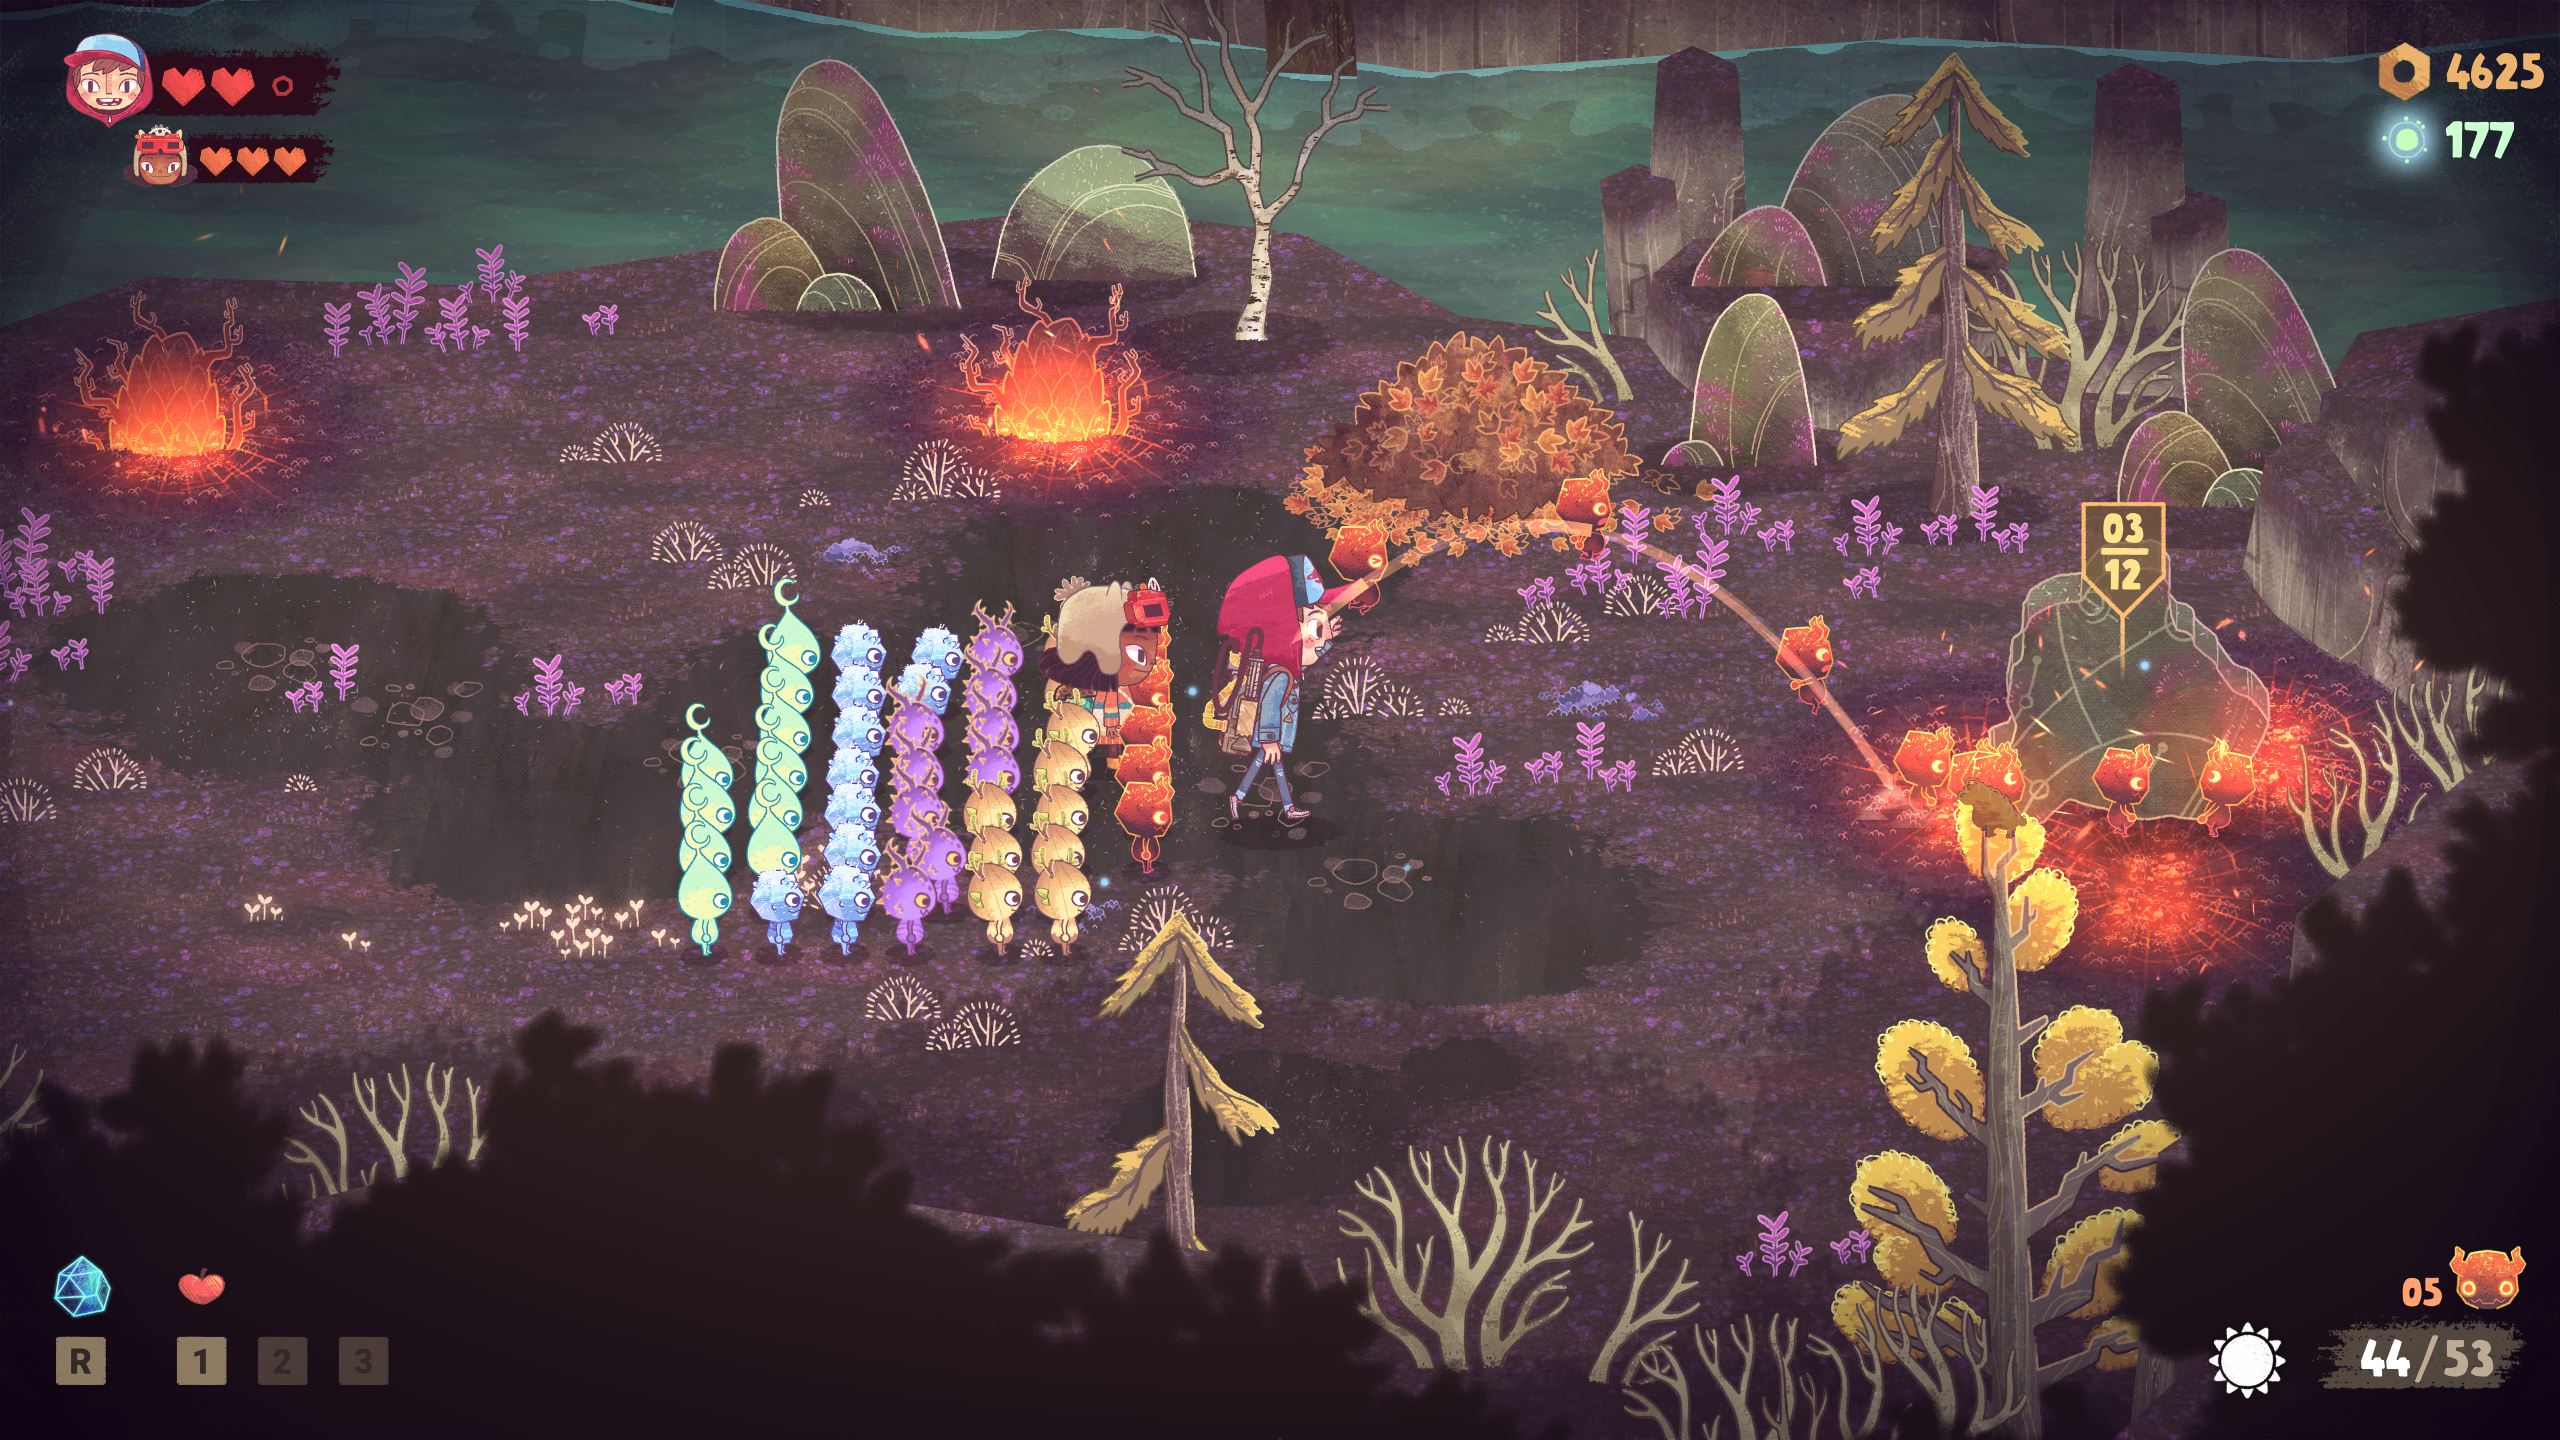
Wispwagon
For your very first piece of the shrine disc, head east from the camp.
Send emberlings to fight the Blazeblops here and you’ll find your piece to the far east. Send emberlings to collect it, as it’s on a fiery area.

For the second piece, head northeast from the camp and cross the bridge. Go up the ramp and proceed north and then northeast. You will be stopped by a green barrier.
Near the green barrier, you’ll find that the wooden fence has a gap from which you can toss spritelings. Toss at least 5 lunalings through the gap and to the other side of the Crud below.
Return to the ramp, go down it and walk into the Crud. Reunite with the lunalings that you tossed before and then toss 5 lunalings onto the moon stone to clear the corruption.
Now head northeast and as Kirby, use the lantern on the Guardian Statue to open the way.

Reunite with your spritelings who had to stop at the bank of the Crud, and return through the deactivated green barrier. Go north and take the raised path leading west.
Here, you’ll encounter a powerful Groggthud. With a decently-sized army, he shouldn’t be too much trouble. Make sure to vacuum your spritelings and run when the Groggthud throws a rock into the air. This attack is very powerful and cost many spriteling lives in one hit.

After defeating the Groggthud, head up north to find Piece #2. Have 6 spritelings carry the thing back to the shrine.
Head to the next part of our walkthrough of The Wild at Heart here!