May
The Wild at Heart Story Walkthrough – Part 4 (The Heartlands)
Stuck in The Wild at Heart? This walkthrough will guide you through the Heartlands, including building bridges and restoring the cog.
The Wild at Heart Story Walkthrough – Table of Contents
- Part 12 (Paper Planes)
- Part 13 (Crystalfall Coast Camp)
- Part 14 (Crystalfall Coast Oyster Piles #1 - #4)
- Part 15 (Crystalfall Coast Oyster Pile #5)
- Part 16 (Crystalfall Coast Oyster Pile #6)
- Part 17 (Shiverlings)
- Part 18 (Frostfields Camp)
- Part 19 (Frostfields Crate #1)
- Part 20 (Frostfields Crate #2)
- Part 21 (Frostfields Crates #3 and #4)
- Part 22 (Frostfields Crate #5)
Welcome to the Into Indie Games walkthrough for The Wild at Heart. This story-oriented walkthrough will guide you through completing the game’s story.
The Wild at Heart is a game of exploration and adventure, so be sure to explore and use your spritelings as much as you can, wherever you can. If you’re stuck, our walkthrough will help you out. For more information on The Wild at Heart, check out the official website here.
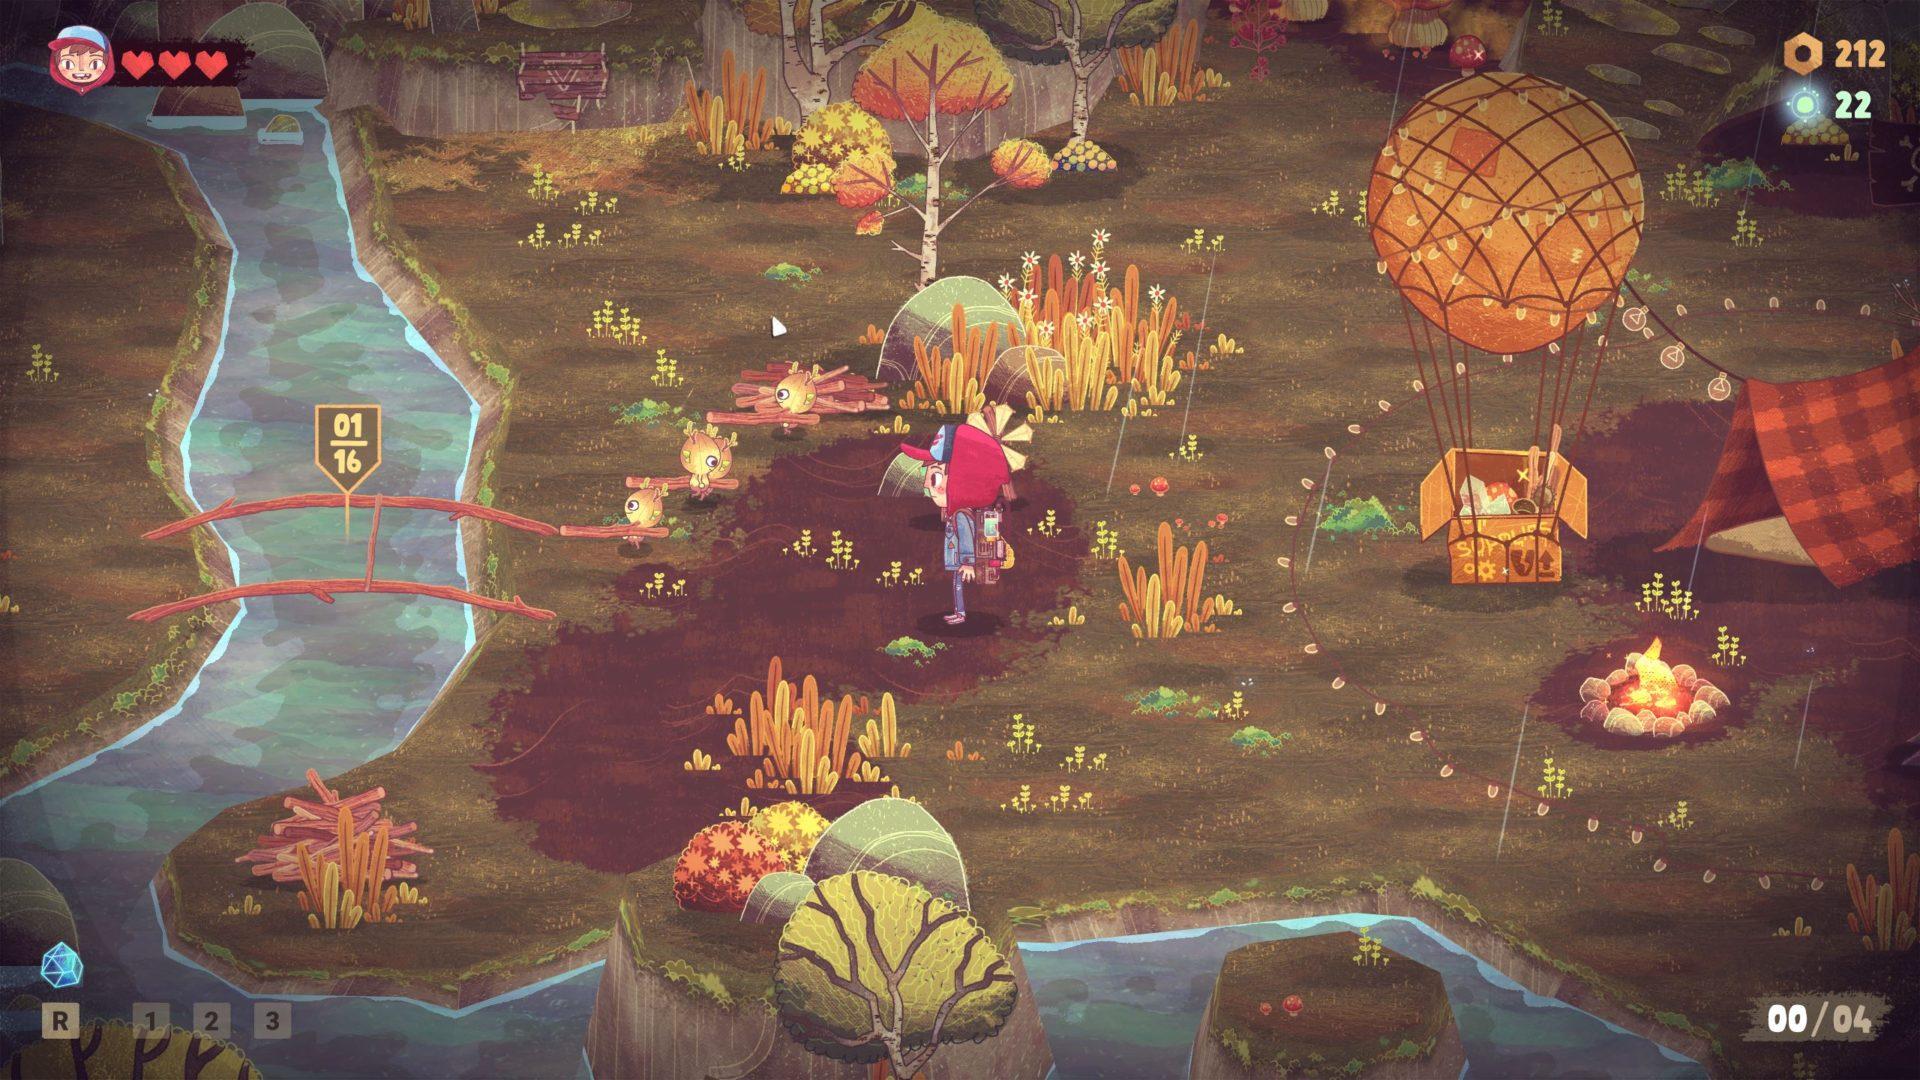
Part 4 (The Heartlands)
Defeat the Gloomcap and head right, pulling down the tree and continuing on to Scrap Heap’s camp. Familiarize yourself with the amenities here.
At the tent, you can sleep until the next morning – good for when it’s getting dark. At the stash, you can put away items you don’t need out in the field, and retrieve them when you want. At the workbench, you can craft new items using the items from your inventory and stash.
To craft, you must combine three eligible items. The workbench is all about experimentation, so try different combinations to unlock new recipes and items.

Finally, at the Spirit Well, you can hatch new spritelings, as well as withdraw spritelings. You can use the Spirit Well as a bank of the spritelings you have, withdrawing as many as you need when you need them.
Our objective now is to put the cog in its place so that the gate going forward can be opened. To find the cog, we’ll have to do some exploring first.
Go west from the camp and toss your spritelings at the piles of wooden sticks. There are two piles – focus on one at a time. The spritelings will automatically build a bridge for you with these sticks.
You will need two piles of wood to build the bridge, so when it’s done, cross over.

Here, you’ll fight a Bushback. Defeat it and then toss your spritelings at the Pip Squashes to the far left. Destroying them will let you pick up the important pips, which you can use to hatch new spritelings.
Pick up all the pips, and also bust the pip squash to the north, to the west of the stone circle. Return to the camp and in the Spirit Well, choose to Hatch Pips.
You may not have enough Glint to hatch all the pips you have collected. You can collect Glint by defeating creatures and busting pip squashes. There’s some more pip squashes just north of the camp. Bust them too and grab all the Glint and pips you can get.

When you have at least 8 spritelings, go to the east of the camp, to the boulder than needs 8 spritelings to move it. Toss your spritelings at it to move it.
Proceed up the vines and defeat another Bushback to the West. You can break down the spiky barricade here using your spritelings to unlock a handy shortcut.
Go east now to the broken rock, which you can’t do anything with just yet, and then go south. Destroy the toxic mushrooms and then defeat the green slime.
To build the bridge here, first use spritelings on the wood pile near you, and then toss spritelings beyond the bridge to build the bridge from the other side.

Reunite with the spritelings. You can now get spritelings to pick up and carry the cog, but first, break open the pip squashes for Glint and pips.
After throwing some spritelings at the cog to get it picked up, use your vacuum on the windmill to open up a path.
Now go north of the camp, up to the windmill that spins the cog you just installed. Vacuum it to open up the way forward.

Talk to Scrap Heap when you’re ready to move on, and then go north. When Scrap Heap tells you to run, run north.
Don’t bother breaking the toxic mushrooms here, just run past them. Vacuum the windmill to open the gate ahead and proceed.
Head to the next part of our walkthrough of The Wild at Heart here!