Aug
The Dream Machine: Chapter 6 Walkthrough
What secrets lie in the final dream? Stuck in the sixth chapter of The Dream Machine? Figure out what you need to do with our walkthrough!
- The Dream Machine: Chapter 1
- The Dream Machine: Chapter 2
- The Dream Machine: Chapter 3
- The Dream Machine: Chapter 4
- The Dream Machine: Chapter 5
- The Dream Machine: Chapter 6
This walkthrough covers Chapter 5 of The Dream Machine. This walkthrough series covers the game on a puzzle-by-puzzle basis, which involves a lot of backtracking. It also omits side-content that isn’t relevant to the story progression. At all times, it is recommended that you explore the world of The Dream Machine yourself and only consult this walkthrough when you’re really stuck.

The Apartment and the Void
You’ll find yourself in your apartment again. Leave the hallway, and the doorbell rings. Answer the door and talk to the mystery visitor. After you’re done talking, leave the apartment and go down to Mr Morton’s office. Talk to Alicia, and you’ll find yourself… falling endlessly.
Look down, and then look into the void. Repeat whatever Legion asks you say, until you have the option to ask if Legion can help you. Use that option, and Legion will offer you a number of wishes. Play around with the wishes if you like, but to proceed, ask for something to look at.
Wait for the mirror to get close to Victor, then pick it up. Examine the mirror, and talk to the reflection. Agree to swap places with the Victor in the mirror, and then do as he says (i.e. knock your heels three times and say the phrase).
After waking up back in your apartment, go to the kitchen. Talk to Alicia, and then, as before, pick up the empty box and take it to the living room. Place the box on the floor and sit down by it. After you’re done with breakfast, enter the bathroom and examine the mirror. Talk to the other Victor and exhaust all of his dialogue.
Return to the kitchen and open the fridge. Enter the fridge.
You’ll enter a white void. Walk in random directions (not the same direction) until you see a blurry image to the north. Approach the vague figure and talk to him. Exhaust his dialogue. Once you’re looking at the telephone and the first prayer comes through, press the button above the blinking light.

Answer the prayer in any way you like. Once God is gone, pick up the key. After that, pick up the prayers as they appear, until you get the option to ignore all prayers. Pick that option. Most of the prayers will disappear, leaving only one. Answer it.
Leave the table with the telephone once you have the option to. Step left into the darkness and the lights should switch on. Participate in the rehearsal and explore the play area if you like. Once you’re done, leave the stage via the steps at the bottom. Head towards the door and use the key to the kingdom of heaven on the door. Enter it.
Step away from where you’re standing, and you’ll see a blinking light. Press the button. Once you start hearing the ‘pings’, repeatedly click on the blinking light until the blurry image fully comes into view. Talk to Victor’s mother if you like, and then leave. Wait for the pings to flatline, and then press the green button.
Open the closet door and leave the closet. Try the elevator, and a strange boat will appear. You can also check out Edie’s place and talk to an old friend if you like. When you’re done, return to the second floor hallway and use the stairwell door to take the tape off. Then, use the key to the kingdom of heaven on the door to unlock it. Open the door and enter. Go down the stairs.
In this forest-like section, keep going forward, or to the sides, as the case may be. There’s only one way to go forward, so you can’t make a mistake. Eventually, you’ll reach a fishing child. Talk to him. Once you’re done talking, leave the scene and keep clicking on the leave button until Victor wakes up.
Click on Victor to have him get up, and then leave by the stairwell to the right. You’ll find yourself in the lobby. You can now head out of the lobby to find out what’s there, or return to the basement to pick up something important. It’ll save you some backtracking if you pick it up right now.
Go down to the basement by using the key to the kingdom of heaven with the keyhole in the elevator. Enter the surveillance room and examine the map, then pick it up.
Go to the lobby and pick up the conspicuously placed coat hanger. Then, exit the building and get on the lifeboat. You’ll find yourself back in Alicia’s ship. Head on over to the bridge.
If you call engineering and ask to go full steam ahead, you’ll learn that the ship is out of fuel. Enter the coal room. Once you’re done ‘talking’ to the other Victors, open the coal chute. You’ll find that you can now pick up corpses. Pick up a corpse and put the corpse in the coal chute. Do this two more times and Victor will automatically do the rest.
Once the coal room is cleaned up, go up the rope, back onto the Bridge. Call Engineering and order them to go full steam ahead. Now click on the steering wheel, and if you picked up the map, you’ll see it displayed on the screen. If you did not pick up the map, go back to Mr Morton’s basement and pick up the map from the surveillance room.
The Centre of the Dreamscape
Click on the big question mark in the middle to travel to the centre of the dreamscape. Once you’re there, leave the bridge and return to the lifeboat. Disembark, and you’ll find yourself in the centre of the dreamscape at last.
Follow the path to the right and you’ll find a fork. Before it, there’s a skeleton. Examine the skeleton and pick up the dirty scroll lying next to it.
Examine the scroll and unfurl it. You’ll notice that it’s a map. This is the first of several maps that you’ll have to pick up while in the centre of the dreamscape. Getting them won’t be as straightforward as this one, though.
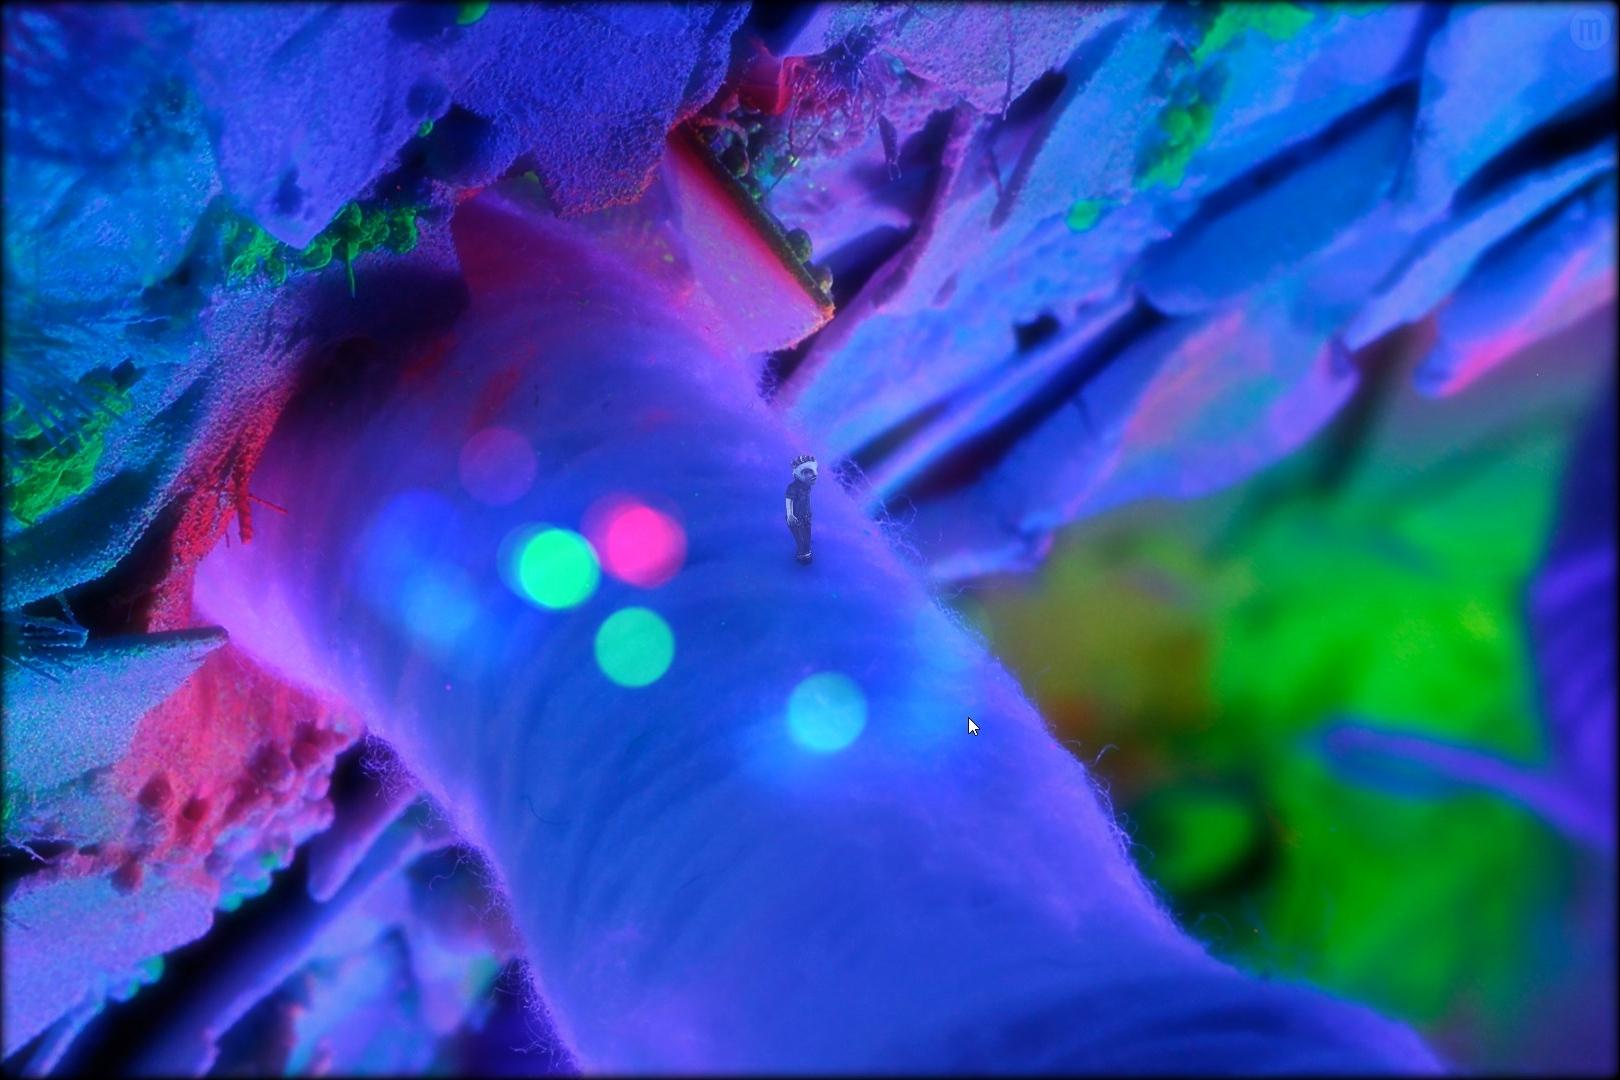
Now, you can explore the centre of the dreamscape, but the area is randomly connected, so there is no single path to get anywhere. You’ll just have to walk in whichever direction you find.
As you explore the Centre, you’ll find that there are four other ‘Victors’ of various ages. Each of them has a map of his own, but you’ll have to get it out of him yourself.
Old Victor
This is the one who is pretending to be a god and answering prayers. Examine his golden phone and read the number on it.
Now, use the quick travel map in your inventory to quick travel to the house, i.e. the apartment building. Enter it and go to the basement (remember to use the key to the kingdom of heaven in the elevator!), and head to the surveillance room. Examine the TV screens and pick up the phone. Call old Victor from here and then use any greeting.
Next, use the option that says “I’m your biggest fan”. Repeat your own request, and then do what you like with Old Victor. Once he’s gone, return to where he was lying, and pick up the map.
Middle-Aged Victor
This is the one who is drinking beer in a theatre. Talk to him and exhaust his dialogue. Then, talk to him again and ask him “What can you tell me about this map I found?” He’ll give you a task to perform that’s quite vague indeed.
Middle-Aged Victor wants to experience something new, but what he really wants is something new to drink or something new to watch. You can go for either solution to get his map.
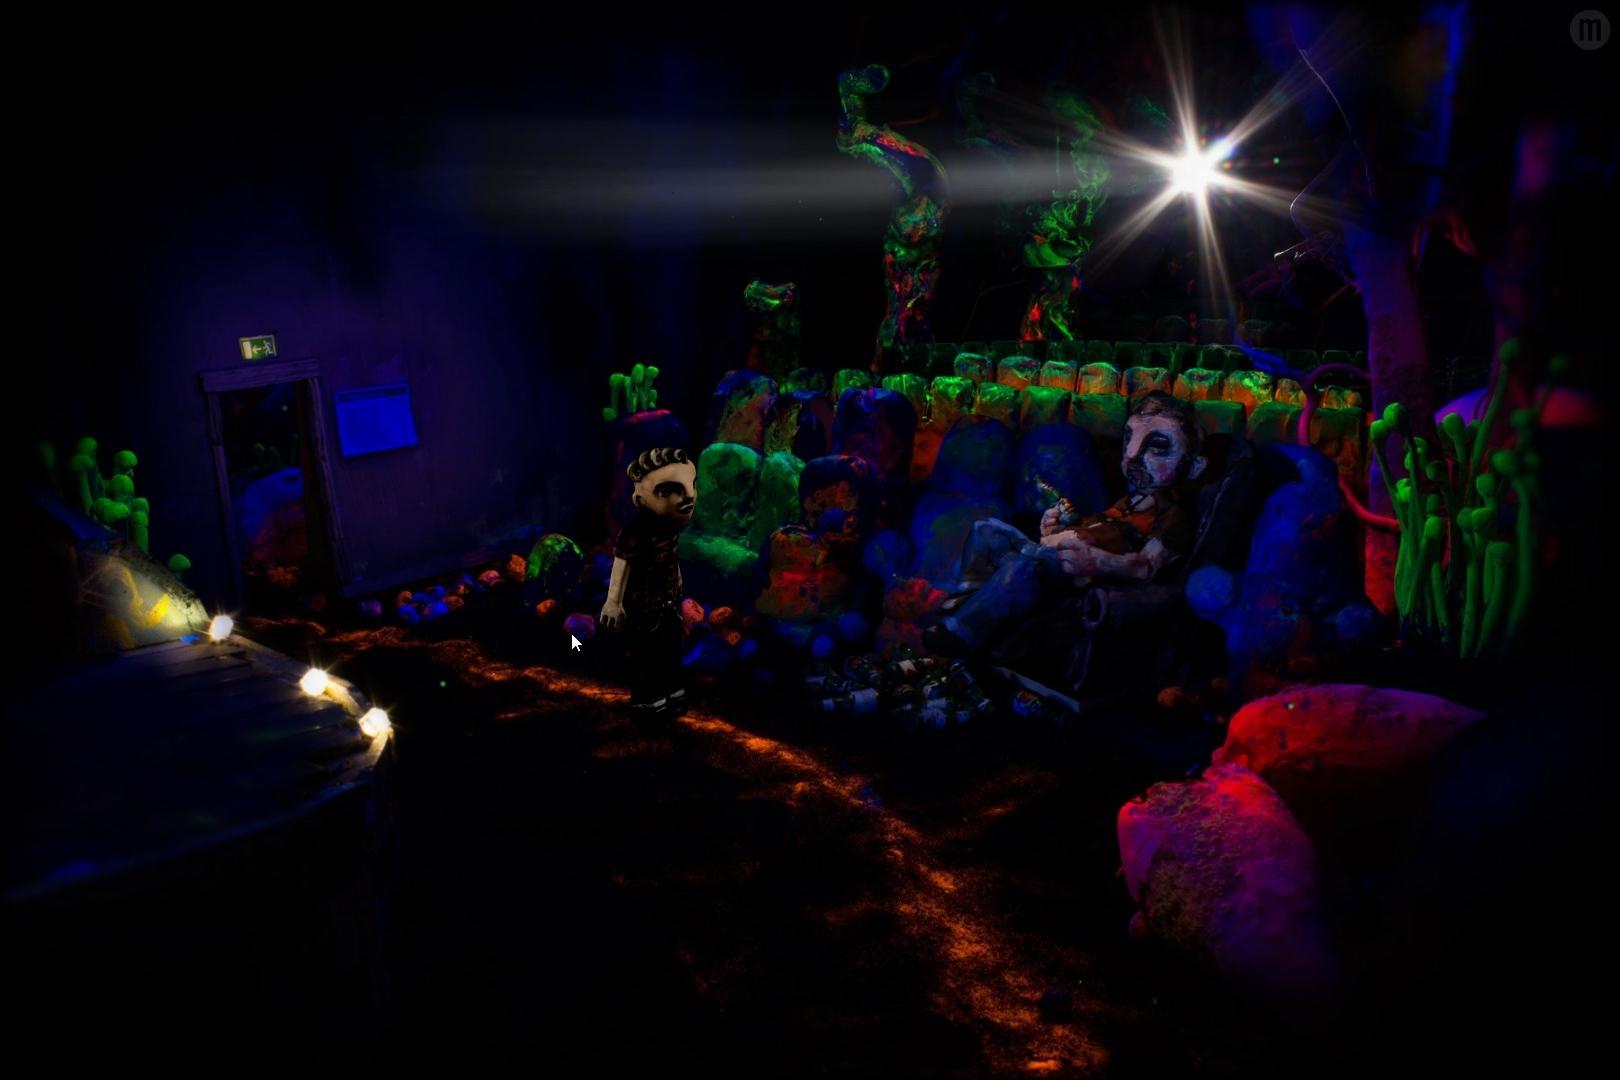
To get him something new to drink, return to the cruise ship and go down to the bar. Examine the liquor rack on the wall and you’ll find an unknown bottle of liquor. Pick it up and give it to Middle-Aged Victor.
To let him watch something new, return to the apartment building and go to the basement. Head to the surveillance room and examine the TV screens. Pick up the remote here, and give the remote to Middle-Aged Victor.
Pick up the evaluation plan next to the door, and you’re done with Middle-Aged Victor… for now.
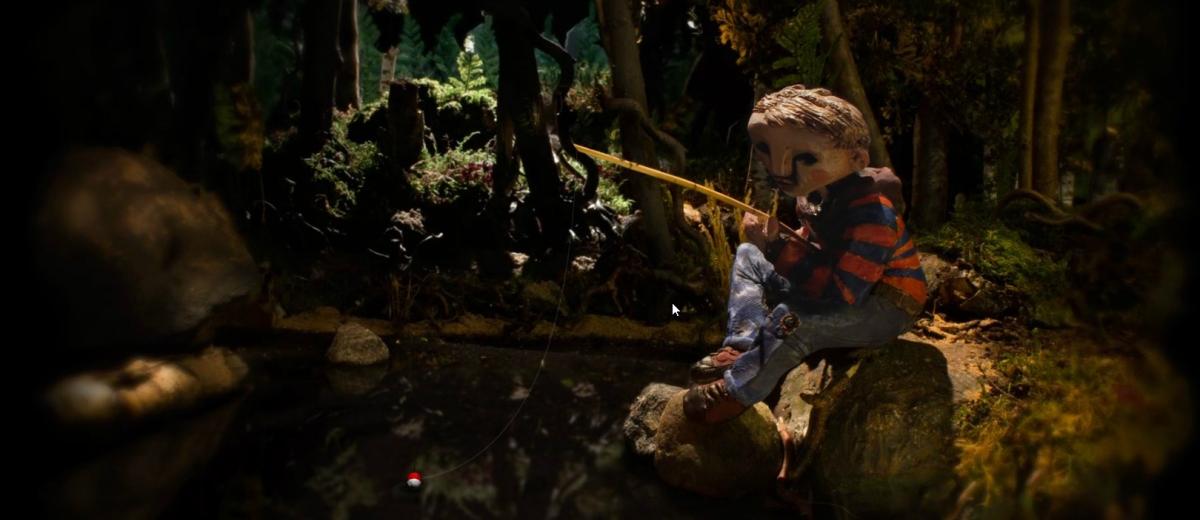
Young Victor
This is the one who is sitting by the pond, not fishing. His greatest fear is catching the fish that changed his life forever. That’s exactly what you’re going to have to do.
Return to the cruise ship and open the lid of the bench on the deck 2 balcony. Pick up both the rations and the fishing rod.
Return to Young Victor and use the crumbs with the fishing rod. Use the fishing rod with the pond, and wait for the bobber to drop, then reel in. Use the fish with Victor (yourself) and disembowel the fish. That’s another piece of the map.
Baby Victor
This is the one who is in his crib. For this one, you actually have to go talk to Middle-Aged Victor. Ask him about baby Victor, and why he had a falling out with baby Victor.
Then, go to Young Victor and ask him about the missing map (the option is behind “About the other Victors…” option). Finally, return to the Baby Victor and pick up the piece of paper to the upper-left of the screen when you’re looking at Baby Victor.
Contemporary Victor
You need one more map, but the Victor you need for this one is not present right away. To trigger his existence, you need to go to Middle-Aged Victor and ask him “Why do you think somebody wished us into existence?”
Once that conversation is done, head out and keep exploring the centre of the dreamscape until you reach a “T” intersection (it has two large green mushrooms). If you approach this intersection from the bottom side, you’ll see another Victor just like you walk to the right.

Follow him and talk to each of the Victors, asking them what they know about the Victor who looks just like you. For Middle-Aged Victor, make sure you ask him specifically, after your initial automatic conversation.
Once you’ve asked each of the Victors about the Victor who looks just like you, return to the skeleton that’s on the screen next to the lifeboat screen. You should find Contemporary Victor standing over the skeleton here. Talk to him. After he leaves, follow him to the four-way intersection.
Talk to him again. Exhaust his dialogue, and you’ll learn that he wants something to eat if you’re going to get his map. There’s two ways to solve this puzzle.
The first way is to go to the cruise ship and use the intercom to call the kitchen. Ask for something to eat, and the kitchen will reluctantly agree to send soup. Pick up the soup from the dumb waiter, and bring it back to Contemporary Victor. Give it to him, and he’ll give you his ‘map’.
For the second way, you first need to have a fish. To get the fish, follow the instructions for getting Young Victor’s map above. Once you have the fish, go to Selma’s Dream and enter Selma’s Cottage. Use the fish on the fireplace and wait until it’s nicely grilled. Return to Contemporary Victor and give him the fish to get his ‘map’.
Crossing the Birth Barrier
Once you have all six maps, go to Edie’s Dream. Enter the living room and examine the wall. Pick up the two photographs to get them out of the way, and start arranging the maps.
Order is important here. You want to arrange the maps in such a way that you go ‘backwards’ in time, from the oldest Victor to the youngest.
Place the unfurled scroll in the bottom-left, as this belongs to the oldest Victor (who is dead). Next, place Old Victor’s map in the top-left. Place Middle-Aged Victor’s map in the top-middle. Place Contemporary Victor’s map (blank piece of paper) in the bottom-middle. Place Young Victor’s map in the bottom-right. Finally, place Baby Victor’s map in the top-right.
Return to the Centre of the Dreamscape. Now, you need to walk along the path you have created for yourself. Upon disembarking from the lifeboat, follow the path up. At the dead Victor, follow the path up. At Old Victor’s, follow the path right. At Middle-Aged Victor’s, follow the path down. At Contemporary Victor’s, follow the path right. At Young Victor’s follow the path up. At Baby Victor’s follow the path up.
Examine the dark figures to the right, and you’ll find Mom and Dad. To find out what’s wrong with the baby, you’re going to have get right in there. Obviously, you can’t do that in your current form.
Go to Martin’s Dream and from the Lifeboat Room, go through the doorway to the top. Follow the path to the top, and you’ll find the good ol’ futuristic gun. Return to the Lifeboat Room, and examine the twig by the top-right gap. Pick it up, because you’re going to need it to climb up.
Return to Mom and Dad in the Centre of the Dreamscape. Without going into the “Examine Mom and Dad” screen, use the forked twig with the bed railing. Become small and use the yarn to climb on up.
Walk under the leg, and step into the birth canal. Enter the womb to the right to meet Fetus Victor. Talk to him if you like. Once you’re done, use the hanger on it. Select “Pierce the Head” and then “Pierce the Ear Canal”. Examine the light that the Fetus Victor was blocking.
Step into the passage and keep walking towards the light, following the Dream Machine’s tentacles until you get to a cutscene of Victor passing the birth barrier.
Once you’re past the birth barrier, you’ll be in ‘Chapter 7’. There’s only one direction to go in now, so keep following the path to the right. When you reach the child, talk to it. Once you’re done with the Dream Machine once and for all, step onto the lifeboat.
When you find yourself back to where it all started, pick up the fishing rod and use it with the forked branch. Time for Victor to get some well-earned rest.
Don’t own The Dream Machine? Get it on Steam for PC and Mac!