Sep
Toem Stamps Walkthrough – Kiiruberg, Part 4
Stuck in Toem? Here’s how to take the right pictures in Kiiruberg to locate an asteroid and play astronaut in the observatory.
Toem Stamps Walkthrough Table of Contents
- Part 1 (Frames & Filters!, A Whistling Dilemma, Photo Challenge #3)
- Part 2 (A Good Spot with No Sun, Solve the Chaos)
- Part 3 (A Layered Melody, The King of Fishes)
- Part 4 (Supreme Deluxe Sandwich?!, Become a Farmer)
- Part 5 (Power Shortage?!, Make Someone Take a Bath, Scorching Flame?)
- Part 6 (Suspicious Activity - Harbor, A Lost Dog)
- Part 7 (Ocean Garbage, Queen of Paper Hats)
- Part 1 (Young and Inspiring, Super Hotbean Bros.)
- Part 2 (A Mouse Bakery, Punk Rocker Bread Crumbs, A Thieving Crow)
- Part 3 (Spooky Scary City, Photo Challenge #5)
- Part 4 (Press-ing News, A Design Problem)
- Part 5 (Hang in There, Buddy, Suspicious Activity - City, Always Tumbled Granny)
- Part 6 (Critical Confusion!, A Ghostly Date)
- Part 7 (Sewer Stumble!, Art Exhibition)
- Part 8 (Cleaning Away the Stress, Ratskullz Crew)
- Part 1 (Become a Yeti, Scarf, Snowball Memories)
- Part 2 (Military Suspicions, Photo Challenge #7)
- Part 3 (Yeti Cuteness, A Wall of Lights)
- Part 4 (Locating an Asteroid, Play Astronaut)
- Part 5 (Ski Goggles, Birthday in Distress)
- Part 6 (Listen to the Goat Choir, Assemble a Snowman)
- Part 7 (Ice Wizard’s Research)
- Part 1 (How to get to Basto, Jet-Ski Tricks)
- Part 2 (Take a Nap!, Dehydrated Muscles)
- Part 3 (Night-Time Cinema, Play a Carnival Game)
- Part 4 (Night Lights, Spooky Stories)
- Part 5 (Bad Hair Day, Painterly Portrait)
- Part 6 (Arthur Hunter)
- Part 7 (Fruit Shortage)
- Part 8 (In Your Face, Sand Castle Competition)
- Part 9 (Bitling Collector)
- Part 10 (Book of Bats, Sweet Tooth)
- Part 11 (Broken Dreams, Brain Freeze)
- Part 12 (Basto’s Hidden Balloons)
- Part 13 (Dry Season)
Welcome to the Into Indie Games guide to Toem! This guide focuses on collecting stamps only, and it does not currently cover compendium photos.
The stamps in Toem are not numbered, but we’ll be numbering them here to make things more manageable. For more information on Toem, check out the official website here.
Kiiruberg
Stamp: Locating an Asteroid
To get this task, go to the observatory, which you can find in the Fluff Ball area, which is adjacent to the cave area (up the long rope, past the bridge). Talk to the astronomer here, and then examine the telescope up the stairs.
While using the telescope, focus on the asteroid and retain your focus until the progress bar fills up. This will give you the task after the cutscene that follows.

To find the asteroid, return to the giggling snowman area. Take the picture of the asteroid from a bit of a distance, so that your camera detects it.
Return to the astronomer and show her your picture.
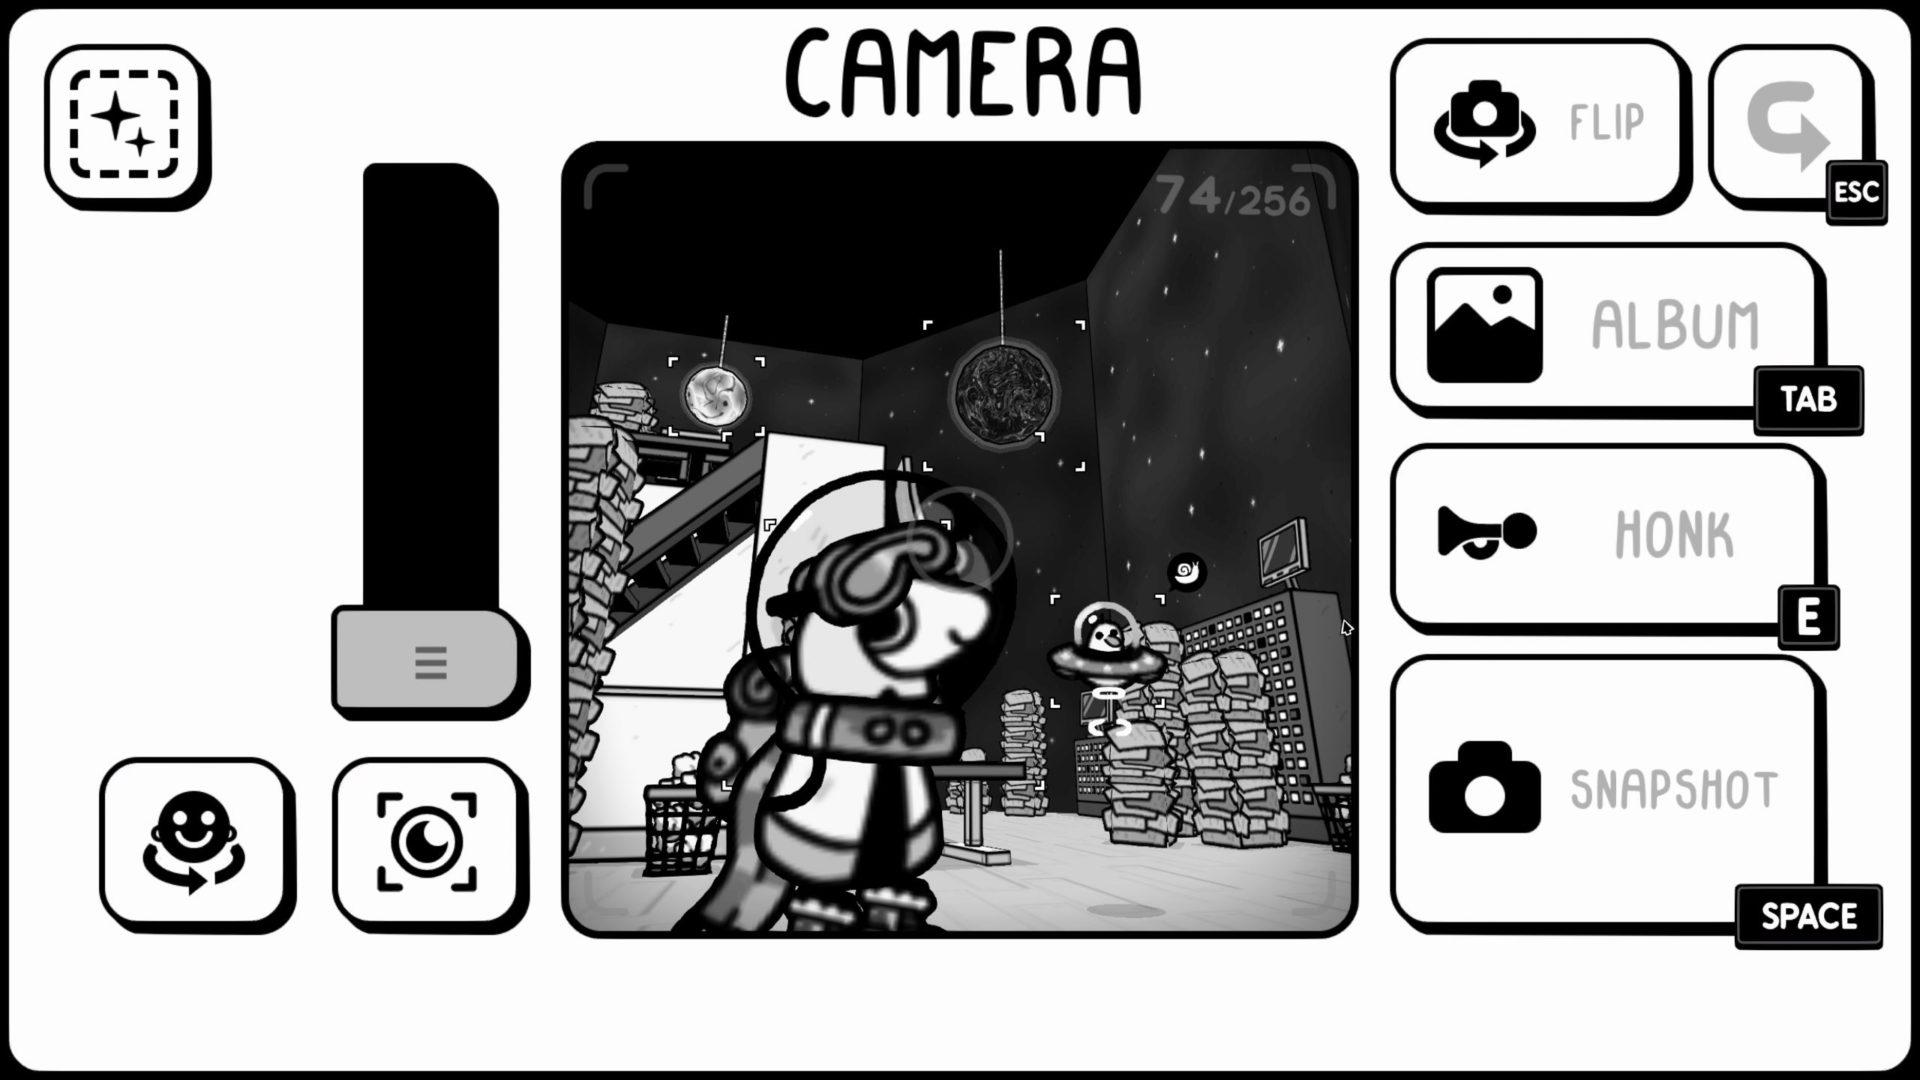
Stamp: Play Astronaut
You get this mission upon arriving in Kiiruberg. To complete this task, you must first acquire a space helmet.
Go to the Fluff Ball area, but don’t enter the observatory just yet. Instead, rotate your camera to the left as far as it will go (i.e. the observatory is on your left and the exit to the cave area is on your right).

You should find a gift box located at the very base of the observatory hill. Open it up to find your space helmet! Put it on and enter the observatory.
The ‘alien’ you need to find is the little creature in the UFO hovering about in one corner of the observatory. The ‘planet’ you need can be any of the planets hanging from the roof.

You need to fit yourself, the alien, and the planet into one frame to get this stamp. Needless to say, you need to flip the camera for selfie mode for this.
Head on to the next chapter of our Toem stamps walkthrough!