25
Feb
Feb
Luna The Shadow Dust Walkthrough – Part 1
The night is young, and you’ve got a tower to climb. Find out how to solve the puzzles of Luna The Shadow Dust in our text walkthrough!
- Luna The Shadow Dust Walkthrough – Part 1
- Luna The Shadow Dust Walkthrough – Part 2
- Luna The Shadow Dust Walkthrough – Part 3
- Luna The Shadow Dust Walkthrough – Part 4
- Luna The Shadow Dust Walkthrough – Part 5
- Luna The Shadow Dust Walkthrough – Part 6
 We start the game off with our protagonist Üri falling from a height. When you gain control of him, have him walk to the right.
Your first puzzle involves a cactus and a crow’s shadow. To proceed, you only have to interact with the cactus by clicking on it. This gets the crow moving, and you can proceed towards the door.
Open the door, and after it closes, the wisp following you will transfer to the lantern above the door. Watch the cutscene that follows, and then open the door to the tower.
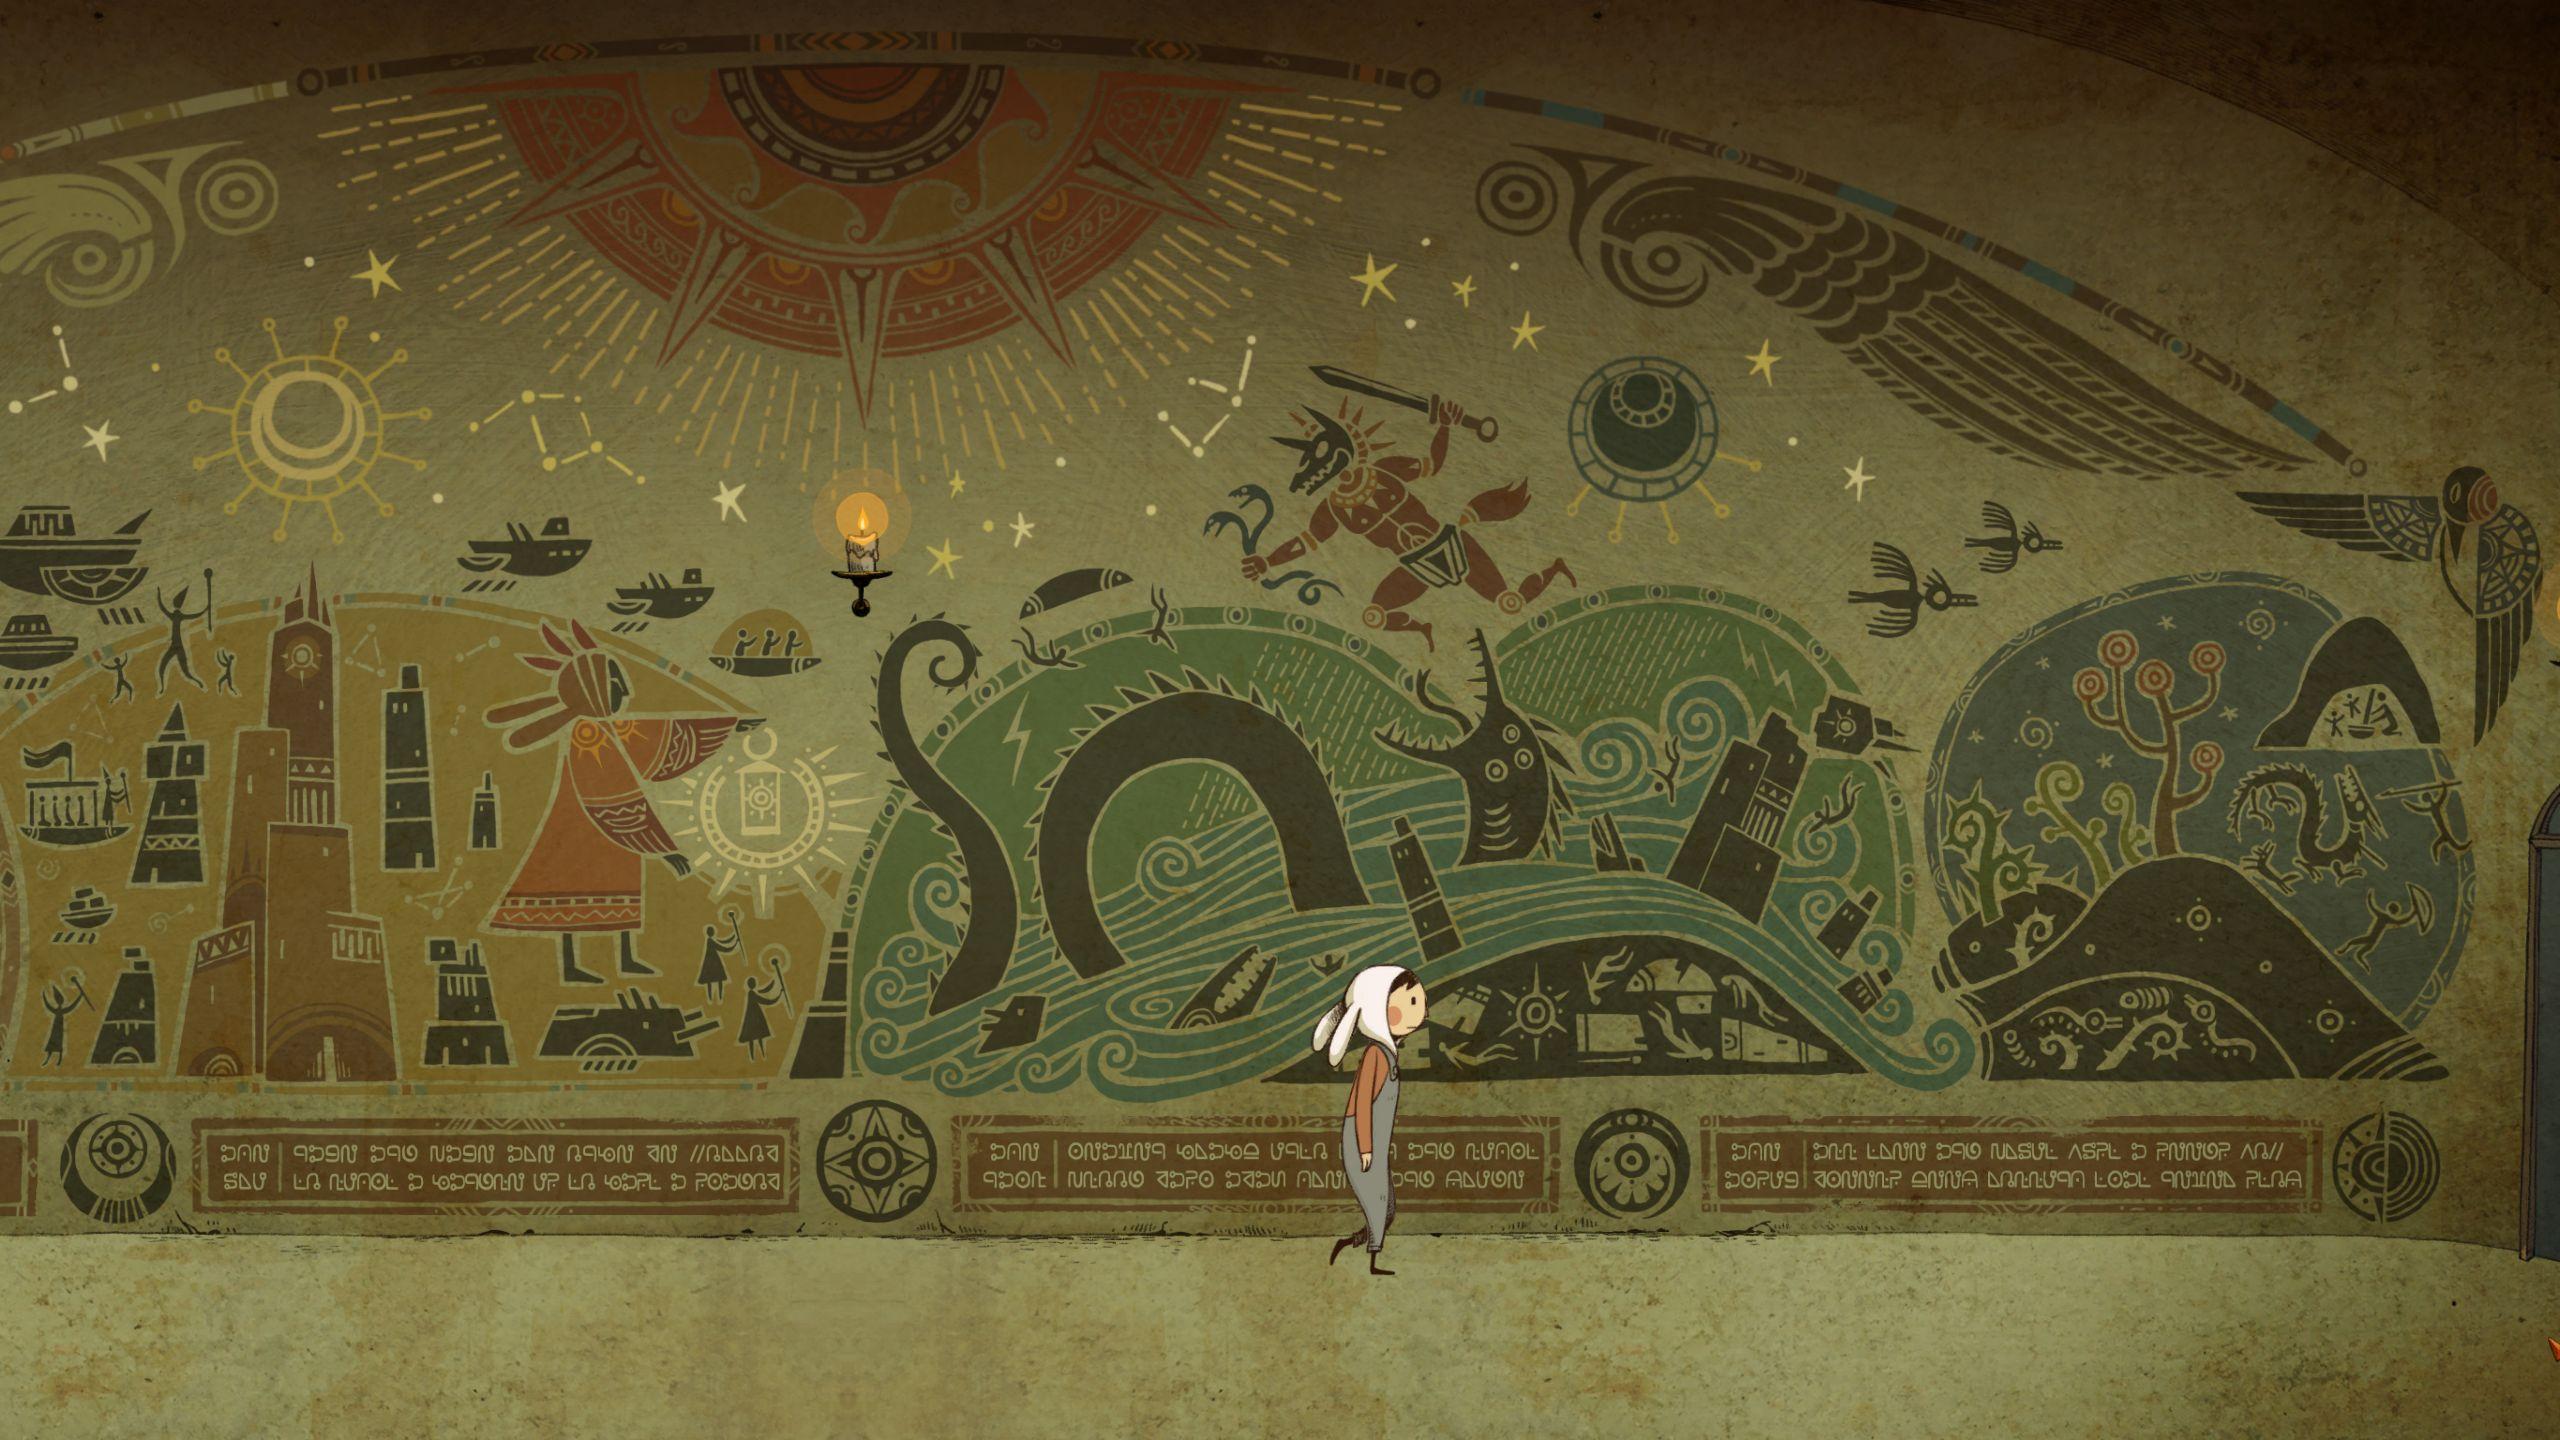
The Mural Room
In this first room, we have a wall painted with a bunch of murals. ‘Solving’ this room is as simple has hovering your mouse over each mural until the colour fills in. Do this for each of the murals, and you’ll see a final mural appear over the others. After that, the door to the right will get unlocked.
The Grandfather Clock Room
We start the game off with our protagonist Üri falling from a height. When you gain control of him, have him walk to the right.
Your first puzzle involves a cactus and a crow’s shadow. To proceed, you only have to interact with the cactus by clicking on it. This gets the crow moving, and you can proceed towards the door.
Open the door, and after it closes, the wisp following you will transfer to the lantern above the door. Watch the cutscene that follows, and then open the door to the tower.
The Mural Room
In this first room, we have a wall painted with a bunch of murals. ‘Solving’ this room is as simple has hovering your mouse over each mural until the colour fills in. Do this for each of the murals, and you’ll see a final mural appear over the others. After that, the door to the right will get unlocked.
The Grandfather Clock Room
 In this room, we have a grandfather clock in the middle, and a bunch of stuff strewn about.
First, go to the lever to the right of the room, by the door. Pull it and you’ll lower the lantern in the middle of the room. Now go over to the lantern and interact with it to turn off the lights.
You’ll notice that there’s nothing notable in the dark except for the three colours in the stained glass above the door to the right. The colours are marked red, yellow, and blue, in that order.
Turn the light back on and interact with the empty orb on the left side of the room (next to the rabbit). Keep interacting with it to have it switch colours until you make it red.
Then do the same with the orb on the right side of the room, which is held by a statue of a cat. Keep interacting until you make it blue.
The orb on the grandfather clock is already yellow, so we don’t need to do anything about that (not that we can anyway).
With the door unlocked, head out to the next room.
The Paintings Room
In this room, we have a grandfather clock in the middle, and a bunch of stuff strewn about.
First, go to the lever to the right of the room, by the door. Pull it and you’ll lower the lantern in the middle of the room. Now go over to the lantern and interact with it to turn off the lights.
You’ll notice that there’s nothing notable in the dark except for the three colours in the stained glass above the door to the right. The colours are marked red, yellow, and blue, in that order.
Turn the light back on and interact with the empty orb on the left side of the room (next to the rabbit). Keep interacting with it to have it switch colours until you make it red.
Then do the same with the orb on the right side of the room, which is held by a statue of a cat. Keep interacting until you make it blue.
The orb on the grandfather clock is already yellow, so we don’t need to do anything about that (not that we can anyway).
With the door unlocked, head out to the next room.
The Paintings Room
 This tricky room has two open doors, but you can’t just walk wily-nilly through them, or you’re get nowhere.
To proceed, pay attention to the stained glass above the doors, which marks a phase of the moon. They both have the same phase showing. To find out which direction to take, you need to look at the paintings above the fireplace.
The four rabbit paintings are each oriented towards one of the two directions, along with depicting a phase of the moon. Simply follow the orientation of the painting, and you’ll be out.
So to proceed, first head left (as seen in the third painting), then head right (as seen in the fourth painting), then right again (as seen in the second painting), and finally, left, as seen in the first painting.
Once you have entered the doors corresponding to the orientations of each of the paintings, you will have lit all the candles above the paintings. You will also have light shining through the doors. Step through the door to the right to continue.
Meeting Layh
This tricky room has two open doors, but you can’t just walk wily-nilly through them, or you’re get nowhere.
To proceed, pay attention to the stained glass above the doors, which marks a phase of the moon. They both have the same phase showing. To find out which direction to take, you need to look at the paintings above the fireplace.
The four rabbit paintings are each oriented towards one of the two directions, along with depicting a phase of the moon. Simply follow the orientation of the painting, and you’ll be out.
So to proceed, first head left (as seen in the third painting), then head right (as seen in the fourth painting), then right again (as seen in the second painting), and finally, left, as seen in the first painting.
Once you have entered the doors corresponding to the orientations of each of the paintings, you will have lit all the candles above the paintings. You will also have light shining through the doors. Step through the door to the right to continue.
Meeting Layh
 This is where you meet the second protagonist of the game, Layh!
Simply interact with poor Layh under the broken planks of wood, and you’ll see a cutscene of Üri helping the creature up. After the cutscene, you’ll be able to switch between Üri and Layh freely by either selecting them directly, or pressing the switch protagonist button (which is the spacebar on computers).
Have both Üri and Layh go through the door to the right. You’ll have to manually move each protagonist to the door, so make use of the switch button!
The Box Puzzle
This is where you meet the second protagonist of the game, Layh!
Simply interact with poor Layh under the broken planks of wood, and you’ll see a cutscene of Üri helping the creature up. After the cutscene, you’ll be able to switch between Üri and Layh freely by either selecting them directly, or pressing the switch protagonist button (which is the spacebar on computers).
Have both Üri and Layh go through the door to the right. You’ll have to manually move each protagonist to the door, so make use of the switch button!
The Box Puzzle
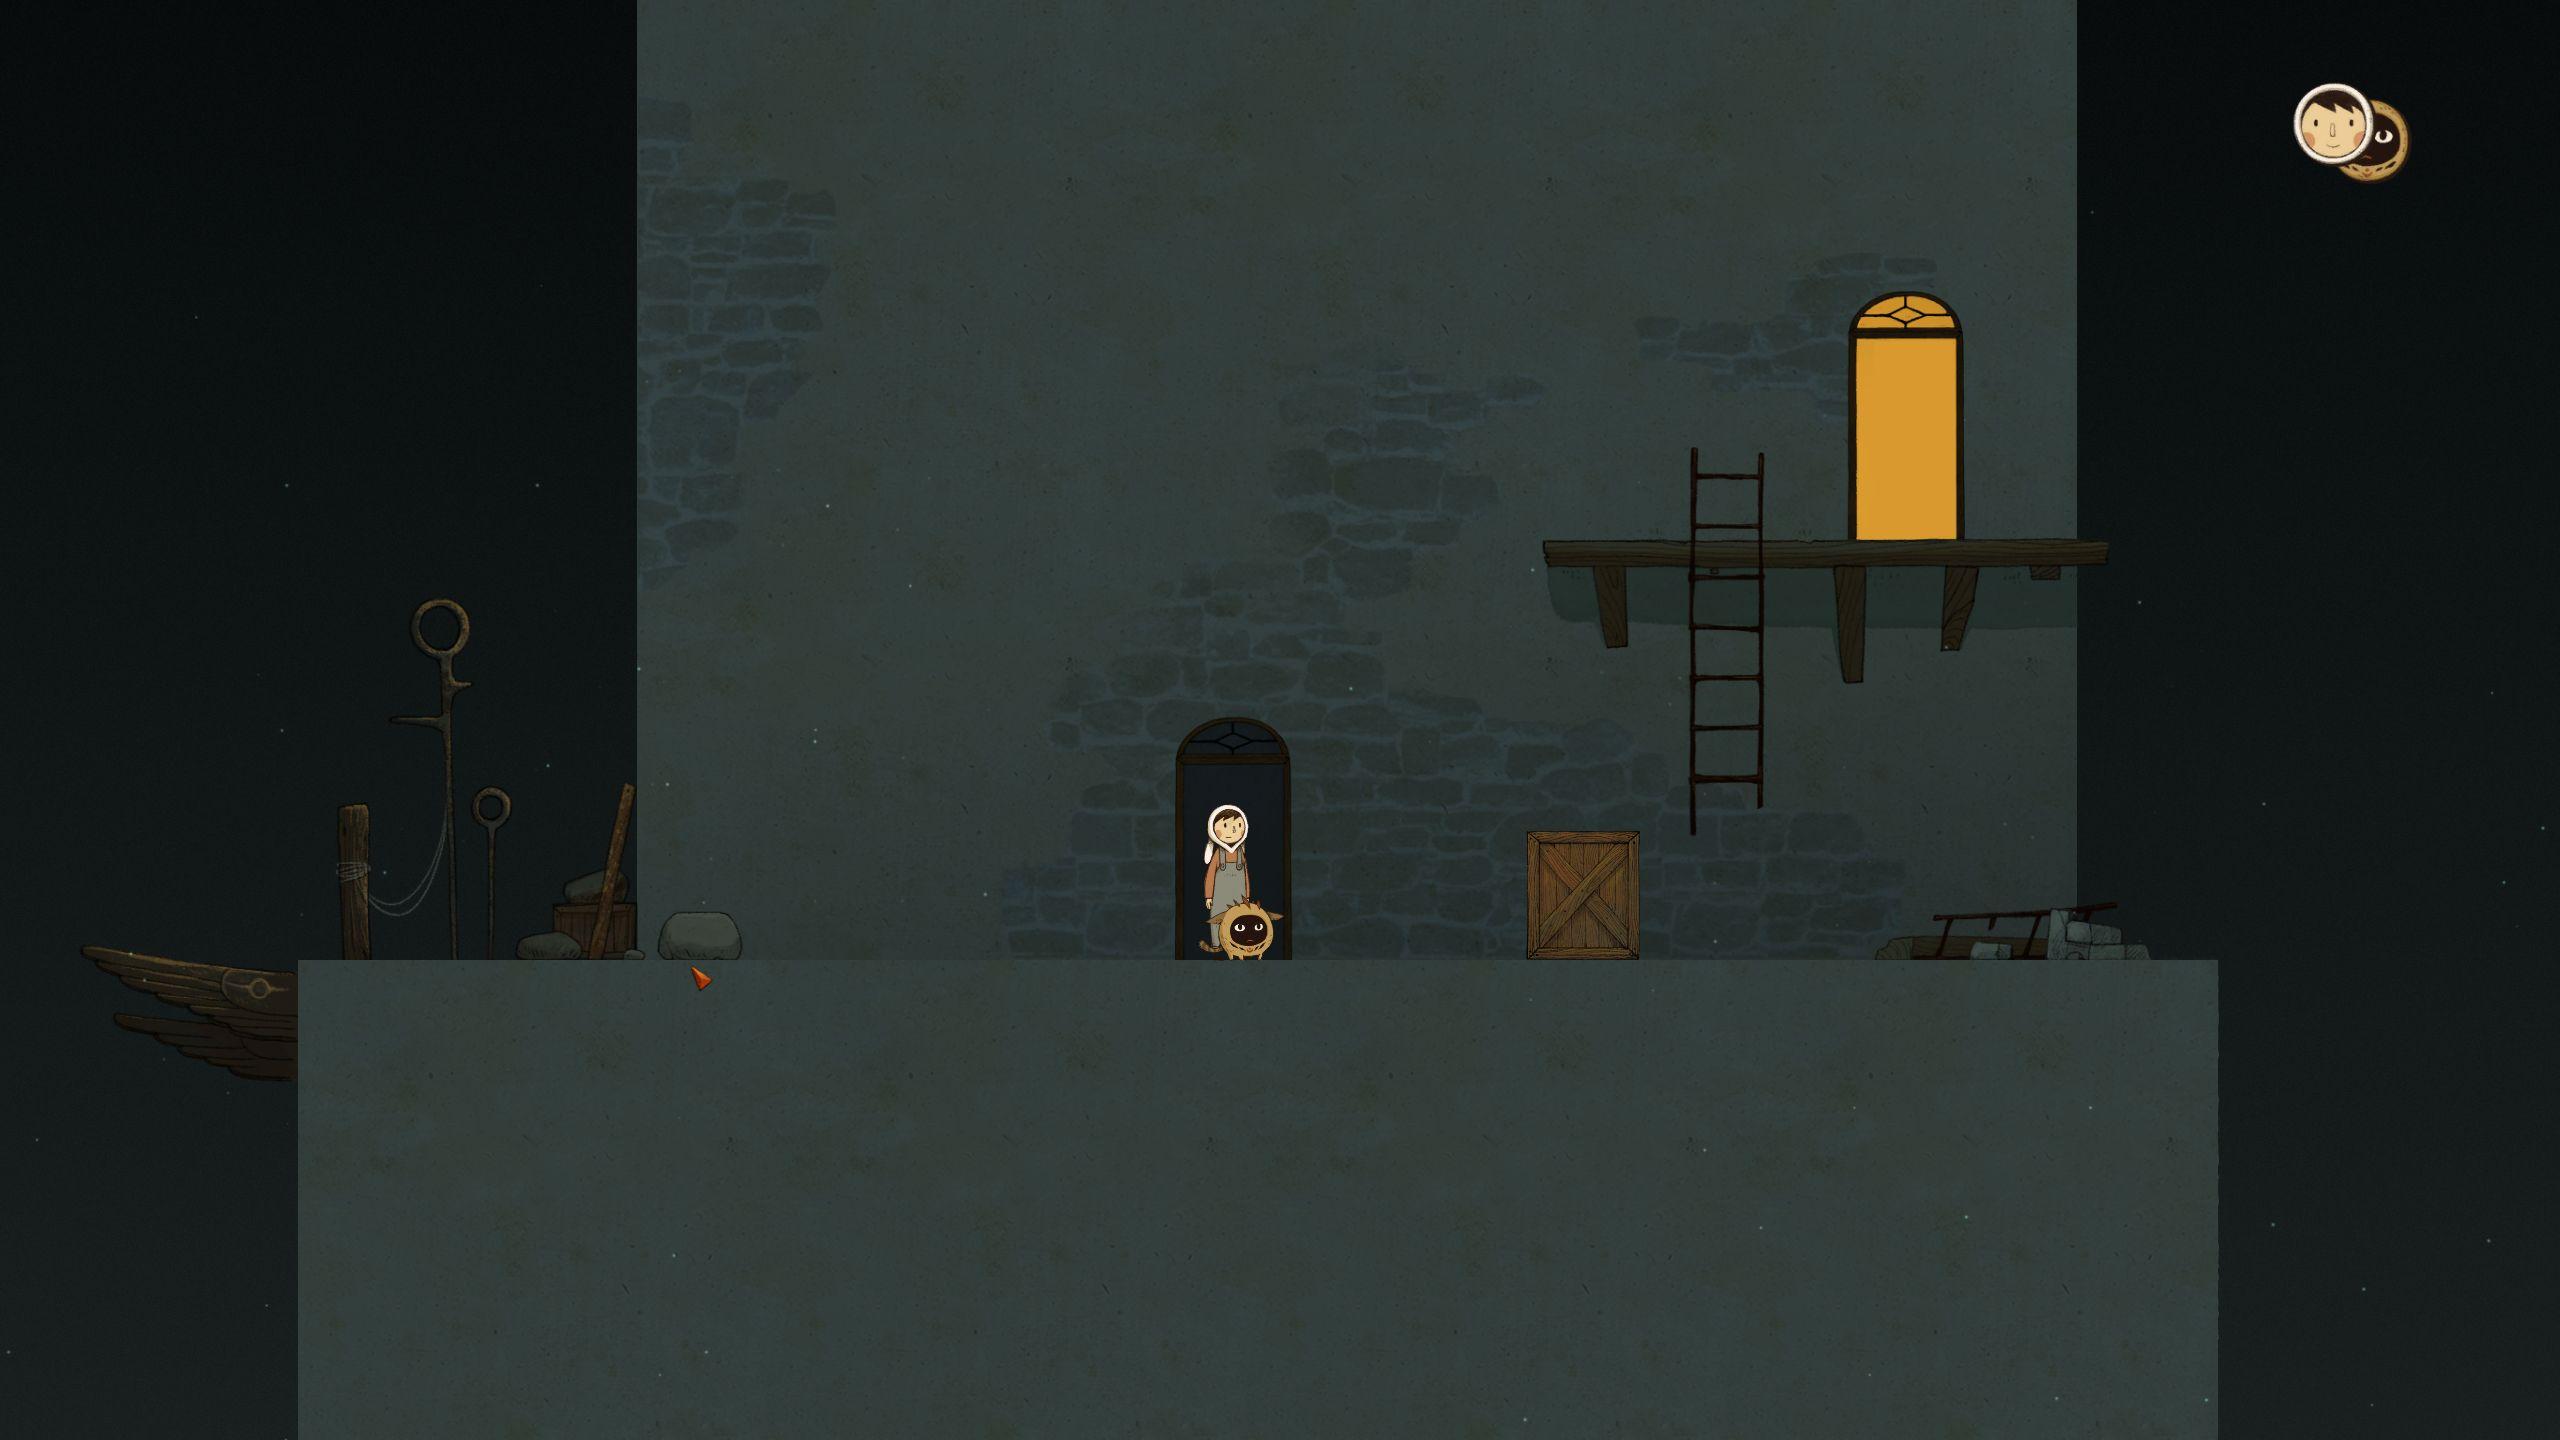 This puzzle takes place along a ledge of the tower.
To start, have Layh go to the left and sit atop the little rock. Make Üri go to the right of the crate, and then interact with the crate to have Üri start pushing it to the left. Remember that you need to position Üri in the right direction first, as he can push the crate in either direction.
Have Üri push the crate all the way to the left to where Layh is sitting. Switch to Layh and have Layh jump onto the crate.
Now move Üri to the left of the crate, and start pushing it to the right, all the way to where the ladder is. Stop the crate below the ladder, and you can have Layh climb the ladder and proceed through the doorway. Have Üri climb the crate, then the ladder, and proceed through the doorway as well.
The Juicer Room
This puzzle takes place along a ledge of the tower.
To start, have Layh go to the left and sit atop the little rock. Make Üri go to the right of the crate, and then interact with the crate to have Üri start pushing it to the left. Remember that you need to position Üri in the right direction first, as he can push the crate in either direction.
Have Üri push the crate all the way to the left to where Layh is sitting. Switch to Layh and have Layh jump onto the crate.
Now move Üri to the left of the crate, and start pushing it to the right, all the way to where the ladder is. Stop the crate below the ladder, and you can have Layh climb the ladder and proceed through the doorway. Have Üri climb the crate, then the ladder, and proceed through the doorway as well.
The Juicer Room
 This large, weird machine is probably a juicer. There’s several components here, so feel free to familiarise yourself with how this room works.
To solve, first get Layh to sit on the rock located to the right of the short ladder. Make Üri go to the left of the screen, and have him push the basket of apples to the right so that Layh can jump onto it. Next, make Layh climb the ladder to the top.
Have Üri push the basket of apples to the left again, but stop when the basket is underneath the large bell-shaped tube.
Now use the valve on the machine to cause the machine’s pipe to connect to a different pipe to the right. Use the lever located to the left of the valve, and this will fill up the machine with liquid.
Now use the valve again to reset the position of the pipe. Use the lever a second time. After the machine stops shaking, the presser on the top will screw itself downwards. At this point, you have to make Layh jump onto the handle of the presser. This may take a few shots to get it right!
This large, weird machine is probably a juicer. There’s several components here, so feel free to familiarise yourself with how this room works.
To solve, first get Layh to sit on the rock located to the right of the short ladder. Make Üri go to the left of the screen, and have him push the basket of apples to the right so that Layh can jump onto it. Next, make Layh climb the ladder to the top.
Have Üri push the basket of apples to the left again, but stop when the basket is underneath the large bell-shaped tube.
Now use the valve on the machine to cause the machine’s pipe to connect to a different pipe to the right. Use the lever located to the left of the valve, and this will fill up the machine with liquid.
Now use the valve again to reset the position of the pipe. Use the lever a second time. After the machine stops shaking, the presser on the top will screw itself downwards. At this point, you have to make Layh jump onto the handle of the presser. This may take a few shots to get it right!
 Once Layh is on the handle of the presser and it has resumed its previous position, you can proceed. Have Üri turn the valve again so that the pipe is now climbable for Layh. Jump onto the pipe as Layh, and then onto the window.
Descend (inelegantly) from the window as Layh and you can now move the wooden planks blocking the door to the room. Switch to Üri and exit the room via the door to the left.
Once both Üri and Layh are out of the room, have them both climb the long ladder and go then through the door. Of course, you’ll have to command them one at a time.
The Kitchen and Dining Room
Once Layh is on the handle of the presser and it has resumed its previous position, you can proceed. Have Üri turn the valve again so that the pipe is now climbable for Layh. Jump onto the pipe as Layh, and then onto the window.
Descend (inelegantly) from the window as Layh and you can now move the wooden planks blocking the door to the room. Switch to Üri and exit the room via the door to the left.
Once both Üri and Layh are out of the room, have them both climb the long ladder and go then through the door. Of course, you’ll have to command them one at a time.
The Kitchen and Dining Room
 In this puzzle, we’ll be taking the help of a friendly and hungry rodent. To get out of this room, you need to do something about the thorny plant that has grown and blocked the door to the left.
Begin by making Layh jump on the blower that’s located to the left of the cauldron. As Layh jumps on it, the fire beneath with the cauldron will come alive and you can start cooking for your rat patron.
First, familiarise yourself with the situation.
Toe the left of the blower is a crank that you can use to cycle between ingredients. The ingredients will appear in a basket above the cauldron. There are three ingredients, each of which is marked on a paper pinned to the fireplace. Finally, the cooking is automated and can be initiated by pressing the red button to the right of the cauldron.
The chilli pepper causes fire, the fish causes water, and the mushroom causes wind.
In this puzzle, we’ll be taking the help of a friendly and hungry rodent. To get out of this room, you need to do something about the thorny plant that has grown and blocked the door to the left.
Begin by making Layh jump on the blower that’s located to the left of the cauldron. As Layh jumps on it, the fire beneath with the cauldron will come alive and you can start cooking for your rat patron.
First, familiarise yourself with the situation.
Toe the left of the blower is a crank that you can use to cycle between ingredients. The ingredients will appear in a basket above the cauldron. There are three ingredients, each of which is marked on a paper pinned to the fireplace. Finally, the cooking is automated and can be initiated by pressing the red button to the right of the cauldron.
The chilli pepper causes fire, the fish causes water, and the mushroom causes wind.
 First, get the chilli pepper in the basket by turning the crank, and then press the button to start cooking a rather hot meal. Once it appears in the rat’s bowl, the rat will eat it and become rather bloated.
Have Üri push the bloated rat as far left as it can go. It’s important to push it left until you can’t push it anymore, as the rat has to be in that specific position.
Have Layh jump on the wooden stool to the left of the blower. With the rat in position to the extreme left of the room, have Layh jump on the rat to blow some flames onto the thorny plant.
This sets the plant on fire, but it’s still not yet gone.
Now to proceed, you will need to re-do the entire procedure above, but with a fish instead of the chilli pepper. If you do it right, the plant will be doused and darkened. If you don’t get this step right (or the previous step right), there will be no effect on the plant.
With the plant’s fire doused, re-do the procedure a third time, this time with mushrooms. The weakened plant will crumble, allowing you access to the blocked door, and getting you out of this room.
First, get the chilli pepper in the basket by turning the crank, and then press the button to start cooking a rather hot meal. Once it appears in the rat’s bowl, the rat will eat it and become rather bloated.
Have Üri push the bloated rat as far left as it can go. It’s important to push it left until you can’t push it anymore, as the rat has to be in that specific position.
Have Layh jump on the wooden stool to the left of the blower. With the rat in position to the extreme left of the room, have Layh jump on the rat to blow some flames onto the thorny plant.
This sets the plant on fire, but it’s still not yet gone.
Now to proceed, you will need to re-do the entire procedure above, but with a fish instead of the chilli pepper. If you do it right, the plant will be doused and darkened. If you don’t get this step right (or the previous step right), there will be no effect on the plant.
With the plant’s fire doused, re-do the procedure a third time, this time with mushrooms. The weakened plant will crumble, allowing you access to the blocked door, and getting you out of this room.
Thanks for reading Luna The Shadow Dust Walkthrough – Part 1. For more interesting articles from Into Indie Games, check out the links below:
INDIE DEV INTERVIEW: USTWO’S DANNY GRAY TALKS DESTA: THE MEMORIES
GENESIS NOIR WALKTHROUGH – PROLOGUE