Apr
Harold Halibut Walkthrough – Chapter 2
Welcome to the Into Indie Games walkthrough for Harold Halibut.
For more information on Harold Halibut beyond this walkthrough, be sure to check out the official website here.
Harold Halibut Walkthrough – Chapter 2 Table of contents
Chapter 2.1 – The Creature from the Sea
After the conversation with Mareaux, your first task in this chapter will be to declutter the storage room.
The storage room can be found immediately to the right of where Mareaux is standing. Enter it and pick up the nearest box.

Take the box to your room, i.e. down the stairs in the lab and put it near the bed.
Repeat this process once more, and the third time you go to get something, you’ll enter a Tetris-like section where you dump items into Harold’s room.
Just keep dropping items into Harold’s room until the section ends.

After your task is completed, go back up to the lab and talk to Mareaux for another conversation.
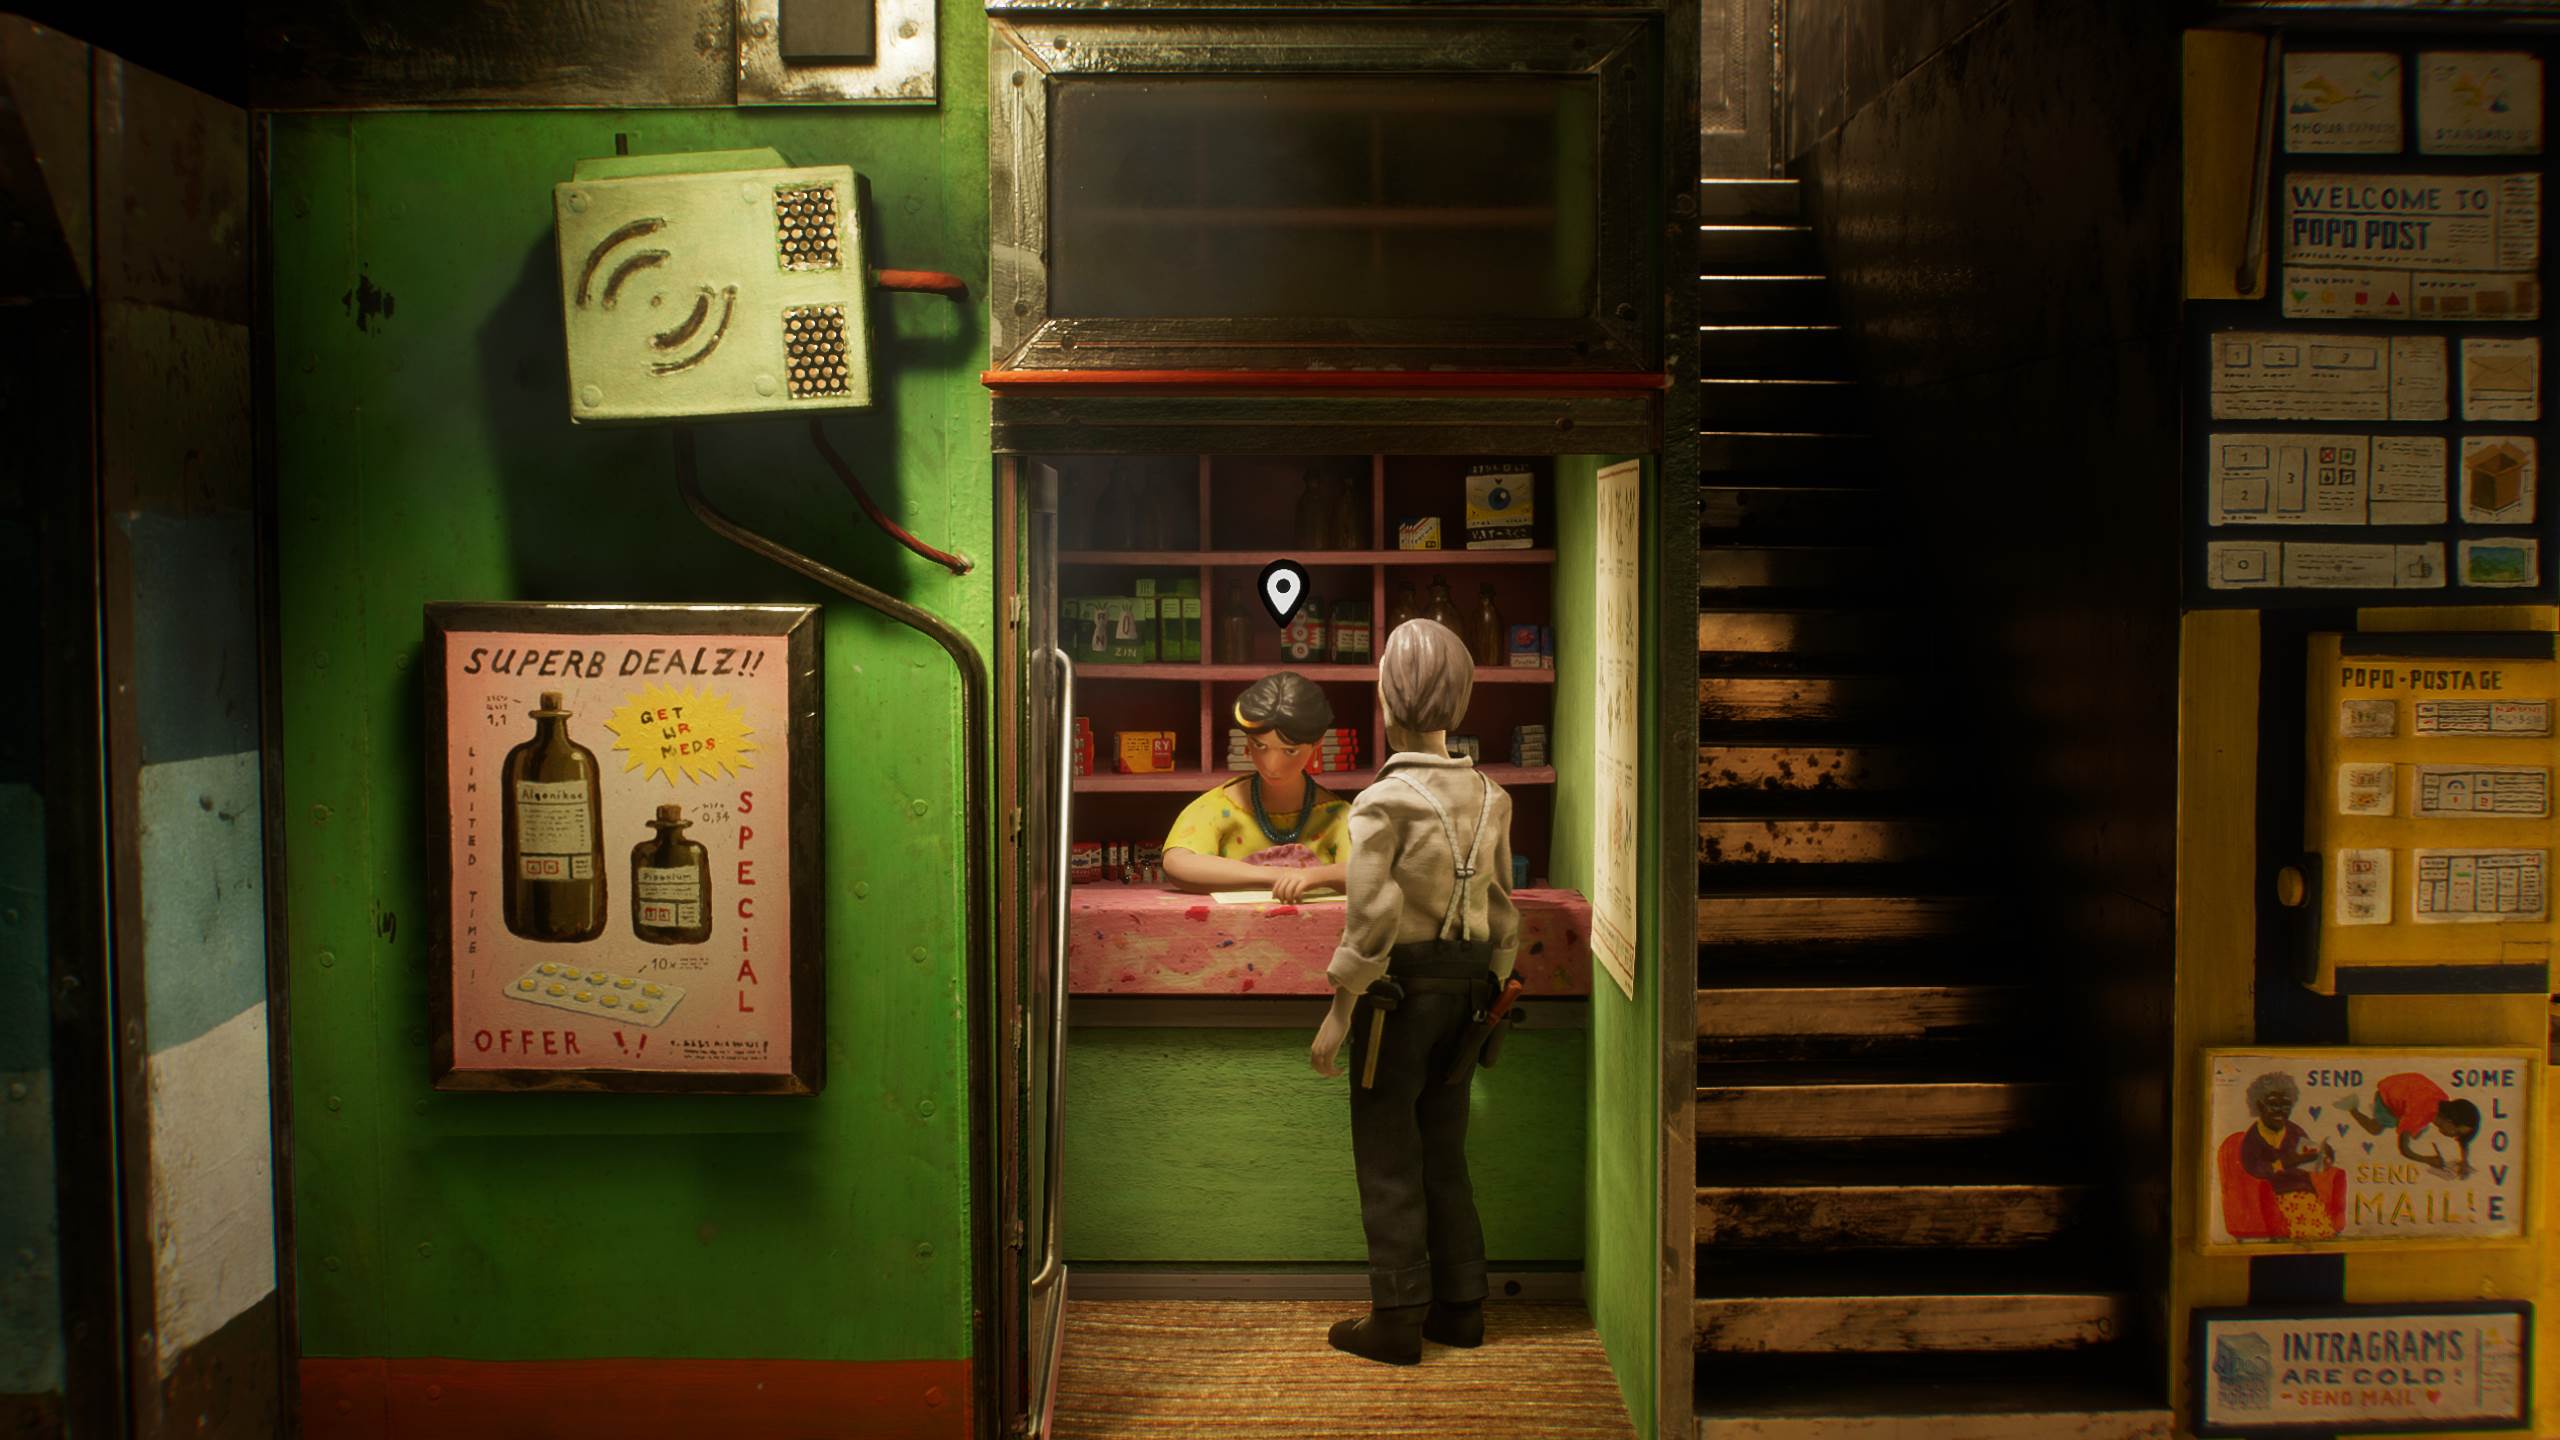
Your next task is to take the blood sample to the pharmacy for analysis. The pharmacy is in the newly opened Utility District, which can be accessed from the Central Station.
First, go back to the tube and take it to Central Station. Then, switch from Tube 2e to Tube 4a, and pick the Utility District as your destination.

Go right in the Utility District until you see the ‘Superb Dealz!!’ poster: this is the pharmacy. Enter it to talk to Sunny Soleil.
On getting the blood replacement from Sunny, hoof it back to Mareaux’s lab and enter the storage room.

Of course, you’ll have to go through the Central Station to access the Lab District.
Interact with Fishy in the storage room. After the “conversation”, head back to Harold’s room under the lab to go to sleep.

Chapter 2.2 – Taking Care
On waking up, go back to the storage room to check on Fishy’s condition.
Next up, we have to go back to Sunny to get help. As before, go to Central Station, and then the Utility District, and talk to Sunny.

After talking to Sunny, take the antibiotics you receive back to Fishy, in the storage room in Mareaux’s lab in the Lab District.
Harold will administer the antibiotics, after which you’ll receive a message from Brigitte. View the message in your PDA to learn that she needs help.
This becomes your new task, so go to the Energy District via the tube now.

Once there, enter Brigitte’s office and talk to her. As you’ll learn from the conversation with her, you’ll learn that you’ll be redoing the previous conveyor belt section, but with two new variables this time.
As before, go to the conveyor belt and wait for the red sample to enter the scanner grid.

This time, after cutting and coating the red sample, put some sugar on the sample, which is the fourth button on the console.
Next, get another red sample in the scanner and this time, use the music button after cutting and coating the sample. This is the third button on the console.

Return to Brigitte’s office now and after the conversation with her, return to Mareaux’s lab so that you can enter your room and get a good night’s sleep.
Chapter 2.3 – The Right Care
On waking up, go back to the storage room to check on Fishy.
After doing this, go all the way back to Sunny to get special medication. As usual, take the tube to Central Station and then the 4a tube to the Utility District, to reach the pharmacy.

Talk to Sunny and you’ll eventually be presented with a choice of medication. Pick whichever one you think is best, and return to Mareaux’s lab.
Go to the storage room and a sequence will play. After the sequence, you’ll receive a message from Brigitte again.

Go to the tube and take it to the Agora Arcades again. This time, go upstairs and then right to meet Brigitte just above the T+B sign.
Chapter 2.4 – All Water Conspiracy
After waking up, go upstairs to talk to Mareaux and watch a presentation from CEO Casselchop.

On gaining control of Harold again, exit the lab and go down the stairs to get to the bathroom. Once there, you’ll have another conversation.
After this conversation, return to Mareaux’s lab and then downstairs to Harold’s room.
Approach the shelf next to the door and then take it back to the bathroom. Remember to enter the shower.

After the conversation, drive the Moto-Cam in the shaft until another conversation takes place.
On regaining control of Harold, go to Mareaux’s lab. Another conversation follows, after which Harold will pick up a box.
Take the box down the stairs to Level 1 in the Lab District. Once there, go right in the direction of the Filtration Pump, but enter the small room near the stairs.

After conversing with Cyrus, head up the stairs to the tube and go to the Agora Arcades.
At the Agora Arcades, enter the rightmost establishment on the lower floor, which is labelled ‘Intercom Oasis’.

Go in and talk to the person behind the counter, Rafi. After talking to them, go back to the Lab District and down to Cyrus’ new lab.
Note that you might encounter Coco, Zoya’s bird, in the Lab District. If this happens, you must chase it into Mareaux’s lab. Harold will automatically deliver the bird to Zoya, after which you will have to make your way back to the Lab District again. Remember that you can use the button to the right to summon the elevator in Zoya’s cockpit.

On returning to Level 1 in the Lab District, talk to Cyrus in his lab and then check your PDA to find a message from Tommy.
Go to the Agora Arcades now and enter Gertrude’s Bier Zone to find Tommy. Talk to him.

Chapter 2.5 – The Creature Awakens
On waking up, go up to the lab and then the storage room to look after Fishy.
Our next goal is to get a picture book from Chris, for which we’ll have to go to the Social District.

This can be accessed from the same 2e elevator connected to the Lab District. Simply enter the tube and pick the Social District at the bottom of the menu to go.
Once in the Social District, enter the classroom to talk to Chris and his ‘bambinos’.

After you get your picture book, return to Fishy in the storage room in Mareaux’s lab. A series of segments will follow.
Chapter 2.6 – Leaving the Fedora
When you regain control of Harold, go up to the lab to meet Weeoo and Mareaux. A couple of conversations later, stand on the elevator in Mareaux’s quarters to be taken down to the lab.

Once down, go right to where Weeoo climbs into the hatch. Follow them in.
Another set of sequences later, you’ll have control of Mareaux’s rover-slash-submersible. You don’t have to navigate though, so it doesn’t really matter what you do.
This will conclude the chapter.
Head on to the next part of our walkthrough for Harold Halibut here! (Coming soon!)