Apr
Truberbrook Complete Walkthrough – Chapter 3
In this chapter of Truberbrook, we enter the mines and make a startling discovery. If you’re stuck, check out our complete walkthrough.
- Truberbrook Complete Walkthrough - Intro and Prologue
- Truberbrook Complete Walkthrough - Chapter 1
- Truberbrook Complete Walkthrough - Chapter 2
- Truberbrook Complete Walkthrough - Chapter 3
- Truberbrook Complete Walkthrough - Chapter 4 Part 1
- Truberbrook Complete Walkthrough - Chapter 4 Part 2 and Chapt
This walkthrough series of Truberbrook covers the game on a puzzle-by-puzzle basis, which involves a lot of backtracking. It also omits side-content that isn’t relevant to the story progression. At all times, it is recommended that you explore the game world yourself and only consult this walkthrough when you’re really stuck.
If you don’t own Truberbrook, check out the official website here.
You’ll find yourself in a black void again. Get used to it. As before, you can walk around if you like, but you really need to wait for the scene to end. When you wake up, you are outside the mine that was once owned by the Baron.
Getting into the mine
To get into the mine, you’re going to have to use the minecart. As it happens, the minecart is missing a fourth wheel. Pick up the cogwheel to the left of the screen, near the chain. Use the cogwheel with the minecraft to fix it.

To get into the mine, you’re going to have to use the minecart. As it happens, the minecart is missing a fourth wheel. Pick up the cogwheel to the left of the screen, near the chain. Use the cogwheel with the minecraft to fix it.
Next, you’re going to need to give it some force to get it going. ‘Use’ the chain to ‘pick it up’ and then use the chain with with the door of the toolshed (it’s the very small building on the left-hand side of the screen). Use the cable car terminal to the far left of the screen to pull off the toolshed door. Grab the propane tank inside the toolshed, and then also grab the belt which is located just below the orange tent (to the right of the minecart). Use the propane tank and belt with the minecart.
Finally, you’re going to need some head gear to protect yourself. Search the rubble located to the left of the minecart. You’ll uncover a helmet, which you should pick up. Now use the minecart to smash through the barricade and enter the mine.

Crossing the cave
Once inside, you’ll find yourself trapped in a cave. Your obvious objective is to cross the chasm and leave by the opening to the upper-right.
Use the minecart once, twice, and then a third time to kick it into the chasm. Now pick up the pickaxe to the far left of the screen. Use the pickaxe on the cogwheel to pick up the cogwheel. In the background, you’ll see a valve that could use the cogwheel, so use the cogwheel with the valve to install it there.
Now, use the pickaxe with the stalactite to the top of the screen to bring it down. Pick up the pickaxe once more when it falls on your side of the chasm. Turn the cogwheel that you’ve fixed to the pipe, and then use the pickaxe with the pipe to open up a few leaks.

The cave will be flooded and you can now hop onto the minecart that you dropped into the chasm. Use the minecart to cross over to the right side of the screen, and then use the broken rails to climb and finish the scene.
Opening the big vault door
After reuniting with Gretchen, you’ll find yourself near a massive door that won’t open. You might notice a little control panel to the lower-left of the door (in the centre of the screen), which looks like it will be used to open the door. However, you’ll need to figure out the pattern for the lights above the door first.
To solve this puzzle, you need examine the dark part of the screen to find markings to look at. These markings won’t show up by default if you use the hotspot indicator button, so you’ll have to search manually.
If you have Gretchen shine her light over the right markings, you’ll light up the lights above the door. However, you will have to shine Gretchen’s flashlight over the right markings in the right order to proceed. If you want to reset the lights (or confirm your choice), use the control panel.
This puzzle is a history-based puzzle. You will have to shine your light over the markings in the order that their creators might have left those markings.
First, shine your light on the neolithic cave paintings: these are located just to the right of the blue rope that is located in the left half of the screen.
Next, shine your light on the Egyptian hieroglyphs to the top-left of the screen, to the left of the opening that the blue rope comes down from.
Third, shine your light on the Latin inscription located to the right of the neolithic cave paintings (but to the left of the big door).
Fourth, shine your light on the Germanic runes located in the upper-centre of the screen (to the upper-left of the big door). You’ll find them above the Latin inscription.
Finally point to the graffiti to the upper-right of the screen (and to the upper-right of the door as well).

In short, the order is: Neolithic -> Egyptian -> Latin -> Germanic -> Graffiti
Once you have lit up the markings in this order and have all five lights enabled, use the control panel to open the door.
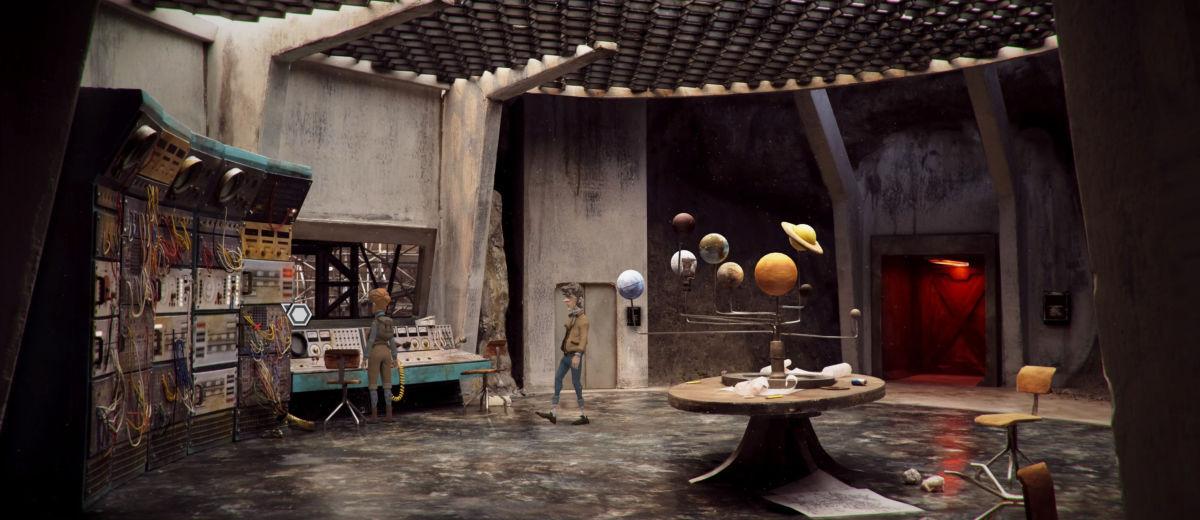
The computer room
Now you’ll find yourself in another dark room, but it won’t stay dark for long. Use the console below the window to turn on the lights.
Your objective here is to open the door bathed in red light to the right. To do so, you’ll need to first fix the memory overflow error reported by the local computer.
There’s a bottle in the shadows to the lower-left of the screen. Grab it. Use the bottle on the solar system model to fix its movement. Pick up the green memory stick lying on solar system model’s table.
Now open the only openable panel on the large computer to the left. It’s the one directly to the left of the window, second panel from the top. Insert the memory stick into the opening.
A mysterious entity will begin talking to you. Have a chat with it as you wish, but to proceed, ask who the talking entity is. You’ll meet Barbarossa 2000, the computer running this facility.
Have a chat with Barbarossa 2000 again, and follow the line of conversation in which you discuss Dr Römmler’s relationship with Barbarossa. If you choose the right options, Barbarossa 2000 will overheat and become non-functional.
Examine the panel to the left where the smoke is coming out of, and Barbarossa 2000 will become functional again. Talk to the computer and tell it that you will be his friend. This will grant you access to the locked room.
Watch the next cutscene and talk to the mystery man to the end to wrap up the chapter.
Truberbrook Complete Walkthrough – Chapter 4 Part 1
Thanks for reading Truberbrook Complete Walkthrough – Chapter 3. For more interesting articles from Into Indie Games, check out the links below:
INDIE DEV INTERVIEW: BRAMBLE: THE MOUNTAIN KING, FREDRIK, DIMFROST STUDIO
THE NORDIC FOLKLORE AND HISTORY BEHIND BRAMBLE: THE MOUNTAIN KING
BRAMBLE THE MOUNTAIN KING WALKTHROUGH – NAECKEN’S POND PART 1
PREVIEW: BRAMBLE: THE MOUNTAIN KING – HAUNTING, DARK AND BEAUTIFUL