Mar
The Last Worker Guide: Chapter 2 (Farm)
The Last Worker Guide - Table of Contents
- Chapter 3 (Rats and B-Kon)
- More parts coming soon!
This Into Indie Games guide to The Last Worker covers the first part of the second chapter of the game, covering stealthing through the farm.
Welcome to the Into Indie Games guide to The Last Worker! This guide is focused on completing the game story and its various endings, and it does not focus on getting achievements.
For more information on The Last Worker, check out the official website here!
Chapter 2 (Farm)
Chapter 2 opens with another shift. Follow our guide for how to do your shift well in The Last Worker, and pay special attention to the ‘expired’ packages this time. As it’s Easter and not Christmas, all Christmas-themed packages must go to recycling. As usual, your goal is to not get F-rank though, so don’t worry too much about pleasing the boss.

During the shift, you will find one package that’s smoking. Don’t worry too much about it, just reel it in and mark it damaged, then send it to recycling.
After the shift is done, you’ll enter a new sequence with Hoverbird. When the B-Kon arrives, grab it with your Jüngle gun and then shoot it off in the opposite direction it came from. You can do the shooting just like you do with any package you send to dispatch or recycling.

Follow Hoverbird into the facility, and when she asks you to hide, go right into the little hole in the wall that’s marked with the blue-and-orange sign. Here, wait for the worker bots to pass and for Hoverbird to tell you that the coast is clear. Then, take a right towards the blue lasers and pass through them.
At the end of this path, take a left through the door that opens vertically. Proceed through the path and then go down the hatch. In the room with all the caged chickens, follow Hoverbird through the vent marked with the blue-and-orange sign.

Here, we enter our first proper stealth room. Begin by going to the hole marked with several blue-and-orange signs, near where you end up at the beginning. Looking out from the hole, notice the bot on the right side – you want to get past the bot when it’s not looking at you.
Make a beeline straight for the hole with the signs that’s directly in front of you, taking care to time it so that the bot on the other end isn’t looking at you. For what it’s worth, proximity is not a problem – you can be right next to the bot and it won’t notice you if you’re not facing it.

Next, wait for the bot near your hole to collect a package from the hole, and get ready to move. Follow the bot when it moves, and then slip past its right when it is depositing its package. You should directly enter a vent marked by the blue-and-orange sign. Have a peek out of the non-grated opening.
Wait for the bot in front of you to collect a package and leave, then take a left from the opening and head straight through to exit the room. Proceed on to another vertically opening door and then to the next corridor.

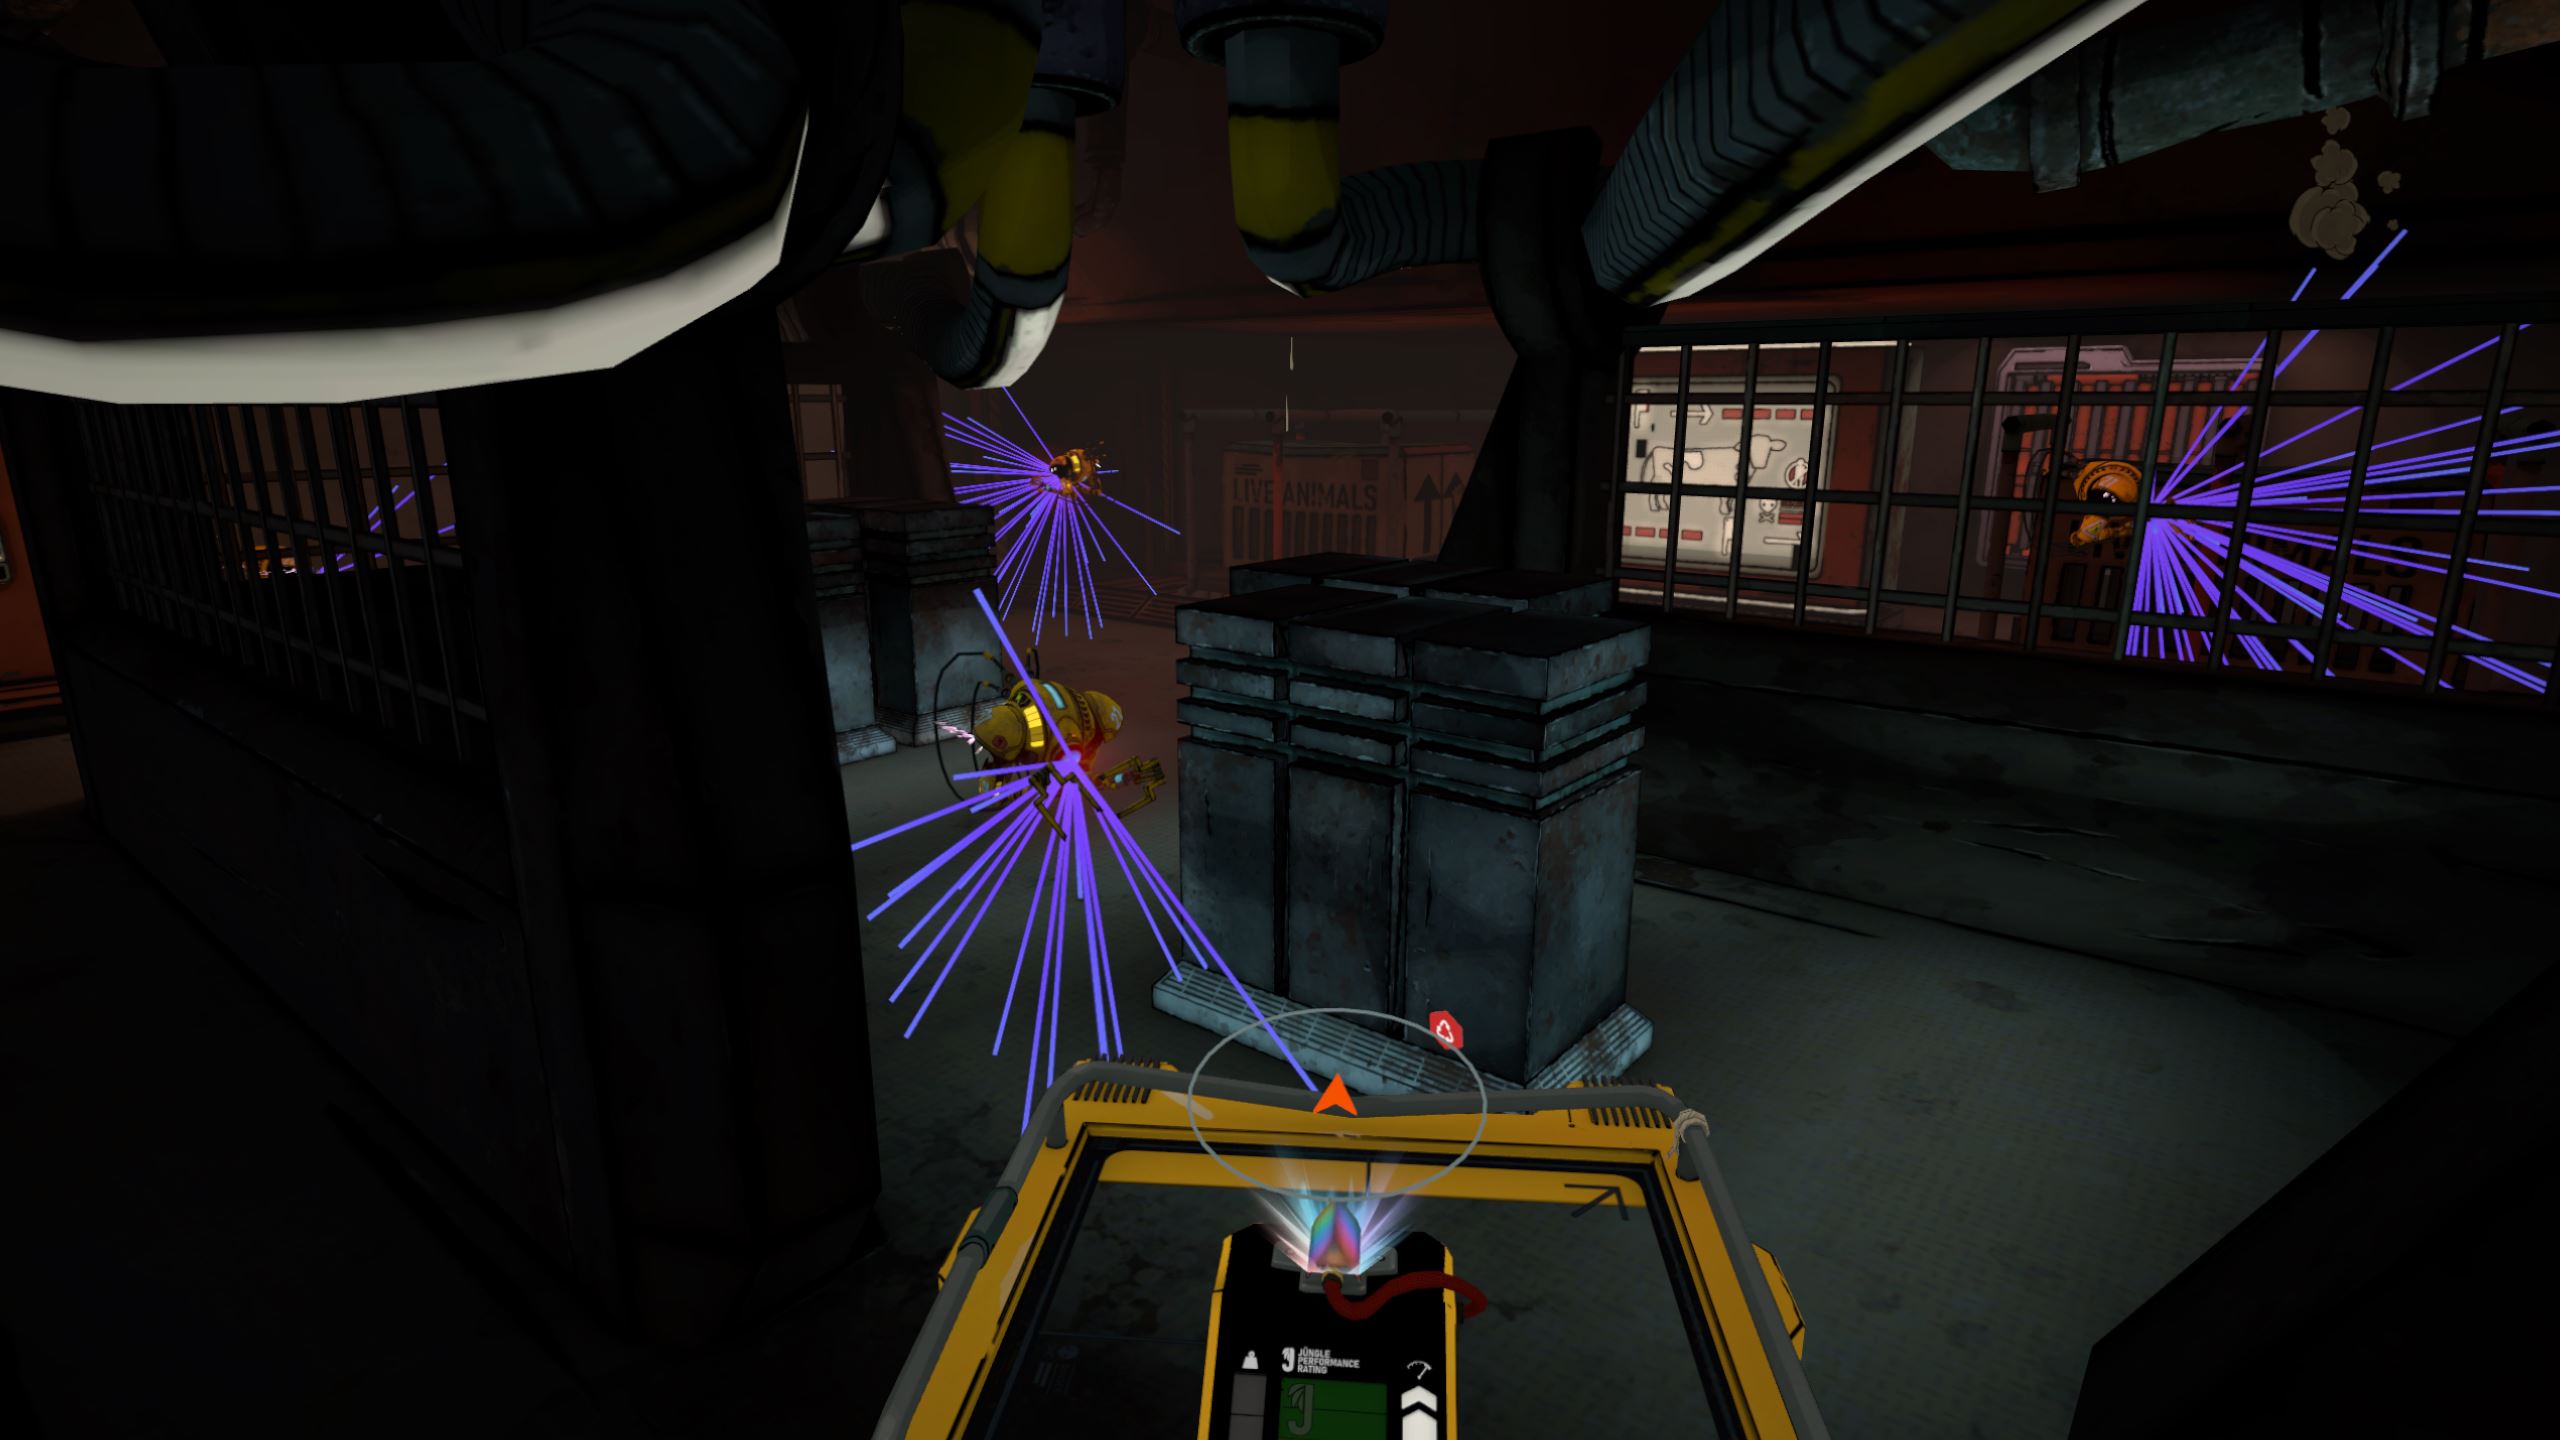
In this corridor, you want to pass by the worker bot scanning the cows. However, you’ll get spotted if you go straight ahead, so you need to hide behind the boxes marked ‘Live Animals’. These stop regularly, so take cover next to one and move forwards with it. Remember to stop when it stops! You don’t want to slip ahead and be noticed by the bot.
Once you’re clear of the worker bot, take a right into the marked vent.

Up ahead is another corridor. Follow the worker bot here just after he turns away from you, and then slip into the marked hole on the left side of the corridor. After the worker bot pass you, take a left from the hole opening and go to the very end of the corridor to pass through the vertically-opening door. Proceed through the path.
Here we find a more complex stealth room. Stand by the right-hand-side opening and watch the bot making rounds around the metal object jutting from the ground. Follow this bot closely and then take a right towards the two bots scanning the boxes. If you time it right, the bots will separate in opposite directions, and you can pass through where they were scanning, between the passing boxes, through the vertically-opening door.

In the next room, position your self where Hoverbird is, just below where the cows are before they get slaughtered. Use your Jüngle gun to grab the crank and then press the interact button exactly when the crank is in the white zone, i.e. when the white zone turns green.

Next, look straight up from the crank for a surprise.