Nov
The Last Faith Walkthrough – Part 11
The Last Faith Walkthrough - Table of Contents
- Part 1 (How to beat the Giant Patron and how to get to the City of Mythringal)
- Part 2 (How to beat the Cold One Shielder, find Nighttide's Rout and explore the City of Mythringal)
- Part 3 (Explore the City of Mythringal.)
- Part 4 (Explore the Federal Inquistion area and how to fight the Winged Pale Lament)
- Part 5 (How to fight Dr. Ridley Hermann, explore a bit of the Osseus Fortress and where to find the Moonshade Charm)
- Part 6 (How to fight Edwynn, the Shadowscrouge Horror and explore the Drowned Crypt.)
- Part 7 (How to fight Starborn Nighthunter and explore the City of Erlim)
- Part 8 (How to fight Leena and Yegor, Find the Propulsion boots and explore the Esk Mansion)
- Part 9 (How to fight the Burnt Apostle and explore the Liturgical Pass)
- Part 10 (How to fight the Voracious Terror and explore the Osseus Fortress and the beginning of Tynewill Village)
- Part 11 (How to fight the second Starborn Nighthunter and explore more of Tynewill Village)
- Part 12 (How to fight Manfredd the Accused and explore Ordens Palace)
- Part 13 (How to unlock the Graveyard and how to fight the Cold One Beast)
- Part 14 (How to fight Leena for the second time and location of all twenty Unborn of the Midnight Aristocracy)
- Part 15 (How to fight Lord Patryk Laddak and Annabella & Caterina)
Demo Coverage -
Check out our walkthrough for The Last Faith on how to fight the Starborn Nighthunter and explore Tynewill Village.
Welcome to the Into Indie Games walkthrough for The Last Faith!
For more information on The Last Faith beyond this walkthrough, check out the official website here. You can also check our coverage of the extended demo here.
After getting the key, check to make sure the door on the right is actually closed. Then move to the left. At the stairs turn and go up, then head right. Take the enemies out. Keep going till you reach the door in the picture. Use the key to enter the door here.

There is a locked gate to your left, so go up and kill the enemies. A Strange Presence will ambush you. Keep going up and exit through the balcony door. Kill the enemy and use the chain on the left to get to the next lock door as shown in the picture below.

Collect the hungry essence on top here and then the healing injections on the right. Drop down and kill the wraith and head further down. At the very bottom there are two doors, left and right. Head through the right one and take out the enemies that spawn. Once the door opens head through, take out the ice spikes and climb up. At the very top use the level to unlock the gate back to the main part of the house we were in first. Retrace your step back and this time take the left door. Inside there is a lock to open the big locked gate earlier.

Destroy it to open a lock. Head up and out. From the balcony, take the chain on your left and head leftwards till you reach a long ladder. Go through and drop down for another lock. Kill all the enemies and break the lock. Use the lever to drop the ladder down.

Ignore the ladder heading down and go up the long ladder up top. Move to the left, killing all enemies on your way to the next lock.

Drop down and use the lever to extend the ladder. Go down the ladder. Kill the Wraith and the other enemy and unlock this door.

In this room drop down to find the fourth lock, destroy it.

Go back up and exit through the door you came in, your location on the map should be here.

Get up on the ladder to the right and then run through the doorway on the left. Once on the outside drop down and push the gravity stone block to the left, get up on top and jump on the balcony to reach the door in the picture below.

Once inside drop down to find the final lock, destroy it to unlock the door.

Head back up and mostly run through back to the now unlocked door. Save and head through the door. Prepare for a boss fight.
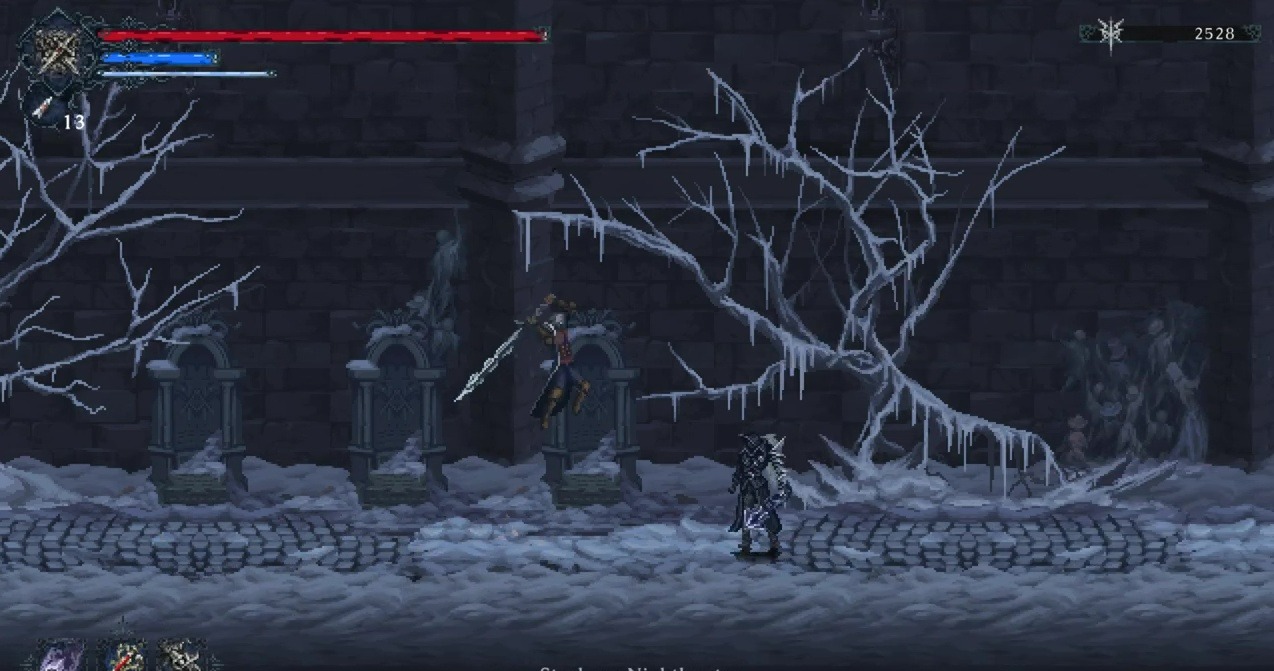
Boss : Starborn Nighthunter

He uses a electrified mace for two slow and three quick slashes and then follows it up with a shotgun blast. He will parry your attacks and do air attacks – two quicks slashes followed by a shotgun blast. He does an AOE electrified attack that does a ton of damage. He can and will heal and shoots two fireballs in both directions that can be jumped over. At 50% HP, he starts using a long four hit combo with his mace. He is almost identical to the one in Erlim. You will receive the Stigma of Protection as a reward for killing him. Run to the right now, keep running till you reach this statue and interact with it. It will open a way to go down below.

Head down now at the unlocked platform. At the bottom dodge roll your way through the ice blast vents. In the next room take out the enemies and head up and right. Go through the door on the right. In the next room drop the gravity stone block off the ledges and push it through to location in the picture below.

Use it to jump to the platform above. Get up and go on through to the next room. In this room there are giant red pustules all over the floor and ceiling, destroy them as to not get afflicted with bleeding. Kill everything here and move on to the next room. Kill everything here as well and move up with vines. Work your way around till you reach this location on the map.

Now go up the ladder. Kill the Grotesque Courtier outside, he looks like a boss but isn’t. Then go to the left and pick up the Nycrux bomb and run to the right to blow up the blockage. Head up the ladder and push down the gravity block down. Drop down and head through the door on the right. Go through the elevator into the room on the right. Save at the checkpoint. This is how far we can currently explore Tynewill Village.
This concludes Part 11 of our walkthrough for The Last Faith. You can find Part 12 here. (Coming soon!)