Dec
Tin Hearts Walkthrough – Act 2 (Levels 19 & 20)
Tin Hearts Walkthrough - Table of Contents
- Levels 30 & 31
- Level 32
- Level 33
- Levels 34 & 35
- Level 36
- Levels 37, 38 & 39
- Level 40
- Level 41
- (More parts coming soon!)
- (Coming soon!)
Check out our walkthrough of Tin Hearts to find out how to solve levels 19 and 20, which are in the second act of the game.
Welcome to the Into Indie Games walkthrough for Tin Hearts!
For more information on Tin Hearts beyond this walkthrough, check out the official website here.
Act 2
To start this act, first go straight and take a right at the open door. Watch the sequence that follows to start Act II.
Level 19
Here, the toy soldier box is on a high shelf near some paintings to the right of where you enter.

You’ll find that the default path for the soldiers actually takes them very close to the exit door – but there’s a catch. The stool the soldiers land on is too low, and to raise it, you’ll need to get the musical soldier moving.
To do this, you must activate three musical instruments that Helen use to play: the xylophone, the harp, and the accordion. This also means we’re going to take a circuitous route around the room.
Pick up one of the red prism blocks from the round table and place it on the shelf with the balloon machine, so that the soldiers make an about turn at the prism block.

Move the drum ahead so that the soldiers will walk on the xylophone. Do not adjust the drum after that – the soldiers will bounce off of this drum and land on top of the piano.

Adjust the drum after the piano so that it sends the soldiers to the drum on the left of the grandfather clock.
Adjust the drum next to the grandfather clock so that the soldiers walk on top of the grandfather clock, then drop onto the shelf with the balloon machine, and get sent to the harp.

While the soldiers make their way to the harp, and from the harp to the round table, go to the round table and adjust the drum next to it so that it sends the soldiers to hit the cannon.

Adjust the cannon so that it hits the ladder, which is where the soldiers will go after hitting the cannon.

Now take the same prism block that you used at the beginning of this level and place it vertically, so that the soldiers will use it as a ramp to walk onto the green book.

Finally, place the second prism block, which is already on the round table, so that it redirects the soldiers onto the drum next to the round table.

Provided you’ve set up the path as given here, the soldiers will find their way to the exit door automatically.
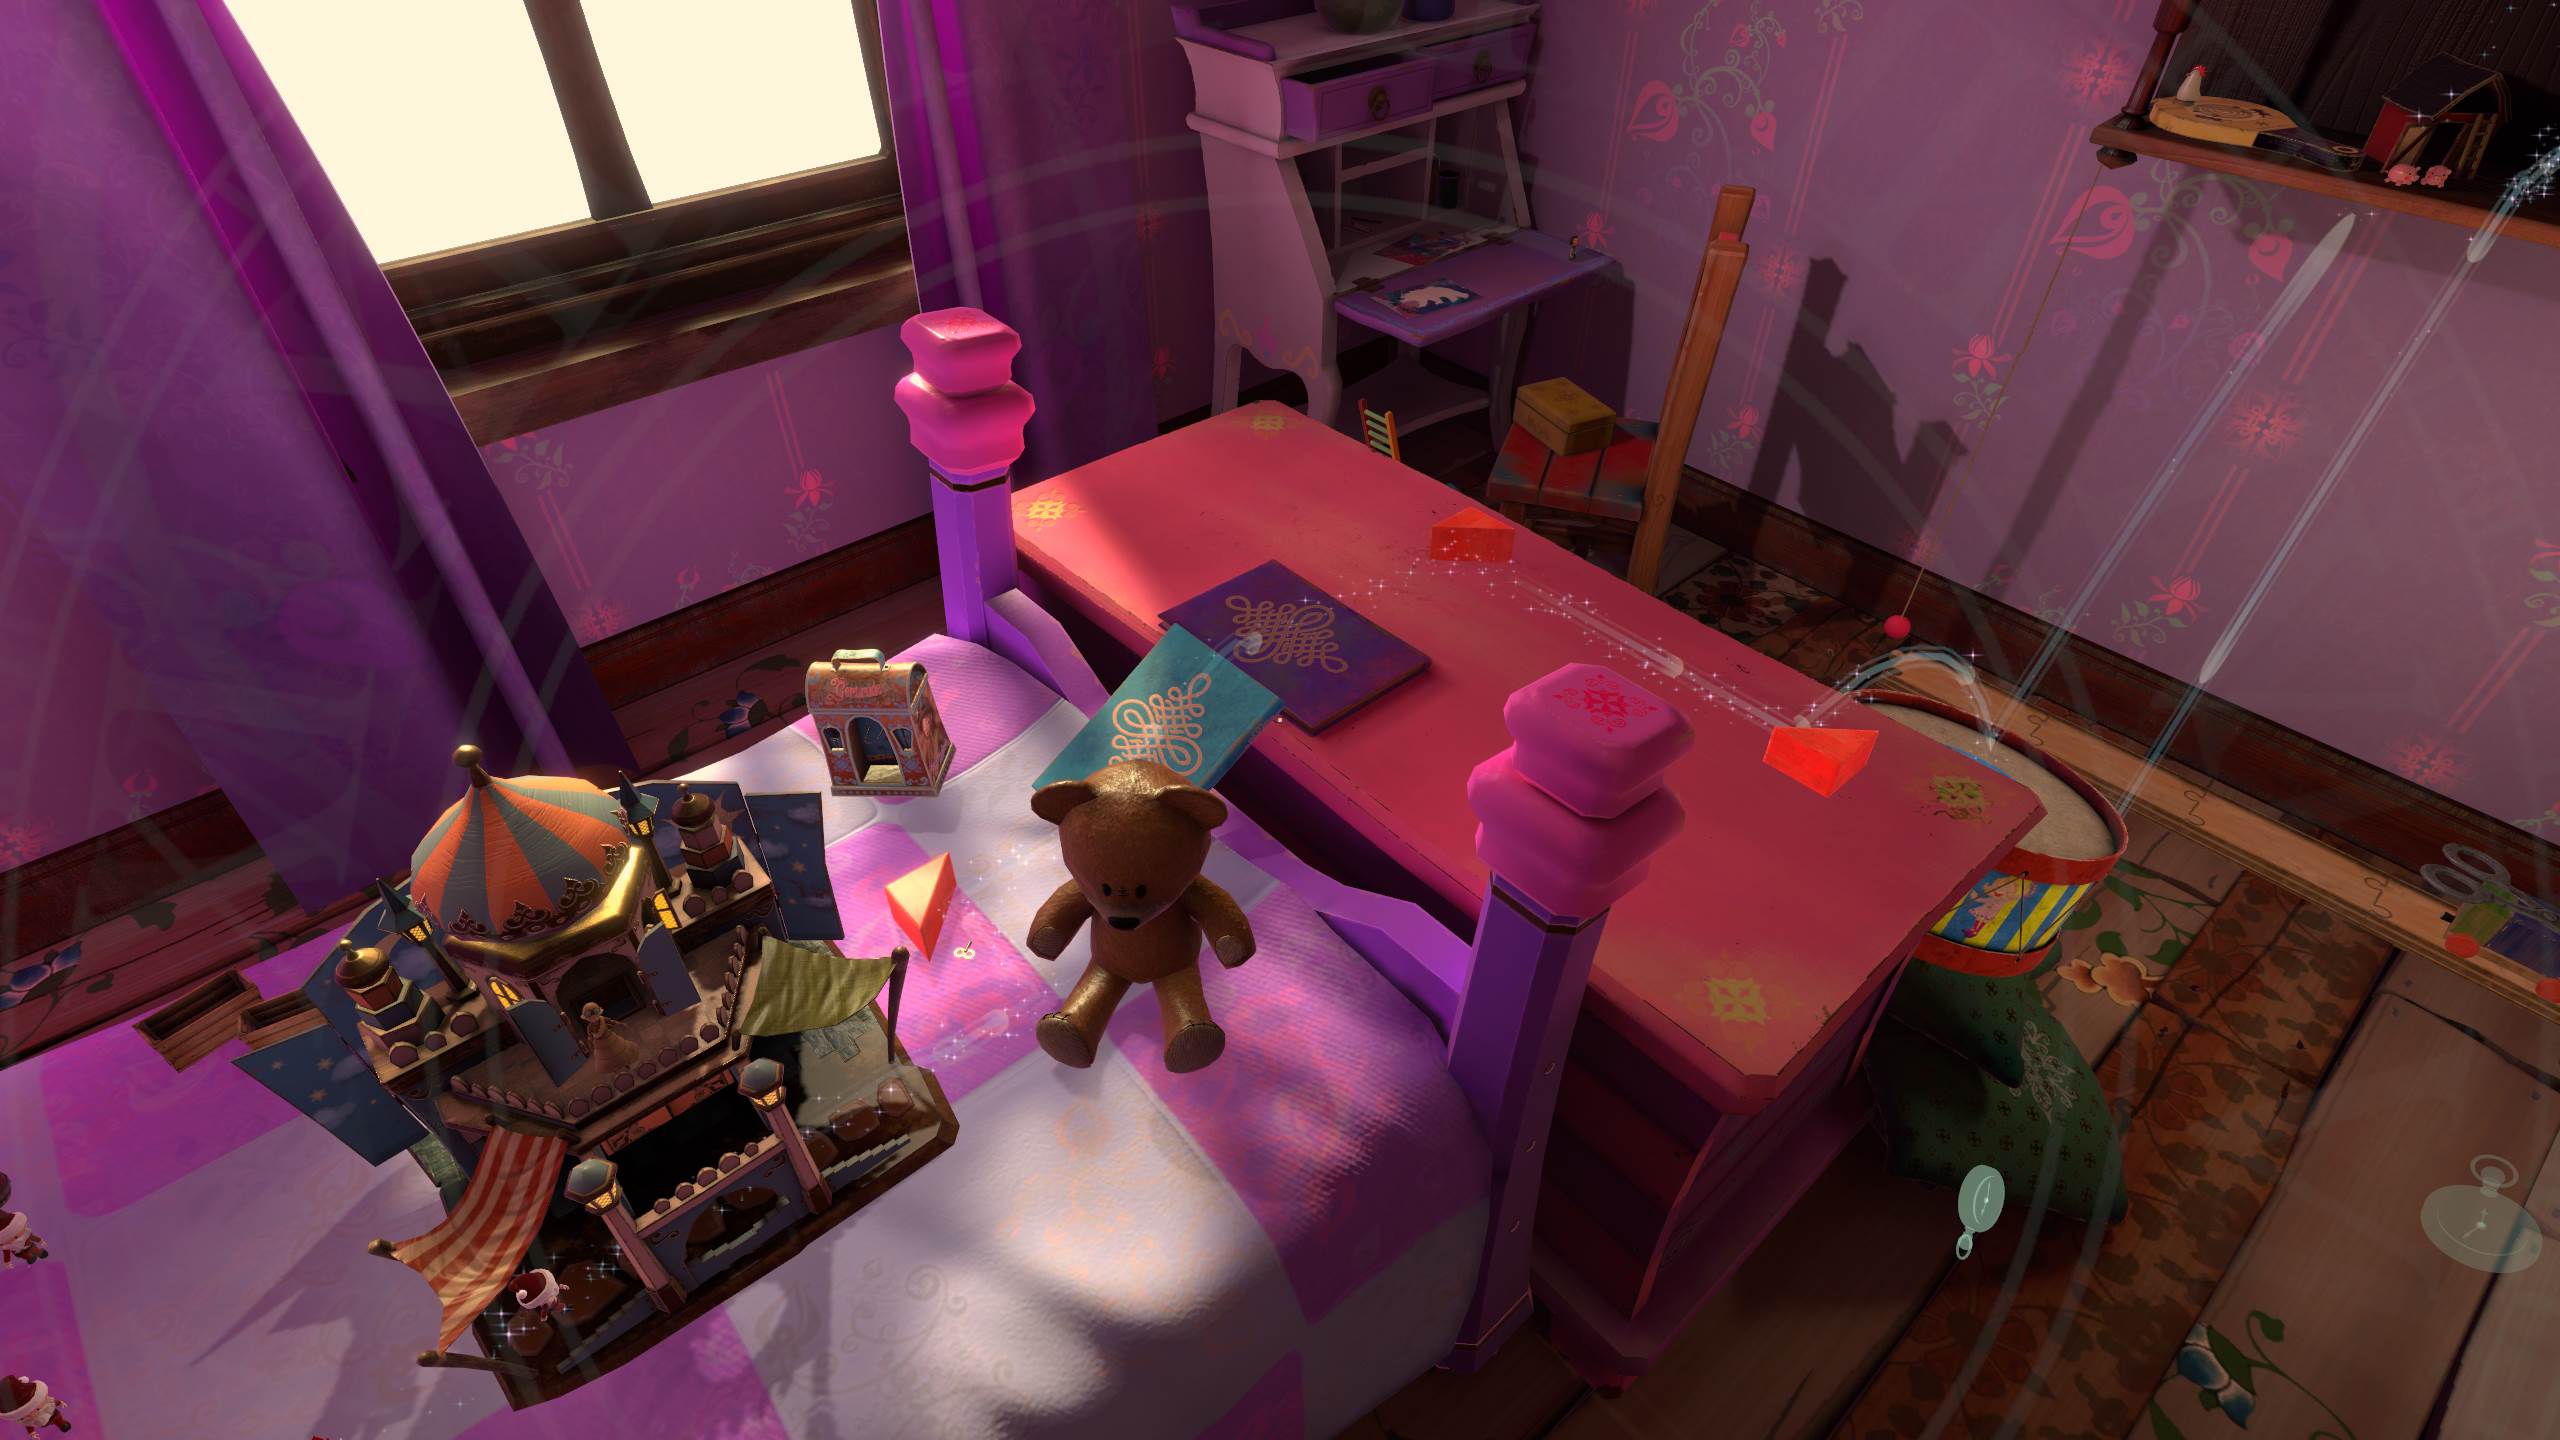
Level 20
In this level, begin by orienting the cannon along the left side of the wall so that it targets the airship up ahead.

Place one of the prism blocks so that the soldiers are redirected to the cannon.

After this, just watch the soldiers march on. As they do, you will eventually see an animated sequence involving Rose.
After this sequence, you will see another sequence when a soldier enters the toy castle. When this happens, you will receive an independent soldier, whom you can control directly. (Note that your soldier may appear different).

Possess the independent soldier and make your way to the table at the foot of the bed. (Note that you can rewind time even while possessing the independent soldier).
Jump on the teal book to have it slide down onto the bed.

Next, climb down the ladder on the other side of the table. Jump onto the metal box on the red chair and jump up to the purple desk ahead.
Here, interact with the red ball tied to a rope.

Now stop possessing the independent soldier and let’s bring our regular marching soldiers to the exit door.
Place three prism blocks so that the soldiers are routed up the teal book and to the drum next to the table.

Once the soldiers are clear of the first prism block, move that prism block up onto the shelf where the soldiers will land. Rotate it so that it directs soldiers onto the ruler that’s on the airship.

Once the soldiers are clear of the second prism block, move that prism block near the exit door, so that the soldiers are redirected to the exit.

While your marching soldiers make their way to the exit, let’s get the independent soldier to the exit as well. Possess the independent soldier once more (we last left him on the purple desk).

Follow the same route as the marching soldiers: so return to the ladder by jumping from the chair, and climb up the ladder. Jump onto the drum, and then make your way to the exit door by crossing the ruler on the airship.
Check out the next part of our walkthrough for Tin Hearts here!