Oct
Cocoon Walkthrough – Part 11 (Up to 73%, Boss 4)
Cocoon Walkthrough - Table of Contents
Stuck in Cocoon? Check out our walkthrough of Cocoon to find out how to bring a drone into the white sphere and then fight the fourth boss.
Welcome to the Into Indie Games walkthrough for Cocoon!
For more information on Cocoon beyond this walkthrough, check out the official website!
Part 11
Go east to the jump pad and use it to get to the next area. Then use the jump pad further north to get to an area to the east.

Here, ignore the sphere activator that’s up the stairs. Instead, go southeast in this area past the lowered fence (which will raise the fence as you pass through).

There’s a drone dispenser in this area, for which we need a code as usual. To find the code, simply move your white sphere near the giant spheres.
The white sphere will illuminate the giant black spheres, showing you the symbol within them. Simply connect the symbols in a series from left to right and you have the code.

The code you need to access the drone is: Butterfly, Triangle, Pentagon, Diamond, Hexagon.
To break the drone free, first put your sphere in the dock near the drone, and then go to where the drone is.

Once you’ve broken the drone free, grab your white sphere again and proceed north to the fence. With the fence disabled, go up the stairs to the sphere activator, and enable it by putting your white sphere in the dock.

Next, put the white sphere in the sphere activator and hop into the white sphere.
Go north from the hopper to find a contraption that will consume your drone and open up the giant door ahead. Once the door is open, go through it, i.e. to the north.

Continue north and press the button on the moving platform to be taken to the next area. Then go north to the hopper, and past it to find the boss bridge.
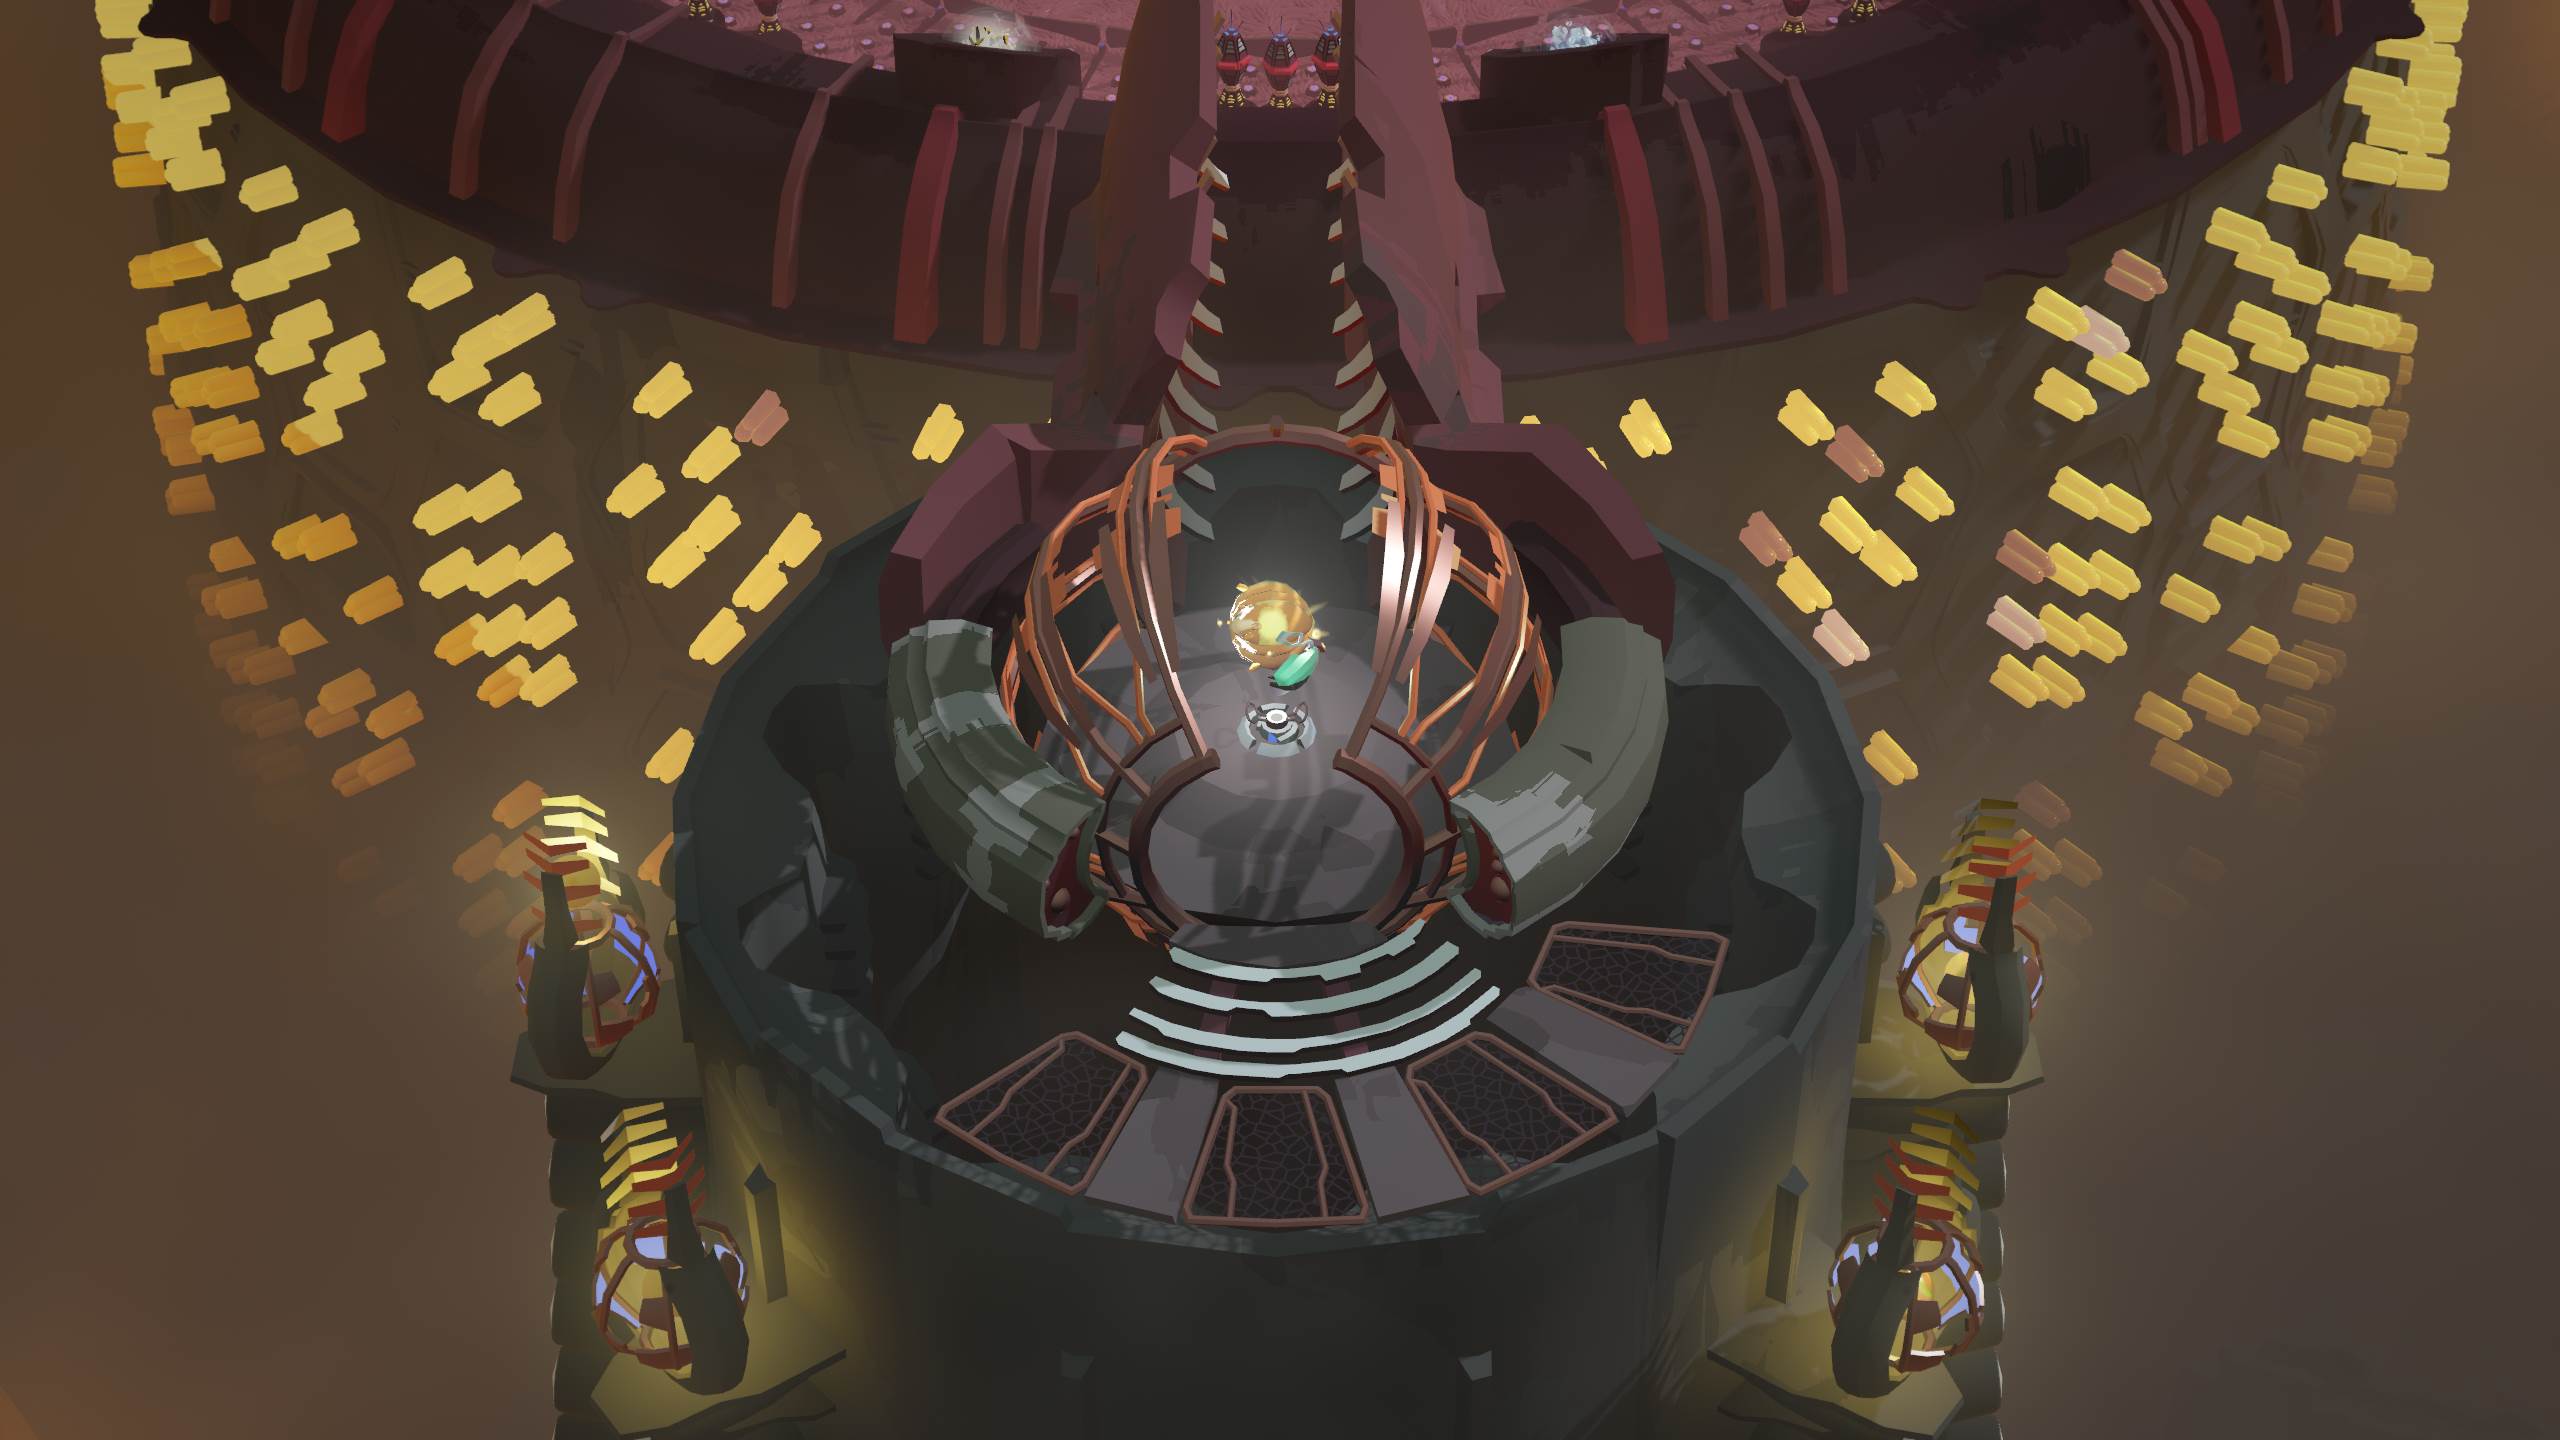
Going north past the boss bridge, you’ll unlock a gigantic cannon. Step into its spherical control center and pick up the ball inside to be launched into the boss arena.

In this boss arena, you will generally move slowly except for the circular spots marked by white symbols. Here, you can hold down action to ‘fly’ for a distance, ideally to another spot with white symbols.
Your goal for now is to fly into one of the golden diamond shells (similar to the ones that hold your regular drones). Blast all four drone shells to unlock the boss’s shell. Then, fly into the boss’ shell to crack it open.

In this boss fight, you want to keep flying to avoid the boss, and move to the white symbol spots as soon as you can. Eventually, one of the spots will glow gold. Step onto this spot and wait until you attract the boss’ attention.

Just as the boss approaches that golden spot, fly away to another white spot. At this point, the boss should attack the golden spot and get temporarily trapped in a golden crystal.
When this happens, fly into the golden crystal to take out one of the boss’ legs. Do this for each of the boss’ legs to destroy the boss.

Apart from striking you with his leg, the boss can also perform ‘earthquake’ attacks. In this, it will strike the ground causing shockwaves to spread from the epicenter of the quake. If you are caught in this shockwave, you will be temporarily stuck.
To avoid the earthquake attack, simply fly over it or away from it.

Once the boss is out of legs, you will have defeated it. Use the hopper in the center of the boss arena to be taken out, and have the white sphere powered up and ready for use.
Head on to the next part of our Cocoon walkthrough here!