Oct
Cocoon Walkthrough – Part 13 (Up to 84%)
Cocoon Walkthrough - Table of Contents
Stuck in Cocoon? Check out our walkthrough of Cocoon to find out how to shoot into spheres and phase shift within the green sphere.
Welcome to the Into Indie Games walkthrough for Cocoon!
For more information on Cocoon beyond this walkthrough, check out the official website!
Part 13
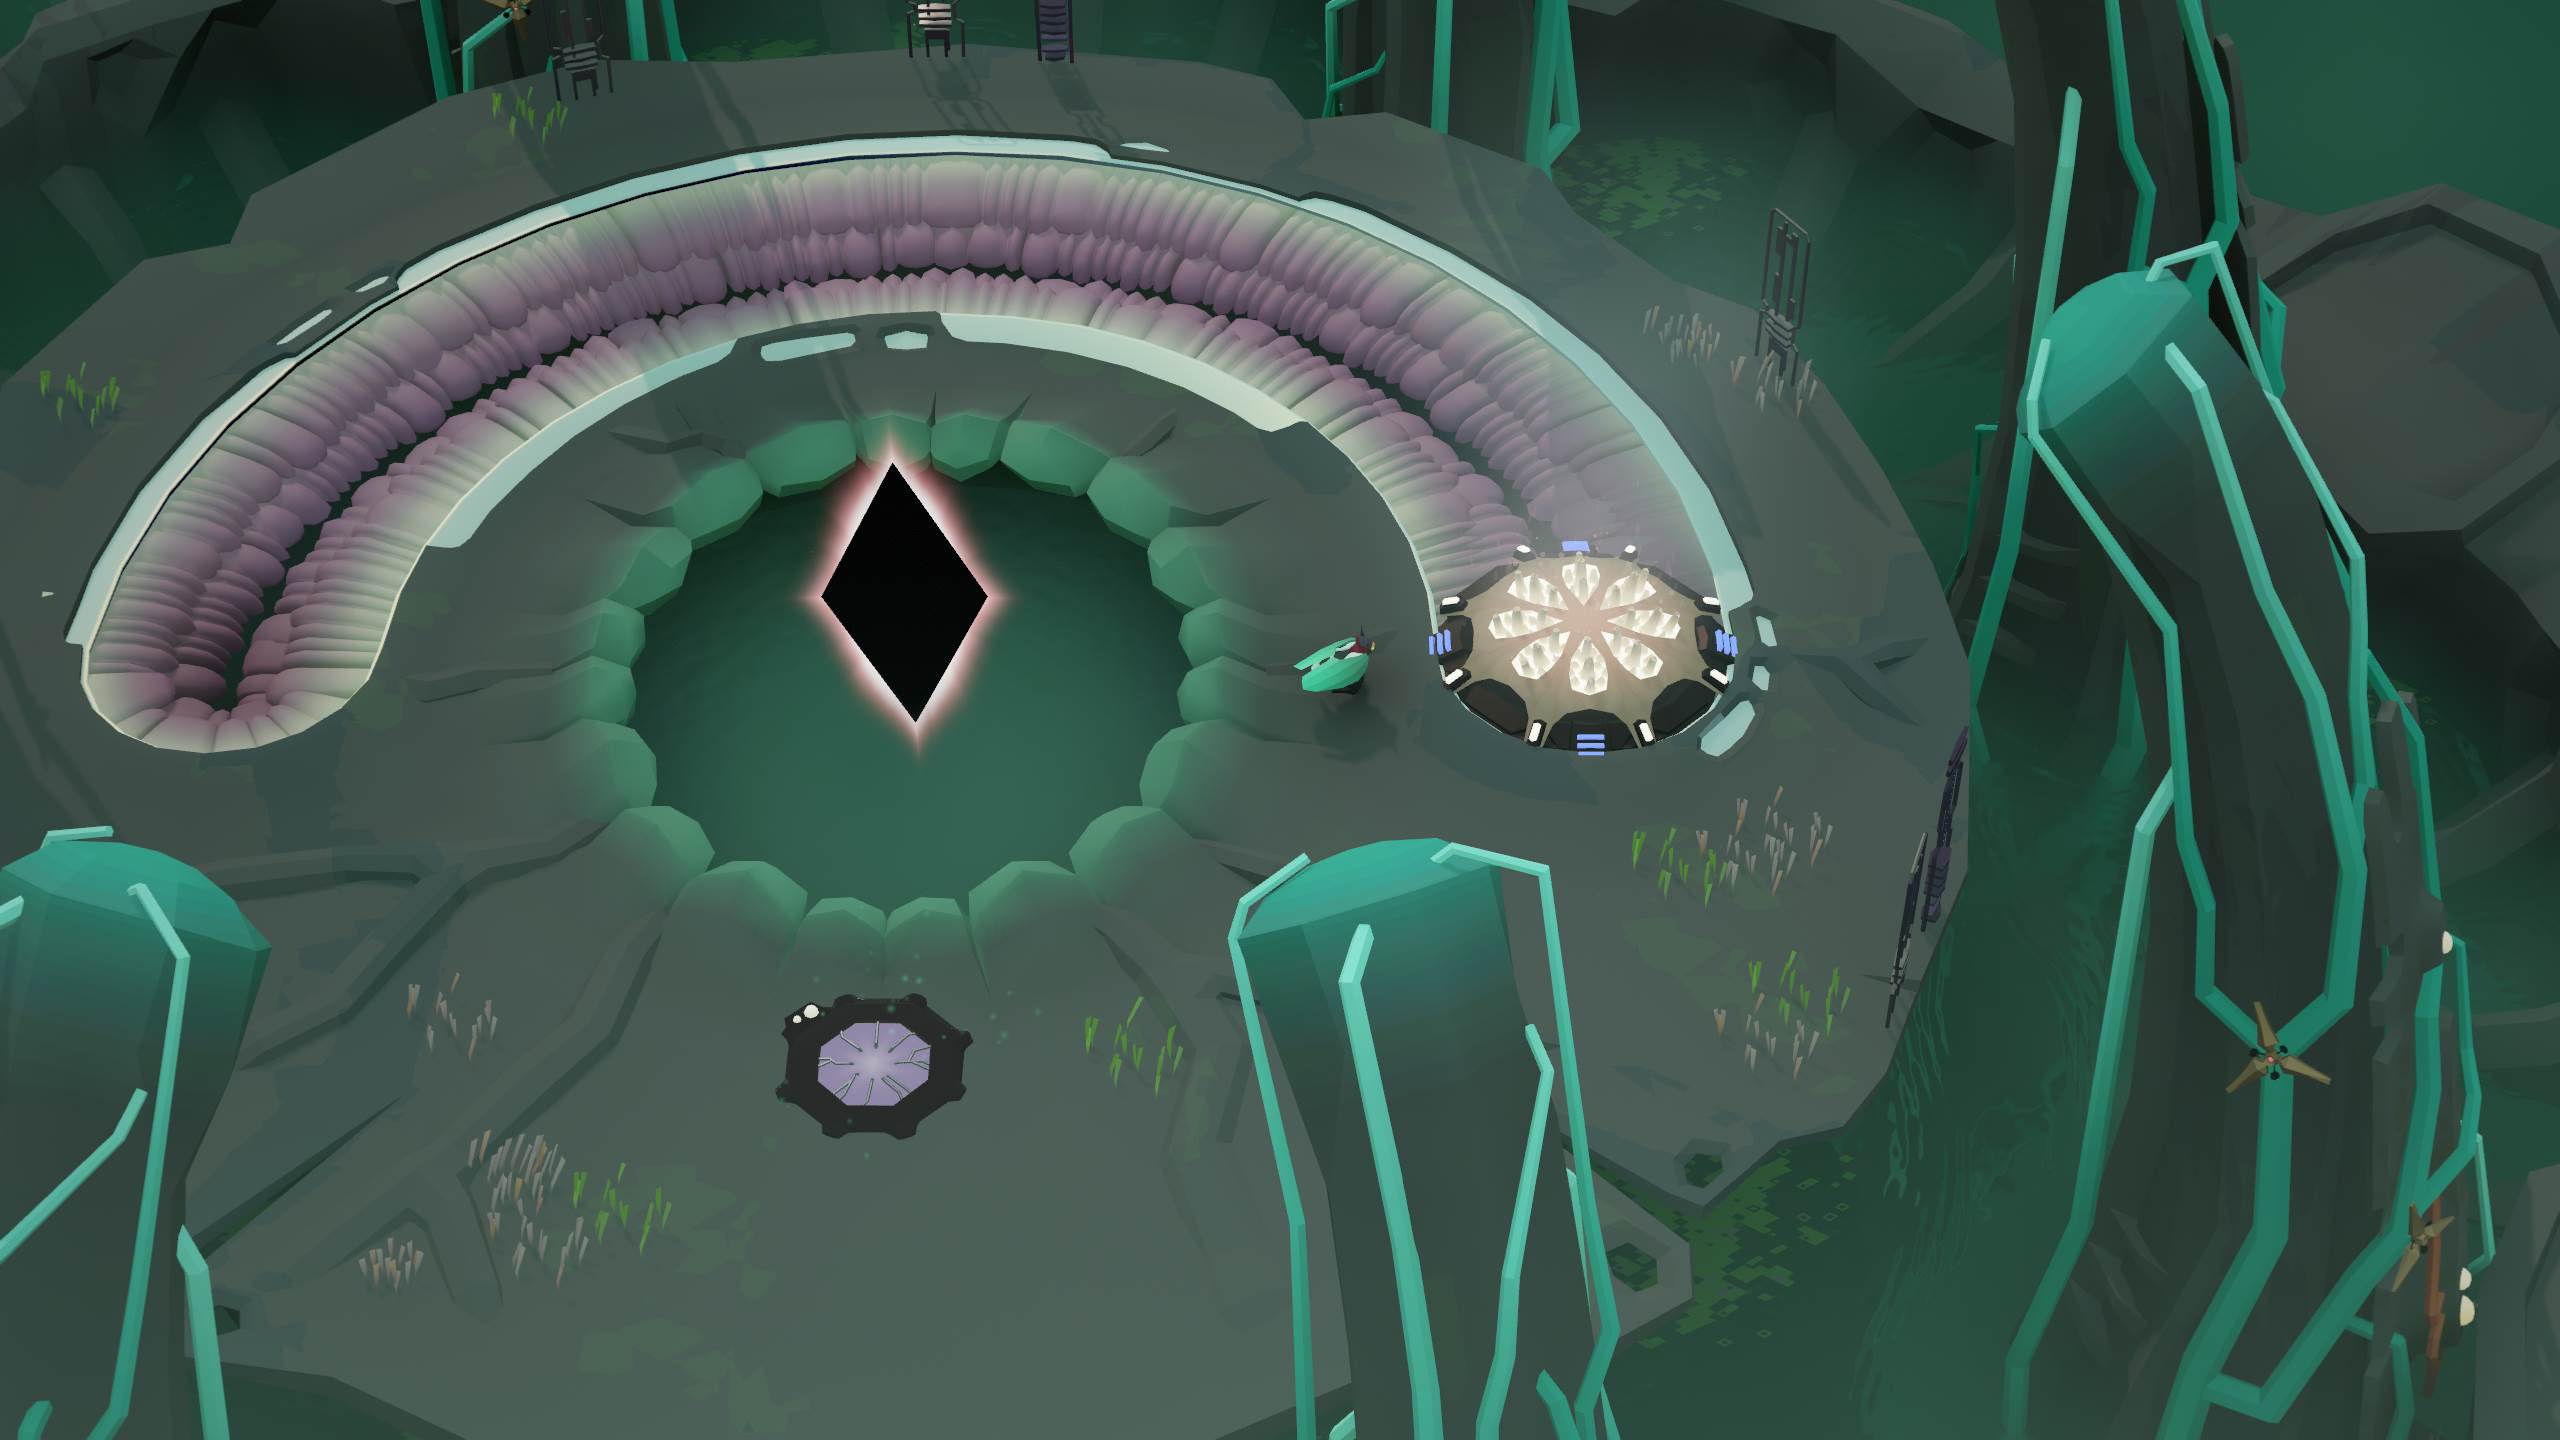
The sphere activator here will be activated automatically by the white sphere. To the west of the sphere activator is a misty green pillar that you can phase shift up. However, if you do this, you can’t pass through the bars further to the west.

Our goal is to somehow phase shift up while not holding a sphere.
To do this, first place the green sphere in the sphere activator. Then, pick up the white sphere and put it in the turret to the east of the sphere activator. Then, hop into the green sphere.

The shot from the turret will enter the sphere and fly west from the hopper, activating the black diamond inside. The black diamond in turn will move the moving platform to its north.
Stand on the moving platform and let it take you north. Then, go to the jump pad and let it send you flying to the area ahead. Use the hopper in this area to get back out of the green sphere.

Pick up the white sphere from the eastern turret and this time, place it in the western turret. Hop into the green sphere to find that the next moving platform is now, well, moving. Stand on the platform to be taken north.
Go northwest to find a new hopper. Once again, hop out of the green sphere and shift your white sphere from the western turret to the northern turret.

Stand on the moving platform to the west of the hopper to be taken further to the west.
Proceed west and then continue through the bars to the north.

In the new area that opens up for you, press the purple button to the south of the black diamond. You’ll find that this button moves the hopper around the black diamond. By placing the hopper to the north of the diamond, you can hit the diamond and thereby phase shift while being inside the green sphere.
Now stand on the hopper itself and hop out of the green sphere.

Go west of the sphere activator and stand in the misty green pillar (when you can), and the automatic phase shifting will send you up the pillar.

Proceed through the bars to the jump pad ahead. After using the jump pad, go east and press the purple button here to activate an elevator and be taken down.
Grab the white sphere from the turret and put it on the dock to the north of the elevator. Return to the sphere activator and hop into the green sphere.

Press the purple button here so that the hopper moves to the east of the black diamond, and then use the hopper to get out of the green sphere.

Pick up the green sphere and head back to the elevator, then press the purple button to take the elevator up.
Then, swap the green and white spheres, so that the green sphere is in the dock and the white sphere is in your hands.
Now go to the white circle to the east of the dock (on which sits the green sphere). From this white circle, shoot west, so that your shot enters the green sphere – where it will eventually hit the black diamond.

When the pillar next to the white circle becomes green and misty, fire off another shot and quickly step into the pillar. When the shot hits the black diamond, you’ll be taken up the pillar.
Go ahead to the white circle and shoot the black diamond to the north to unlock a ramp going east. Further to the east, activate a shooting gallery challenge by holding down action on the concentric rings.

To further power this shooting gallery challenge, you’ll have to put a sphere into the dock. Of course, the white sphere won’t do, as we need that to actually shoot in the shooting gallery.
So go southeast from the shooting gallery area and then southwest to find a dock that activates a bridge. Put your sphere in this dock.

Go west, pick up the green sphere, take it back up to the dock in the shooting gallery, and put it there. Then, take your white sphere from the bridge dock and stand on the shooting gallery’s white circle. Shoot the black diamond when ready.
This shooting gallery is more challenging than the last one, so good luck with it!

After beating the shooting gallery, fire off a red ball at the boss. The boss will toss it back to you, so remember to toss it back to the boss repeatedly, until the boss is defeated.
Finally, pick up the orange sphere from the boss when you are offered it.

Hold down action to shoot through the waypoints and be taken to the next area.
Head on to the next part of our Cocoon walkthrough here!