Oct
Laika: Aged Through Blood – Walkthrough Part 1
Laika: Aged Through Blood Walkthrough
- Part 1 (Rage & Sorrow, Boss: A Hundred Hungry Beaks)
- Part 2 (A Heart for Poochie,Shake off the Dead Leaves, Boss: A Long Lost Woodcrawler)
- Part 3 (Diplomacy)
- Part 4 (Diplomacy, Boss: A Caterpillar made of Sadness)
- Part 5 (Radio Silence)
- Part 6 (Radio Silence, Boss: A Gargantuan Swimcrab)
- Part 7 (Worse than Nightmares, Stargazing, A New Sheriff in Town, A Bonehead's Hook, A Little Tombstone, Where We Used to Live, Bone Flour)
- Part 8 (The Big Tree, Target Practice, The Prophecy, Clean your Beak, Last Meal)
- Part 9 (The Big Tree, A Break for Camille, Last Meal, Boss: Pope Melva VIII)
- Part 10 (The Prophecy, Life of the Party, Worse than Hives, From Mother to Daughter, Childless, Ava, Closure, Worse than Stomach Flu, Floating, For the Cash, First Blood)
- Part 11 (Water Whispers, We'll Never Know, Worse than Stomach Flu, Just a little girl, Fade out, Hell High, Boss: The Two-Beak God)
Check out the Into Indie Games walkthrough for Laika: Aged Through Blood.
Welcome to Part 1 of Into Indie Games’ walkthrough of Laika: Aged through Blood.
To learn more about Laika: Aged Through Blood beyond this walkthrough, check out the official website here and check out our feature on upcoming indie games here.
Area: Where All Was Lost
As the game starts, walk to your left to the bike and answer the walkie talkie to play through the dialogue.

Quest: “Rage & Sorrow” – Find Jakob
Start moving right and hit the checkpoint.

Jump up the three hills and go across the bridge. Jump the next hill and remember to balance your bike with the Left analog stick if you are playing on a controller. Jump the next big ramp. Ride across the two low ledges and keep going. Steep jump coming up, do a couple flips if you feel like showing off your style. After you go far enough, a call will come in on your walkie-talkie.

Keep going forward, making necessary jumps and adjustments and you will hit the steepest wall yet. Accelerate through. You will move downhill now, gaining speed. Jump off a cliff and you will see a trail of blood. A cutscene will play out.

Walk back to your bike. Follow the onscreen instructions to learn how to drift. It’s very important that you master this skill. Turn back towards the cliff you jumped off from moments ago, activating the checkpoint as you rush past it. Go downwards.

Jump off the cliff and change directions mid-air. Land on the huge pipe ramp and continue to the right.

Keep going till you hit a dead end and then drift into a turn and head left and downwards. As you jump off the cliff (In the picture below), remember to brake and drift at the end – otherwise, you will go over.

Continue downwards after hitting the checkpoint. Another call will come in on your walkie-talkie from The Elder. Drop off the cliff into the cave and drift as you reach the far end wall and change directions. Move left now. Jump off the cliff and across the wall and go downwards again. Hit the ramps for some air and soon you will be a highway with a giant carcass of what I can only assume is a boss you will fight at some point in the main game.

There is a path behind you but it’s blocked. Keep moving to the right. Hit the checkpoint and across the speed sign that says “50”. Learn how to wheelie and take the upper path next, over the school bus.

Here, you will receive another call from Maya. Keep moving to the right. You understand you need to go to “The Military Area.” Keep moving across the jumps and past the speed sign with “70” to end the section.
Area: Where Birds Lurk
Speed past the speed sign that says “110”. Another call will come in.

Go past the jumps and ramps and eventually, you will pass a dilapidated military truck to a steep ramp. Jump across to find another truck. Here you will find more blood trails and more trucks. Hit the checkpoint at the end, drift and move upwards.

Keep going up the ramps – past a tent on the second level. Drift at the end and keep moving up. Past the 3rd level and on to the 4th. Jump across the chasm on the 4th level on to the blood trail. Prepare for a long loop-de-loop at the end.

Keep going, flip off the ceiling, and stick the landing. There is another off-ramp here, go up and right. Hit the checkpoint, drift and go left. Jump off the ramp, drift at the end and head towards the same ramp to jump up to the next level.

On the next level keep going right till you get another call from Maya. Go up to the next level here. Drift at the end and move left and up then hit the next checkpoint and keep speeding left. Learn how to block bullets with your bike. Jump off the ramp here. It’s the first fight. There will be two birds at the bottom. Try not to get hit and move across, then up.

Speed across the satellite dishes and the ramp, there are four more birds underneath. Again, don’t get hit. This will be a recurring theme.

Jump off the next ramp, across a bird on a tower. Head towards the ramp and across. There are two more birds underneath. On the other side drift, jump over the 2 birds and keep heading down. Change directions at the point in the picture below and head down.

Hit the checkpoint to find another trail of blood. Learn how to reflect bullets from the onscreen instructions. Reflect the next bullet back to sender.

Do a full 360 flip to recharge your bullet reflect ability. Reflect the bullet from the next bird. Jump off and head left again. Here, a call will come in from Maya. Jump across the big ramp and head downwards. Keep going right and jump off to block bullets from a bird till you hit the next checkpoint. At the end you will get a cutscene.

You get your gun and the Quest: Rage & Sorrow is updated. Go back to your bike and learn how to shoot from the onscreen instructions. Shoot the red gear to open the door.

Hit the checkpoint and learn how to enter bullet time (long live Max Payne). Jump off the ramp and take out the bird in front of you. Do a 360-degree backflip in the air to reload your gun. Jump onto the second platform, and take the bird out. At the end, drift and move upwards. Take the next three birds out till you hit the dead end with a ramp.

Go up the ramp and on the platform. Jump off the platform and onto the next level with a blimp in the background. Wonder if you can ride it (you can’t). Take the bird out in front of you. And then the next one standing on a blimp engine. Hit the checkpoint and go down the ramp and then take the bird out standing on top of a red gear. Hit the gear next to open a door on the level above.

Go through the door and across the tents. Learn about resources from the onscreen instructions.. Basically, shoot any chest you see. So, shoot the chest in front. Head into the cave and shoot all the ores.

Head to the right and downwards. Activate the checkpoint and move left. Kill the bird that shows up. Go across the big ramp and head right. There are two more birds here – one on top and the other at the bottom. Split them up and take them out in bullet time. There’s another bird at the end. Take it out.

Jump across and shoot the ores inside the cave. Jump down and take the bird out. Shoot the honeycomb stuck on the ceiling. Hit the checkpoint and hit the red gear to lift the stone to open a path.

Shoot the ores and the chest at the end of the cave. Jump down the ramp below, shooting a metal ore as you go down. There are two more birds here, next to the excavator. Jump over and shoot them. At the far end of the cave, shoot the ores. Turn back and head down. Shoot the ore overhead. Jump past the digger and onto another bird. Shoot it.

Shoot the ore beyond him and keep moving right. Jump up the next ramp and there is a two-story ramp with a bird on top. Avoid his shot. This is a bit tricky. When you take him out, on to the next side, there’s another bird next to an excavator. Take him out. There are two ores here on the far end. Shoot them both.

Turn around and jump on the second story of the platforms we just came from. Jump across. There is a bird next to a chest. Shoot it and the chest. Shoot the red gear to open the elevator. Go across and hit the checkpoint. Get back to the elevator and shoot the gear on the right. You will go up. You will receive another call from the elder. Move to the left and shoot the ore on the far end of the cave. Turn right and go across the elevator and up the ramp past the vending machine.

Hit the checkpoint. Go up the ramp and to the right. Hit the jump and take the bird out underneath. On the second jump, there will be two more birds. Then on the 3rd jump, there will be two more birds. Jump down off the pipes into an area with a red alarm going off. You will find a gear that tells you that the War Machine is down not up.

Go left. Hit the checkpoint on your way, jump up and take the bird out. Here, you will encounter another, steeper jump, and another bird. The third jump has one bird on top and one at the bottom. Take the bottom one out at the top of your jump and the top one when you land. When you land, immediately accelerate up the ramp and take the next bird out. Keep going left and up at the cross section.

Hit the checkpoint and head left. As you come down the ramp, there is a bird in front of you. Take it out but be aware that the next section is tricky. There are 4 birds and a half pipe. You need to shoot the one on the top right even before you hit the ramp. Next take out the far-left bottom one on the top of your jump. Hit bullet time right after and kill the one right below you now (The bottom right one) and then last the top left one. Hit the chest at the bottom.

Jump off the ramp at the end and shoot the honeycomb on top. Here, Shoot the chest at the end and prepare for a boss fight.
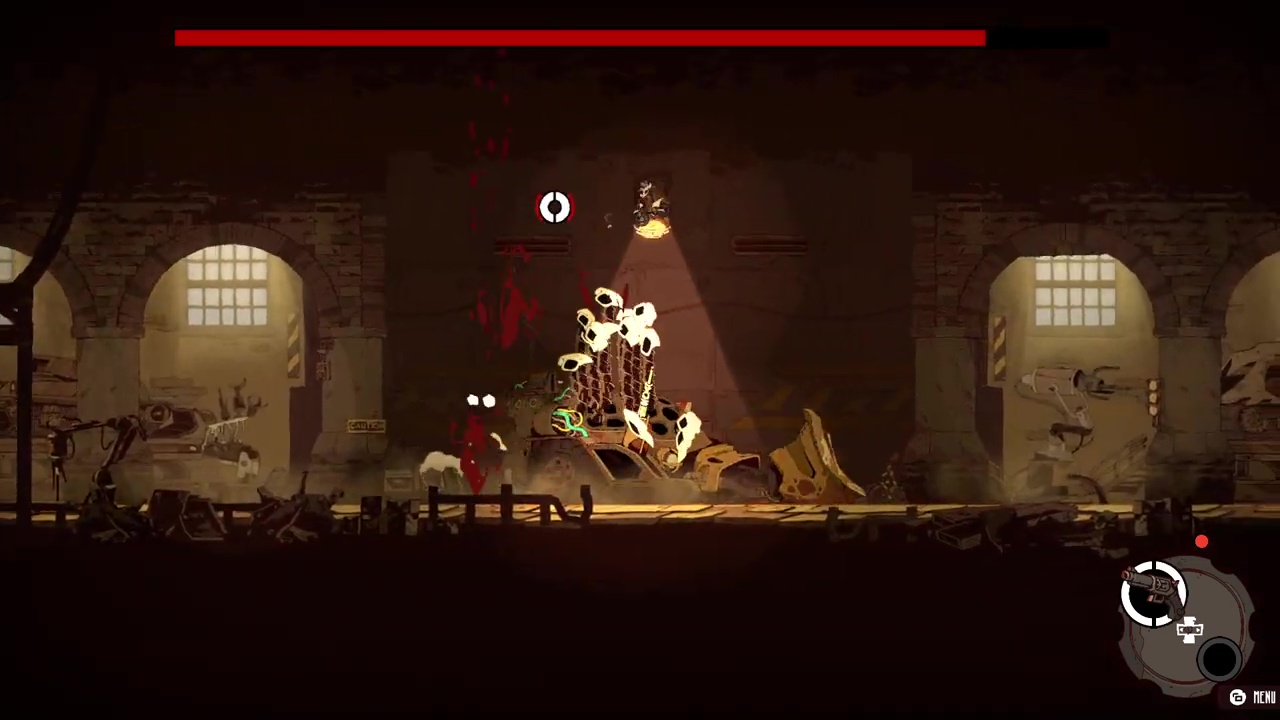
Boss: A Hundred Hungry Beaks

This is a very simple boss. It only has two moves. It charges from one side of the screen to the other, and shoots a single bullet at you. Conveniently, there is a ramp in the front of the vehicle that you can jump off and take each of the skulls with. Jump off the ramp, go into bullet time, shoot the skulls, and block any bullets that come your way. It took me two tries. After defeating the boss, enjoy the cutscene.

The quest is updated. We have to find a huge elevator. Go back to Area: Where Birds Lurk. Retrace your path back and hit the checkpoint. You are back at the crossroads. Go down and across all the way to the red alarm zone, where we saw the sign that told you where the War Machine was.

Take the elevator up. Move left till you reach the red gear in the picture below and hit it.

Get to Jakob and talk to him. Your quest should be complete.
That concludes Part 1 of our walkthrough for Laika: Aged Through Blood. You can find part 2 here.
Thank you for reading our walkthrough of Laika: Aged Through Blood! For other interesting articles on indie games and the indie games industry, check out the links below!
- Into Indie Games Homepage
- The Last Faith Walkthrough – Extended Demo Part 1
- Hades II: Release date, pre-order and everything we know
- Review: The MAONO DGM20 GamerWave Gaming Microphone
- The Invincible – Interview with Starward Industries