Jan
Prince of Persia: The Lost Crown – 100% Walkthrough – Part 5
Prince of Persia: The Lost Crown Walkthrough - Table of Contents
- Part 1 - Prologue - The Battle of Perseoplis
- Part 2 - Lost in Mount Qaf - Lower City
- Part 3 - Lost in Mount Qaf - Hyrcanian Forest
- Part 4 - Lost in Mount Qaf - Path to the Citadel
- Part 5 - The Abducted Prince - Sacred Archives
- Part 6 - The Abducted Prince - Upper City
- Part 7 - The Tiger and the Rat - The Depths
- Part 8 - The Path to the Sand Prison - The Depths
- Part 9 - The Path to the Sand Prison - Sunken Harbor and Soma Tree
- Part 10 - The Path to the Sand Prison - Temple of Knowledge
- Part 11 - The Darkest of Souls - Pit of Eternal Sands
- Part 12 - The Celestial Guardians - The Sunken Harbor and Raging Sea
- Part 13 - The Celestial Guardians - Upper City West
- Part 14 - The Celestial Guardians - Upper City East
- Part 15 - Return to the Past - Upper City Day/Night
- Part 16 - Father and Son - Soma Tree
- Part 17 - Father and Son - Tower of Silence - Part 1
- Part 18 - Father and Son - Tower of Silence - Part 2
- Part 19 - Crossroads of Time - Darius' Palace
Check out our walkthrough of Prince of Persia: The Lost Crown to progress through the Sacred Archives for the quest The Abducted Prince.
Welcome to the Into Indie Games walkthrough for Prince of Persia: The Lost Crown walkthrough.
For more information on Prince of Persia: The Lost Crown beyond this walkthrough, check out the official website here.
Starting from the Wak-Wak tree after killing Jahandar, move to the right and back into the main statue courtyard. Drop down and head to the left and through the door. We are going to the green door on the map.

Head down the stairs and air dash over the spikes. You will come across a wall jump, so jump over the spikes and air dash to get the time crystals. Drop down and go to the right and drop down again and air dash to the left over the spikes.

Keep going to the left and you will find another Sand Vial (2/4). Track your steps back to the top and head left. Jump across the retracting platforms over the spikes and keep going left. Use the retracting wall to wall jump over the spikes and to the higher ledge.

You can pick up a Missive 1 in the next area as soon as you enter. Drop down the opening here and slide through the gap on the right to pick up the Amulet: Rukhsana’s gift which restores health after a successful parry. Slide through the gap on the left and fall to the last floor. Take out the big enemies down here and go to the right.

In the next area, drop down and use the lever to open the grate. Right before the grate, on the right you can pick up another Lore Item – Artisan Tools Carpet Weaver. After picking it up, drop down and take the archer out. Jump across the gap and take the flying enemies out. Air dash across the gap to pick up a bunch of time crystals.

Trace your steps back to the left and go up the stairs to exit the area. In the next area, fight the axe wielder while dodging the arrows from the archer on top. Wall jump up from the wall on the left, then head up and slide through the gap on the wall at the top.

In the next area drop down and go to the left and vault across the spikes, while avoiding the retractable wall to drag down the far wall to jump onto the pole on the right, land on the retractable platform and then air dash to find a Xerxes coin for this area (1/4). Retrace your steps back up to the surface.

Head to the left first to activate a Wak-Wak tree. Keep going to find a time anomaly purple sphere that you can smash to reconstruct the statue. This is a Homa Statue, which is a fast travel network. Right now you can travel between The Haven and Scholars’ Area. You can go there now and unlock the gate locking the statue out from the inside.

Go back and leave the room through the right side and head up the poles outside. The traversal path is given below –


Go to the left once you get to the top. You will see a cutscene here, and a gauntlet will ensue. These enemies are shield-less are easy to take down. Vahram will join mid fight and give you the Amulet: Blade Dancer. If you are keeping count that’s 6/36 total available amulets. Also, the Quest: The Abducted Prince is updated. Exit in to the next area and you will discover the Location: Sacred Archives. Read the signs as you go up and talk to the Mad Alchemist. At the junction head up the moving stairs.

At the very far right hand is a secret area. Smash the wall here.

You will find 5 Time Crystals inside. Go to the left up the moving stairs and turn right to find another Wak-Wak tree. Jump across to the left to access a bit of lore.

Drop down to the very bottom and slide across the hole in the floor and drop down the platforms. There is a locked door here that you can’t open now so commit it to memory and head back out and exit the area at the top. A new type of enemy will be introduced now. Maybe a boss? Anyway, take out the mad alchemists and keep moving to the left. In the next area, head up the stairs and take out the mad alchemist. Wall jump off the left side wall and keep moving up and to the right.

Keep going right and wait till the stairs take you down and head up instead of exiting the area or going down.

Once you reach the top go to the left and go up grabbing on to the hand holds over the spike and you will find a purple time anamoly. Reconstruct the Homa Statue here. Drop back down and head out the exit on the right we ignored before.

In the next room, you will see that new enemy type, the Jailer. He has a large field that when disturbed marks you and enables him to find you regardless of where you are on the level. If he grabs you will be sent to the prison. I was grabbed and I got sent to jail where I picked up the Lore Item: Broken Chains which is 1/11 for this area. Break out the top left wooden platform and head up that way. Slide out and you will be in the prison area. Head to the right and go up the hand holds, careful of the enemies on the platforms here.

Get up on top and to the left, unlock the cell and kill the mad alchemist to read a bit more text on the wall. Go out and go to the right and slide under through the gap and drop down to fight an enemy.

After killing him, jump off the right-side wall and airdash across to find a Sand Vial (1/4).Back in the central area of the prison, drop down through the hole in the middle of the room. At the bottom go right and exit this area. Keep going right in the new area and stick to the upper path and head up the platforms.

If you step on the lock here, a spirit will attack you and take over your health bar, making you essentially a one hit.

Head up the platforms and on the top you can pick up a time crystal. After picking that up head to the right, another locked door. There is a third similar door at the very bottom. You should commit all three locations to memory. Jump back up and exit the area on the left. We are back in the bottom part of the central area, so head to the left now.

You will find another of those locked doors and an inscription. Drop down the wooden platform and you will find your 5th locked door. Mark these two locations on your memory too and head up. Go all the way up to the top most floor here and read the inscription. Head to the right and then up and slide through the wall on the left to find a bunch of flying enemies. Take them out to find a chest.

If you go to the left from here, there is a door that cannot be unlocked right now. So go back out and exit the area on the right by stepping on the lock to open the door. Exit the area and our location should be this on the map –

Head to the left again and up the stairs. Take out the mad alchemists as you make your way back to where the Jailer was. Drop down immediately so that you stay out of the reach of his hearing, crouch and slide to avoid him. Once you reach the far right side, wall jump and head up the platforms.

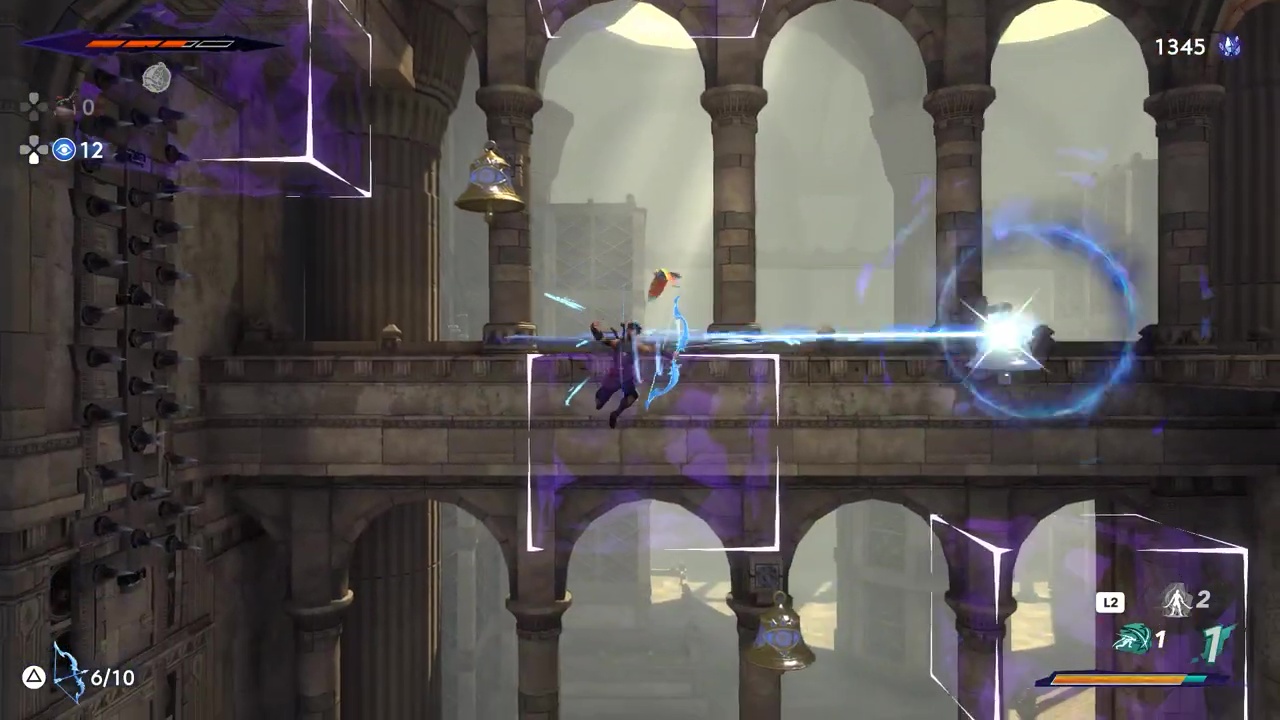
From here head to the right to exit this location. There is a new enemy here that uses a baseball bat (?) to shoot spinny wheels of death at you. Jump over and dash to close the distance and take them out. Keep going to the right to exit this area. In the next area, activate the switch to call a lift down. Take the lift down first and go to the right, where you will be faced with a new kind of puzzle. First hit the bell with an arrow which will cause the platforms in range to solidify and jump on the platform and go to the right.

Now hit the bell again and jump on to the upper platform.

Jump on the platform on the left and hit the bell and then wall jump on the sound wall that has just formed.

Wait for it to disappear as you grab on to the wall on the left and air dash across to find time crystals.

Go back down and now hit the bell on the left and jump over the platforms to the left.

Now hit the other bell on top and wall jump between the two blocks and head up.

The blocks will start to disappear as you reach the top so immediately hit the bell up there with an arrow.

Jump across to the right to find a chest containing an Amulet Holder Upgrade.

Back to the left again, and hit the bell to solidify the platforms and jump across. Immediately hit the second bell to extend the duration. Then drop and jump across the blocks.

When you reach the next bell hit it and keep wall jumping up till you reach the top.

Airdash across the gap and exit the room. In the next room, you will find Fariba. Buy the map of the Sacred Archives area from her. Unlock the door and exit the area. In the next area you will find floating jellyfish enemies. Arrows work a treat on them. Drop down here and you will find an elevator. Let the elevator go down but don’t get on it, get on top of it and its coming up and on top you will find a secret area with time crystals.

Go back across and your location on the map should be around here –

Drop down and take the enemy out, then get back up through the trap door on the right and keep moving to the left. Take the stairs up to reach the upper most left room to find an Azure Damascus Ingot – which is used to upgrade your weapons.

Drop down and take out the enemy right below here and exit through the doorway beyond him. There is another jailer in the next room, so avoid him by taking the upper path – which has one of those baseball bat enemies. Avoid the jailer’s bubble as best as you can and if you get hit, run to the upper left wall, jump up the handholds and over the stairs in front of the statue and jump across to the arrows. Jump across once more through the corridor on the other side and drop down to find a chest for the Amulet: Will of Rostam.

Keep dodging the Jailer and exit through the door on the far left.

In the next room, head to the far left and go up the platforms. The left side is blocked off to you right now, so go to the right and drop down the hole and wait for the spiked slab to pass and you can jump up and continue moving to the right. You should have come out on the top level of the area where the Jailer is. Hit the bell and run across the sound bridge.

Kill the enemy at the end and hit the bell and jump on the platform and keep making your way up. The platforming isn’t that complicated. Make your way up to the left corner to find a time crystal, after picking that up exit the area through the door on the right. In the next area kill the floating jellyfish enemies and head to the right to find a Wak-Wak tree surrounded by sound platforms.

This concludes Part 5 of our Prince of Persia: The Lost Crown walkthrough. You can find Part 6 of our walkthrough for the Price of Persia: The Lost Crown here. And you can find Part 4 of our Prince of Persia: The Lost Crown walkthrough here.